When KDE announced that Plasma 6.8 would be dropping the X11 session entirely, not everyone was happy about it. Wayland has been the default on most major distributions for a while now, but there's still a significant chunk of users with reasons to stay on X11.
One such case is of a group of developers who took the code that KDE itself is walking away from and started building an X11-first desktop around it. That project is SonicDE.
Their goal is to maintain and actively develop the parts of KDE Plasma's X11 stack that are being left behind, while cutting out Wayland dependencies and pushing X11 support forward rather than just holding the line.
The work can be traced back to a KWin/X11 patchset called kwin-x11-improved, which was later merged with the full KWin/X11 source by Joseph Crowell in September 2025 under the name "KDE-Lite," and rebranded as SonicDE by December.
SonicDE: X11 Plasma Restored
Image sourced from Joseph Crowell, one of the contributing developers of SonicDE.
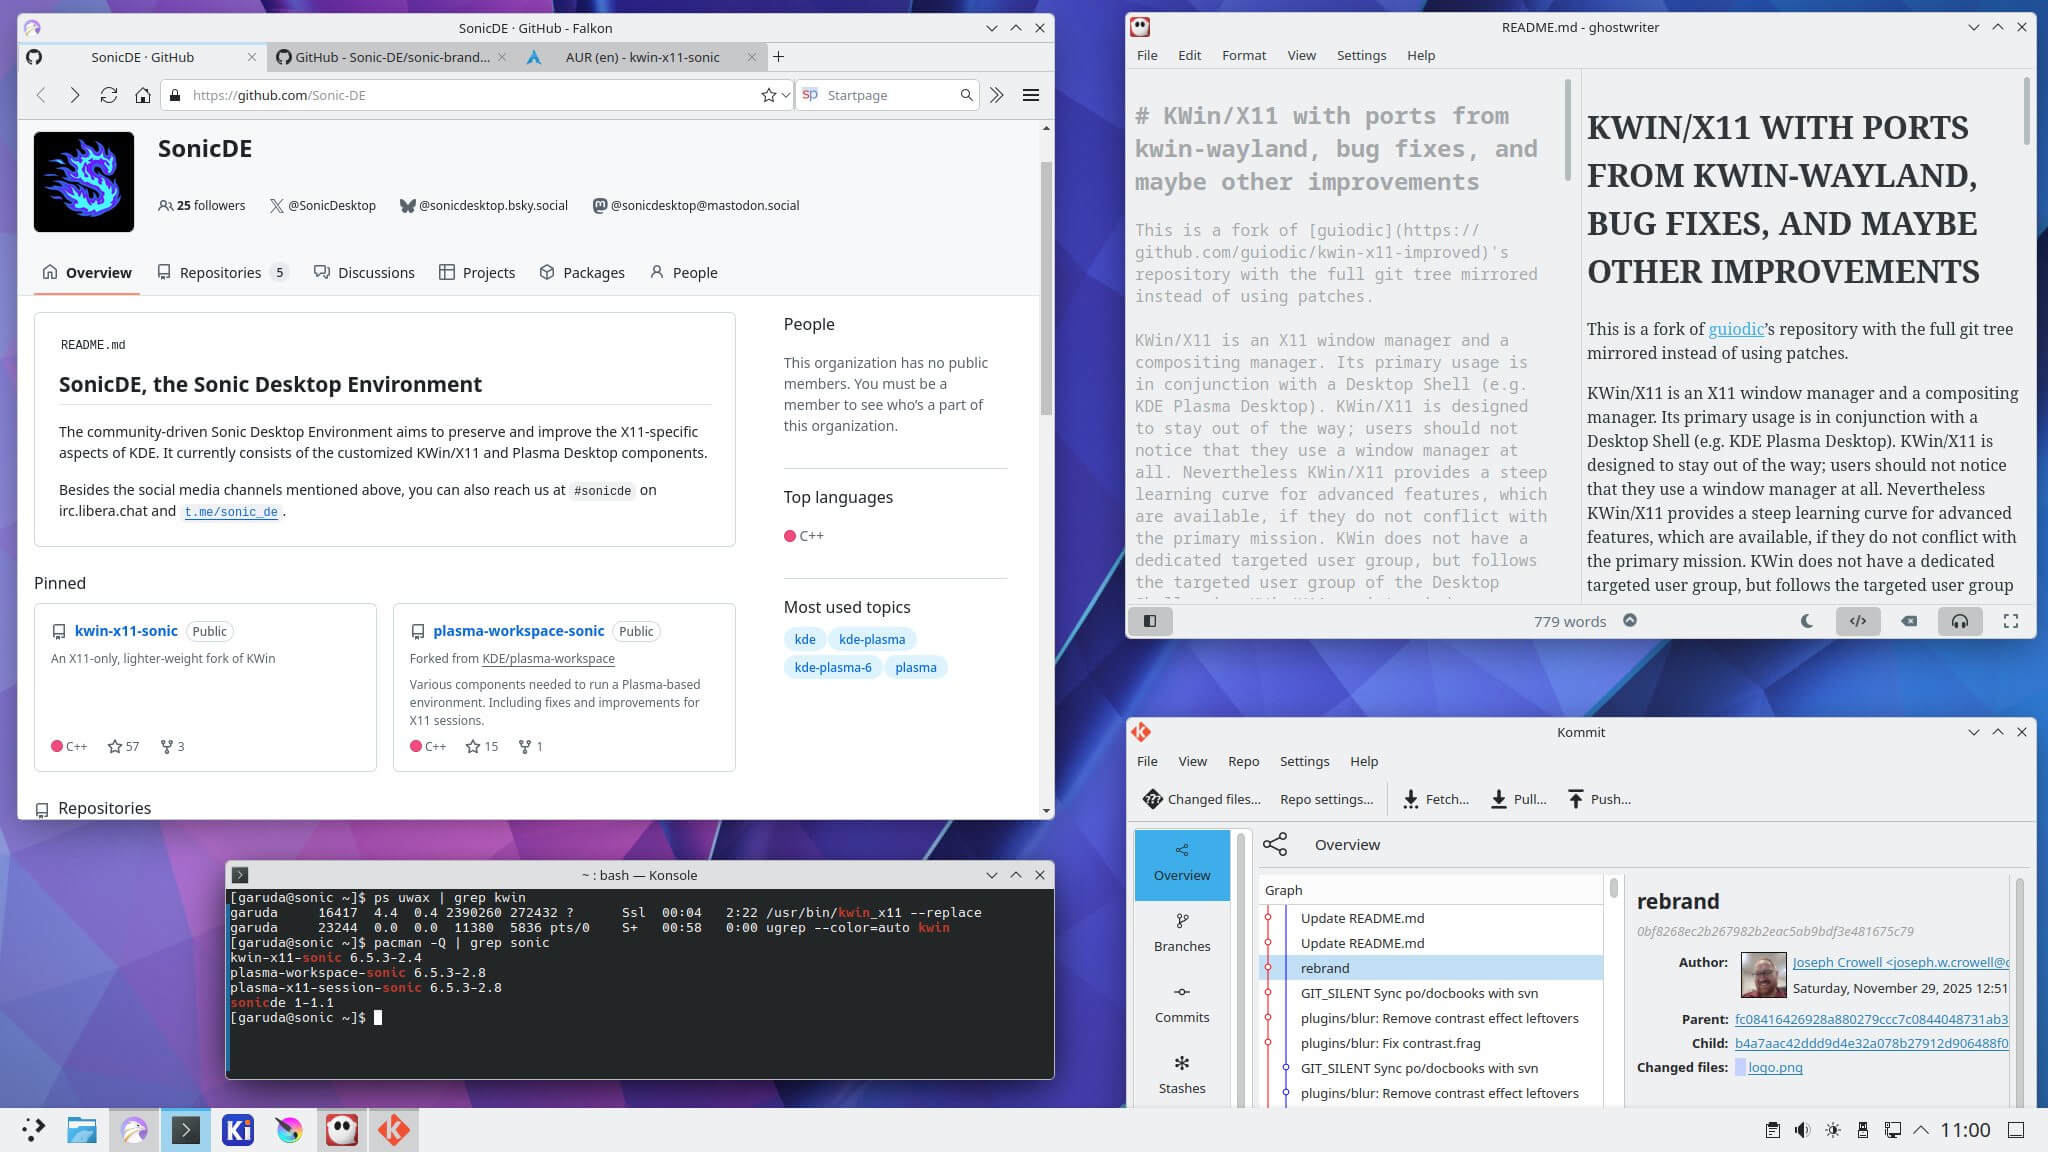
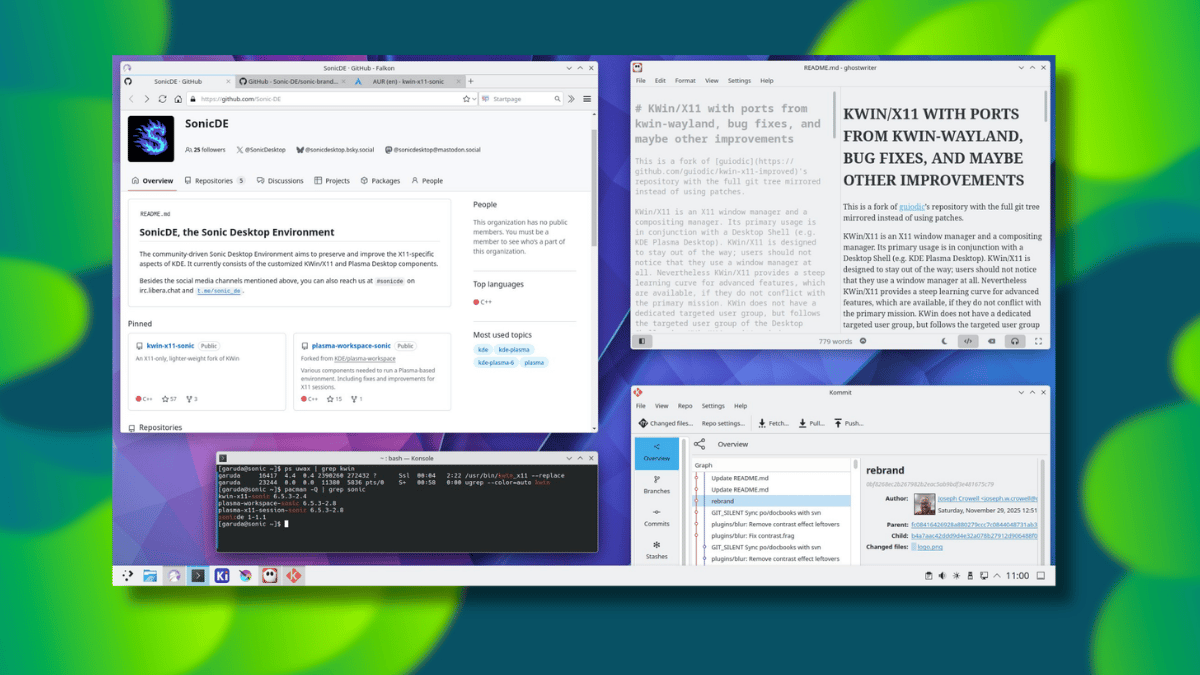
It is a collection of KDE Plasma and KDE Frameworks component forks, each rebuilt with X11 as the focus. The project now spans 40 repositories on GitHub, with the team working through the KDE stack and stripping out what's not needed.
The most prominent of those is sonic-win, a fork of KWin/X11 that handles window management and compositing. It's the most active repository in the project and the one where most of the foundational work is happening.
Alongside it are sonic-workspace, derived from plasma-workspace, and sonic-desktop-interface, forked from plasma-desktop. The former provides the core environment components, while the latter handles the desktop shell. Together with sonic-win, these three form the backbone of what SonicDE actually is as a desktop.
The project covers a lot of ground beyond the core trio of components.
For networking, sonic-network-manager is there; sonic-audio-applet-pulse covers PulseAudio volume management; sonic-screenlocker takes care of screen locking; sonic-screen manages display configuration; and login sessions are handled by sonic-login-manager.
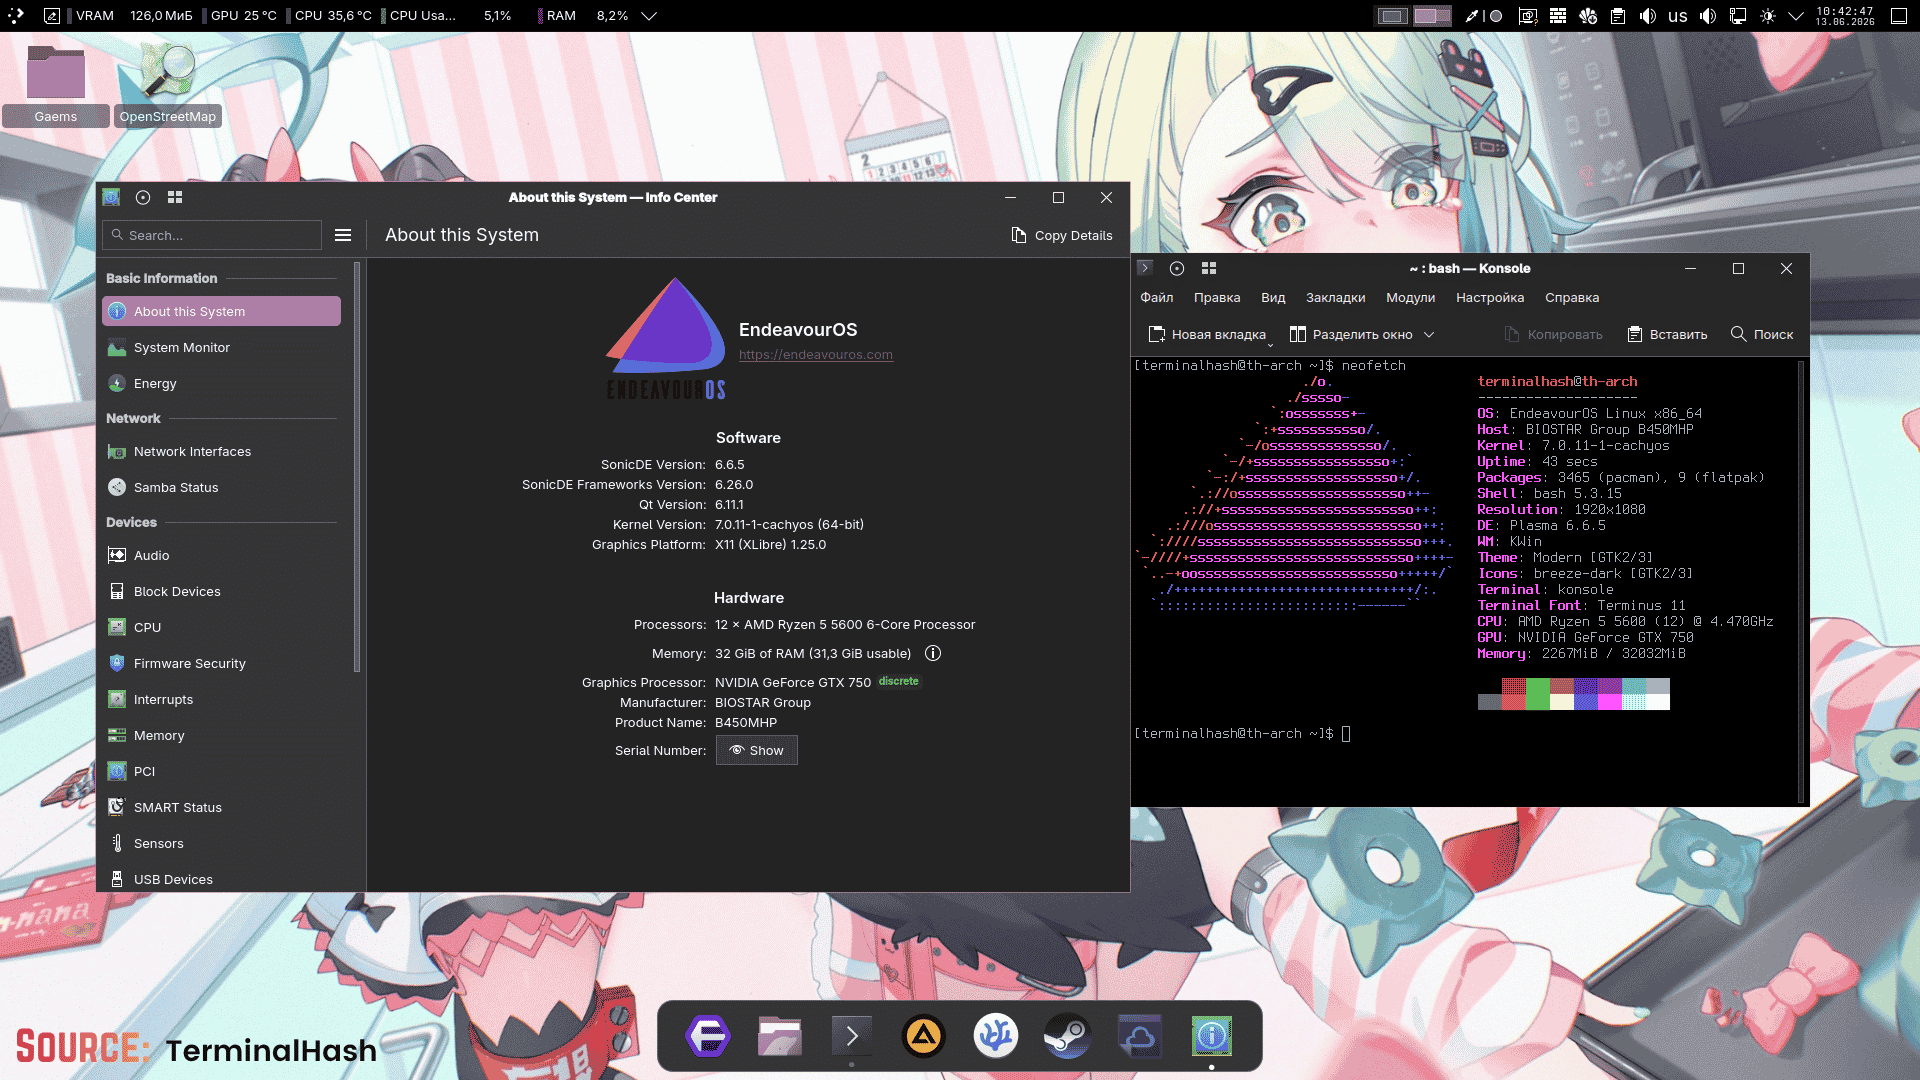
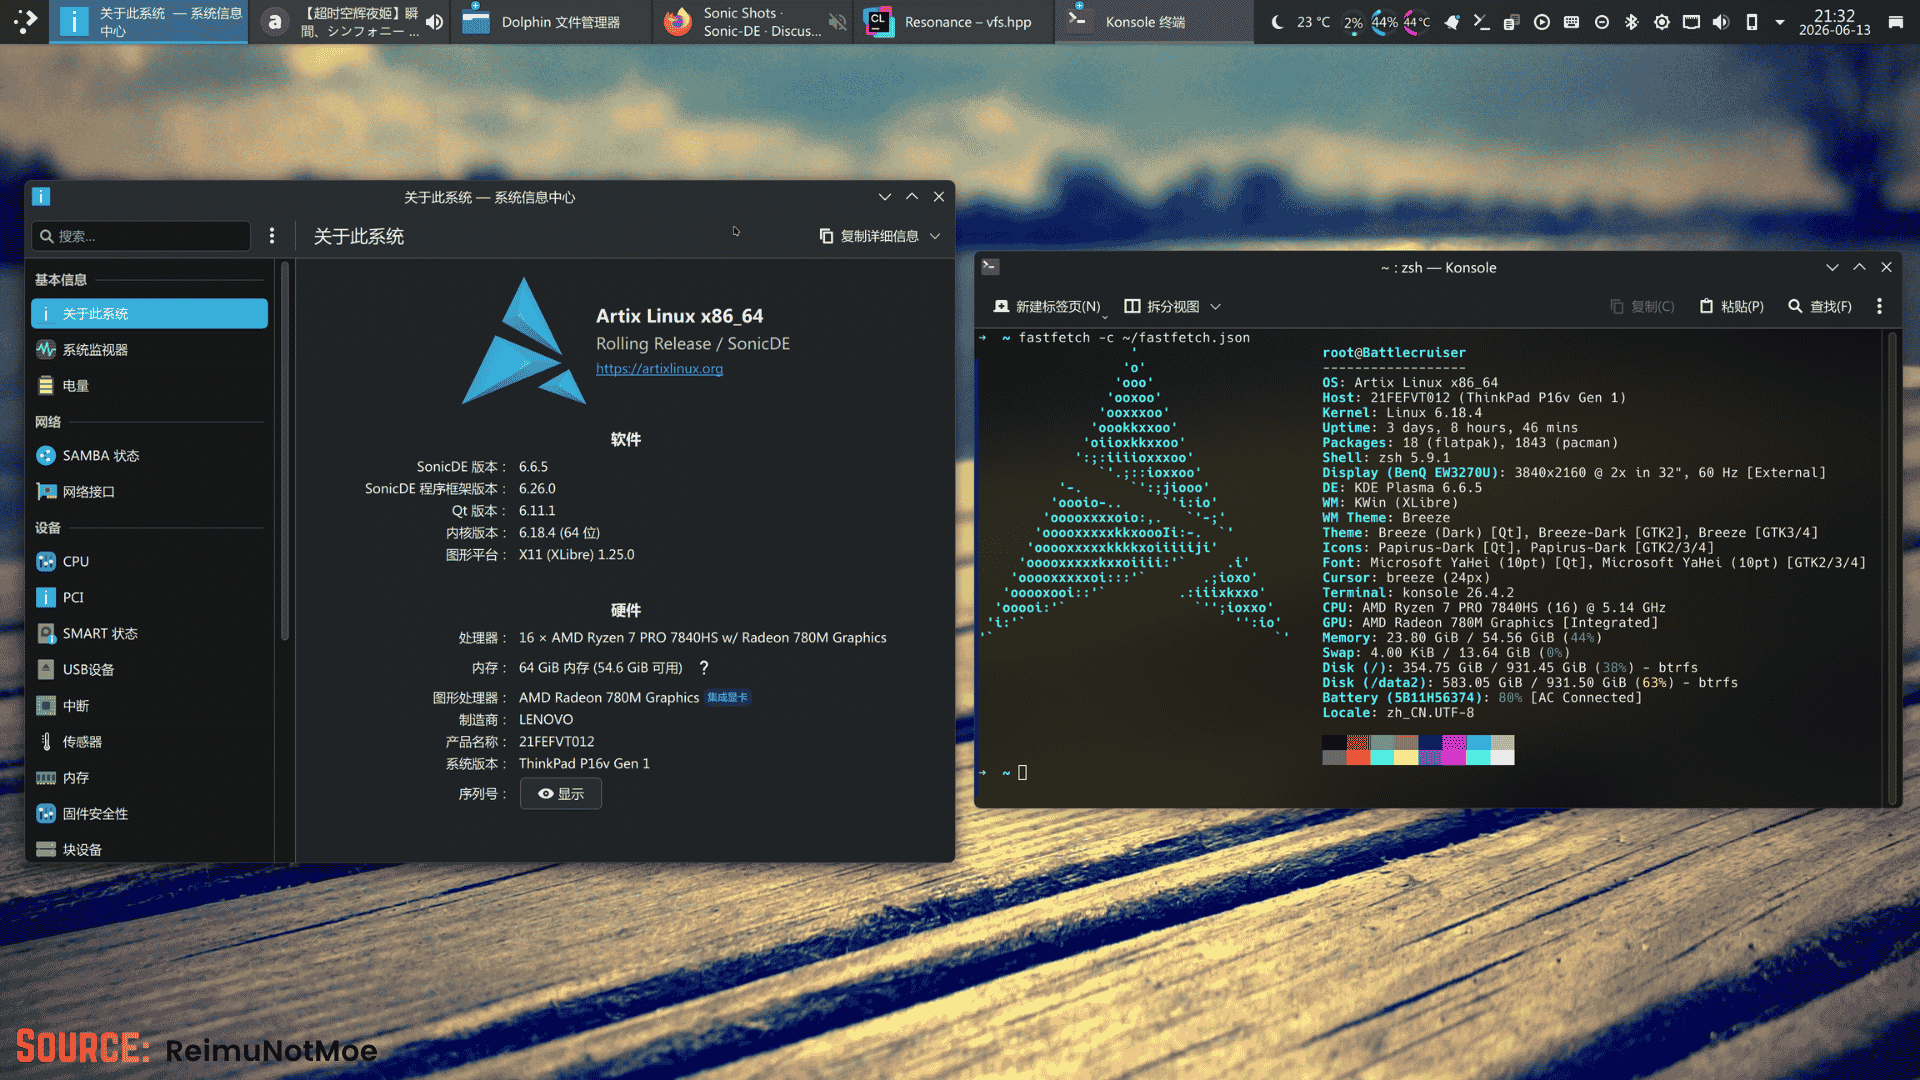
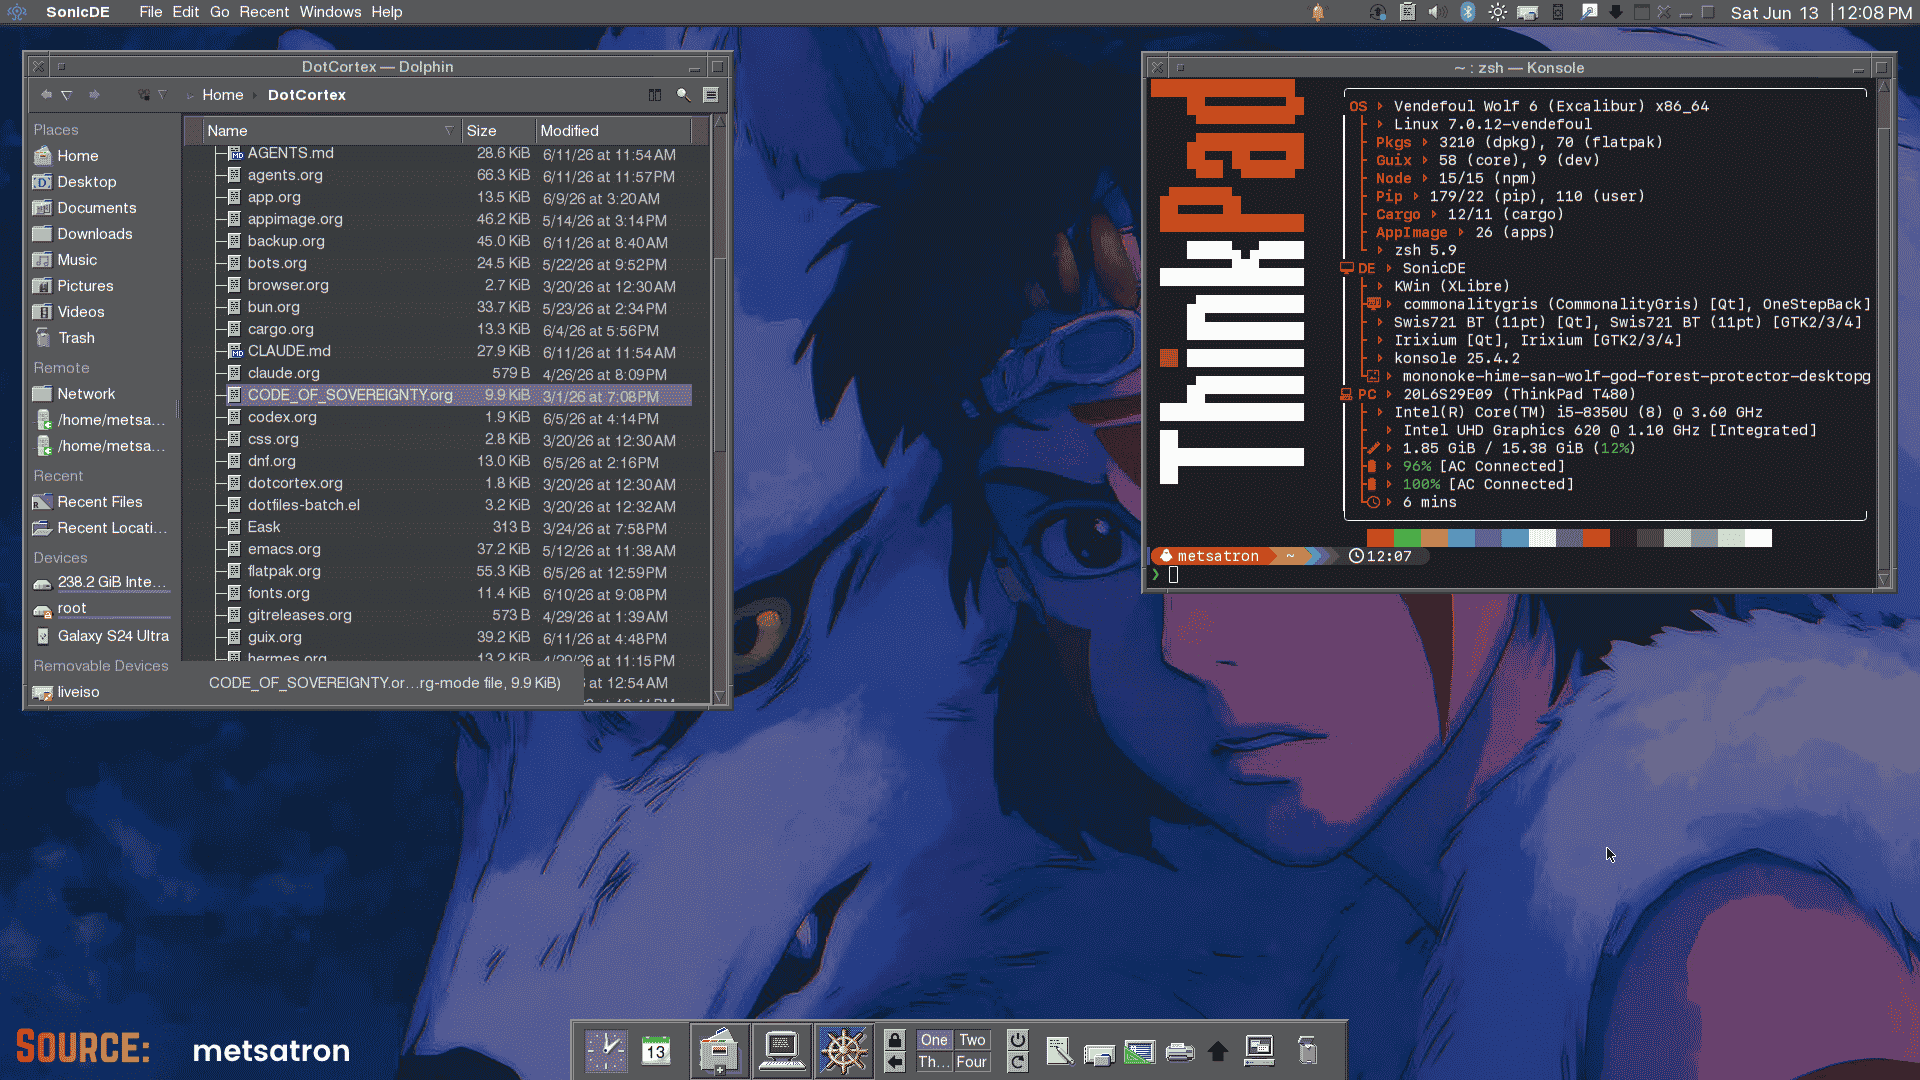
From left to right we have SonicDE on EndeavourOS, Artix Linux, and Vendefoul Wolf.
SonicDE also ships a Silver theme, forked from the Klassy theming utility for Plasma, alongside a matching silver-sddm login screen. Together, they give the desktop a consistent look rather than just resembling a stripped-down Plasma install.
What users actually get is an X11 desktop that behaves the way longtime KDE users expect, while still inheriting improvements from the upstream Plasma components it forks from.
And since SonicDE is being built to be init system agnostic from the start, it isn't locked to systemd. BSD support is one of the stated goals too, so the project is thinking well beyond Linux users.
Availability of this?
It is already packaged for Arch Linux-based distributions, with additional builds available for Debian, Devuan, Artix Linux, and Vendefoul Wolf. The official website has the links for the packages for those distros.
Also good to know is that the developers are already packaging SonicDE for Gentoo, NixOS, OpenMandriva, and FreeBSD, so keep an eye out on their socials and GitHub page for updates.
KDE is Going Wayland Only So This New Project Gives You KDE With X11
Passwords are one of those things everyone knows they should handle better but rarely do. The bare minimum is not reusing them across sites, and beyond that, you really want a password manager doing the heavy lifting for you.
If you have been looking for options, you have probably come across Proton Pass (partner link) and Bitwarden as two of the more popular cloud-powered choices. For local hosting, something like KeePassXC lets you keep everything on your own machine without any cloud dependency at all.
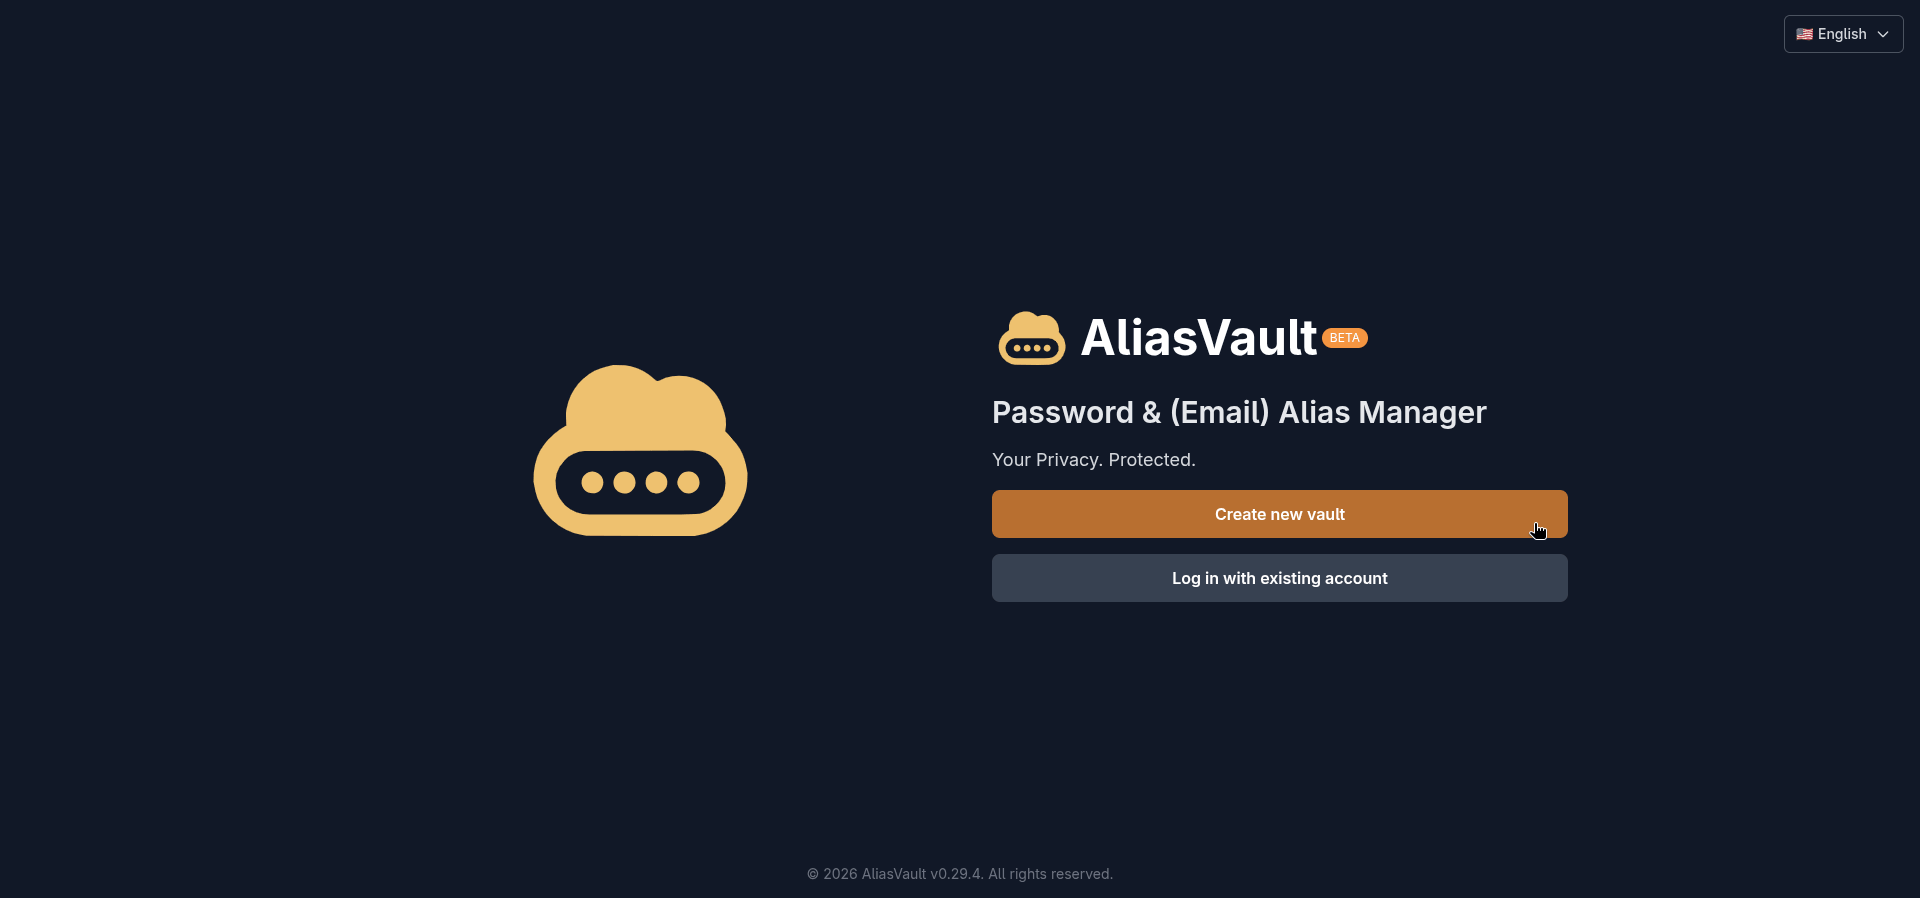
But I recently came across something a bit different. It is web-based, fully open source, works completely outside any ecosystem, and does a fair bit more than just storing passwords. And you can self-host it as well. So let me tell you about it.
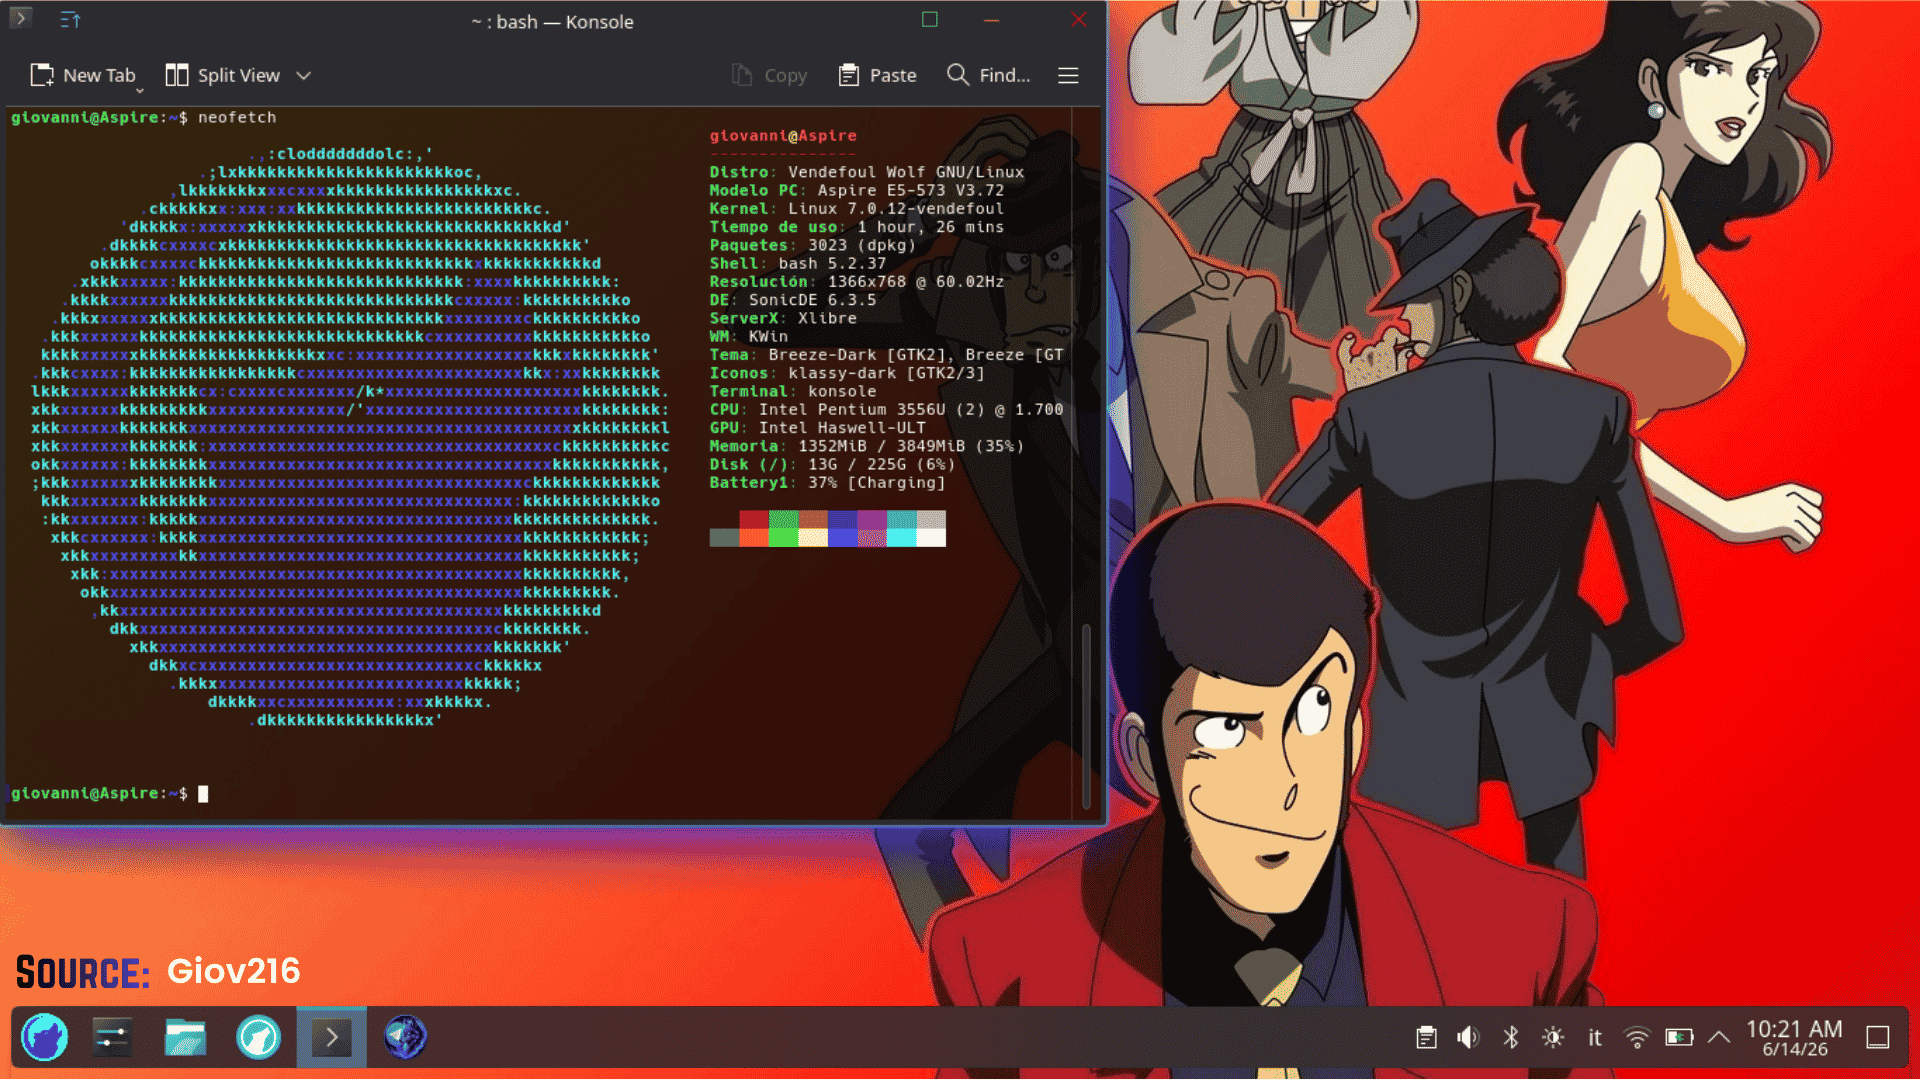
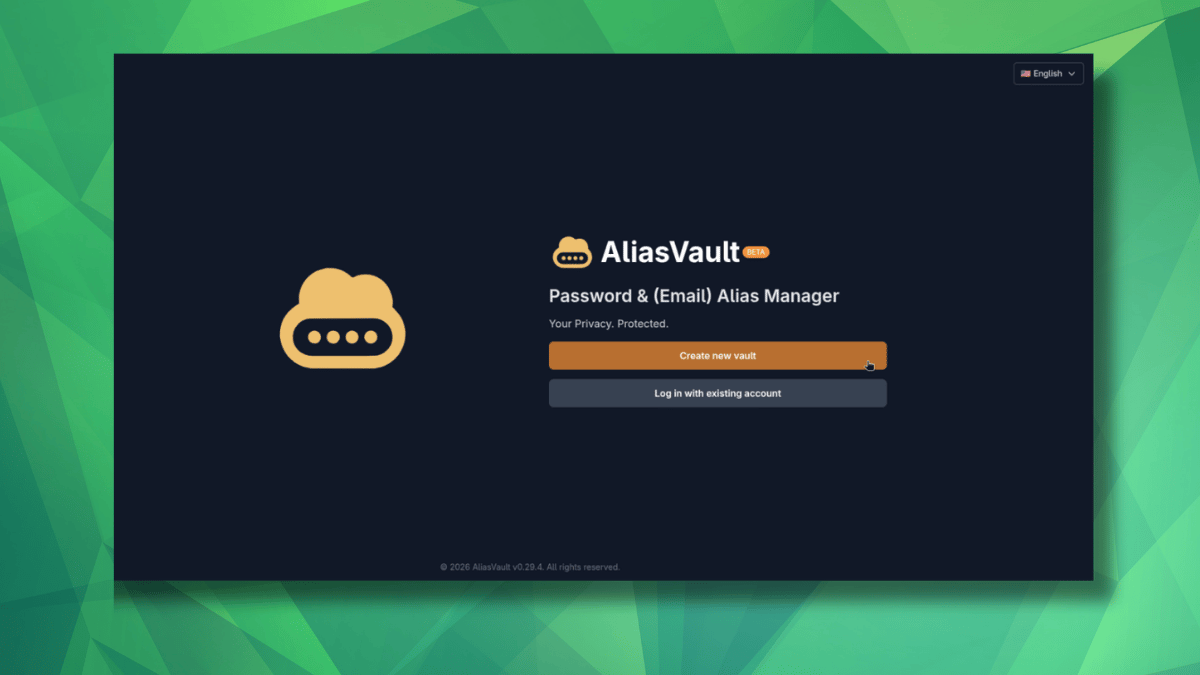
AliasVault: One Vault for Everything
Offered as an open source, end-to-end encrypted password and email alias manager, AliasVault lets you store passwords and create new aliases for use on the web.
The latter works like this. Instead of using your real name and email address everywhere, you generate a unique identity, password, and email alias for each service you sign up to.
If one of those services ever leaks your data or starts spamming you, you know exactly where it came from, and you can just kill that alias.
Operated under XIVISOFT, this is the work of Leendert de Borst, a software developer from the Netherlands who has been building privacy-focused tools since 2013. The project itself is licensed under AGPL-3.0, and the source is available on GitHub.
The cloud version runs on dedicated servers in Germany (Hetzner), within the EU, making it GDPR-compliant. There is also a full self-hosting path via Docker if you would rather keep everything on your own infrastructure.
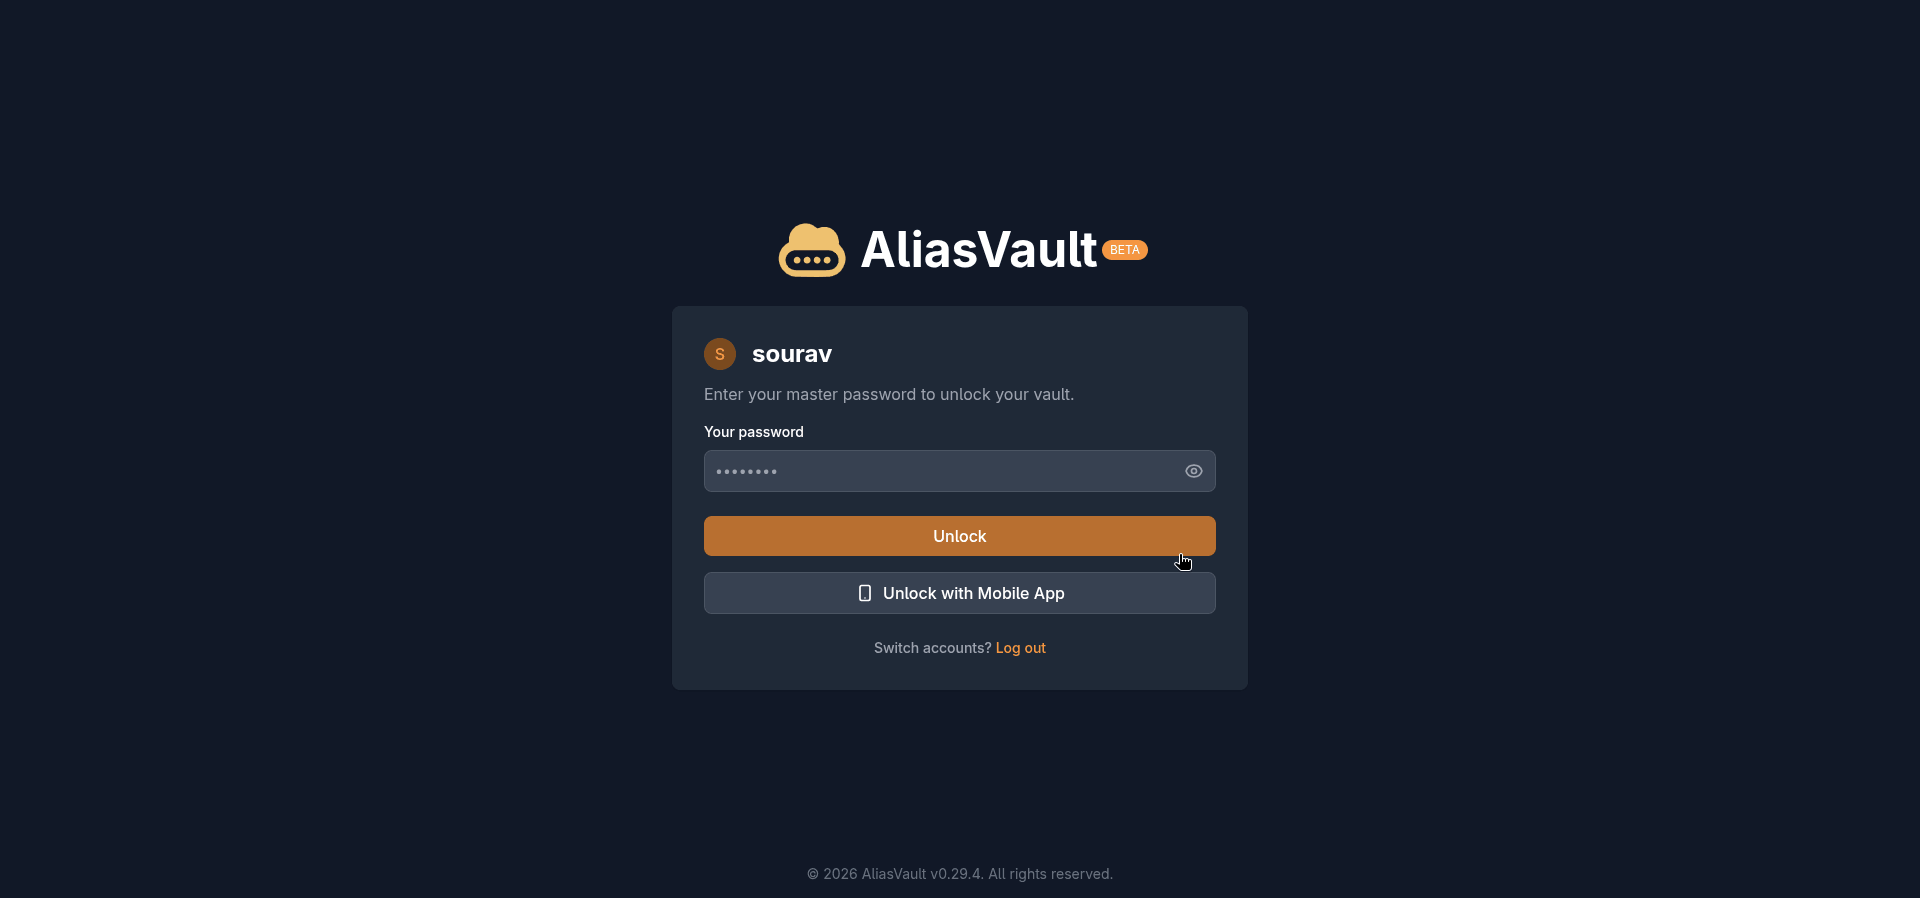
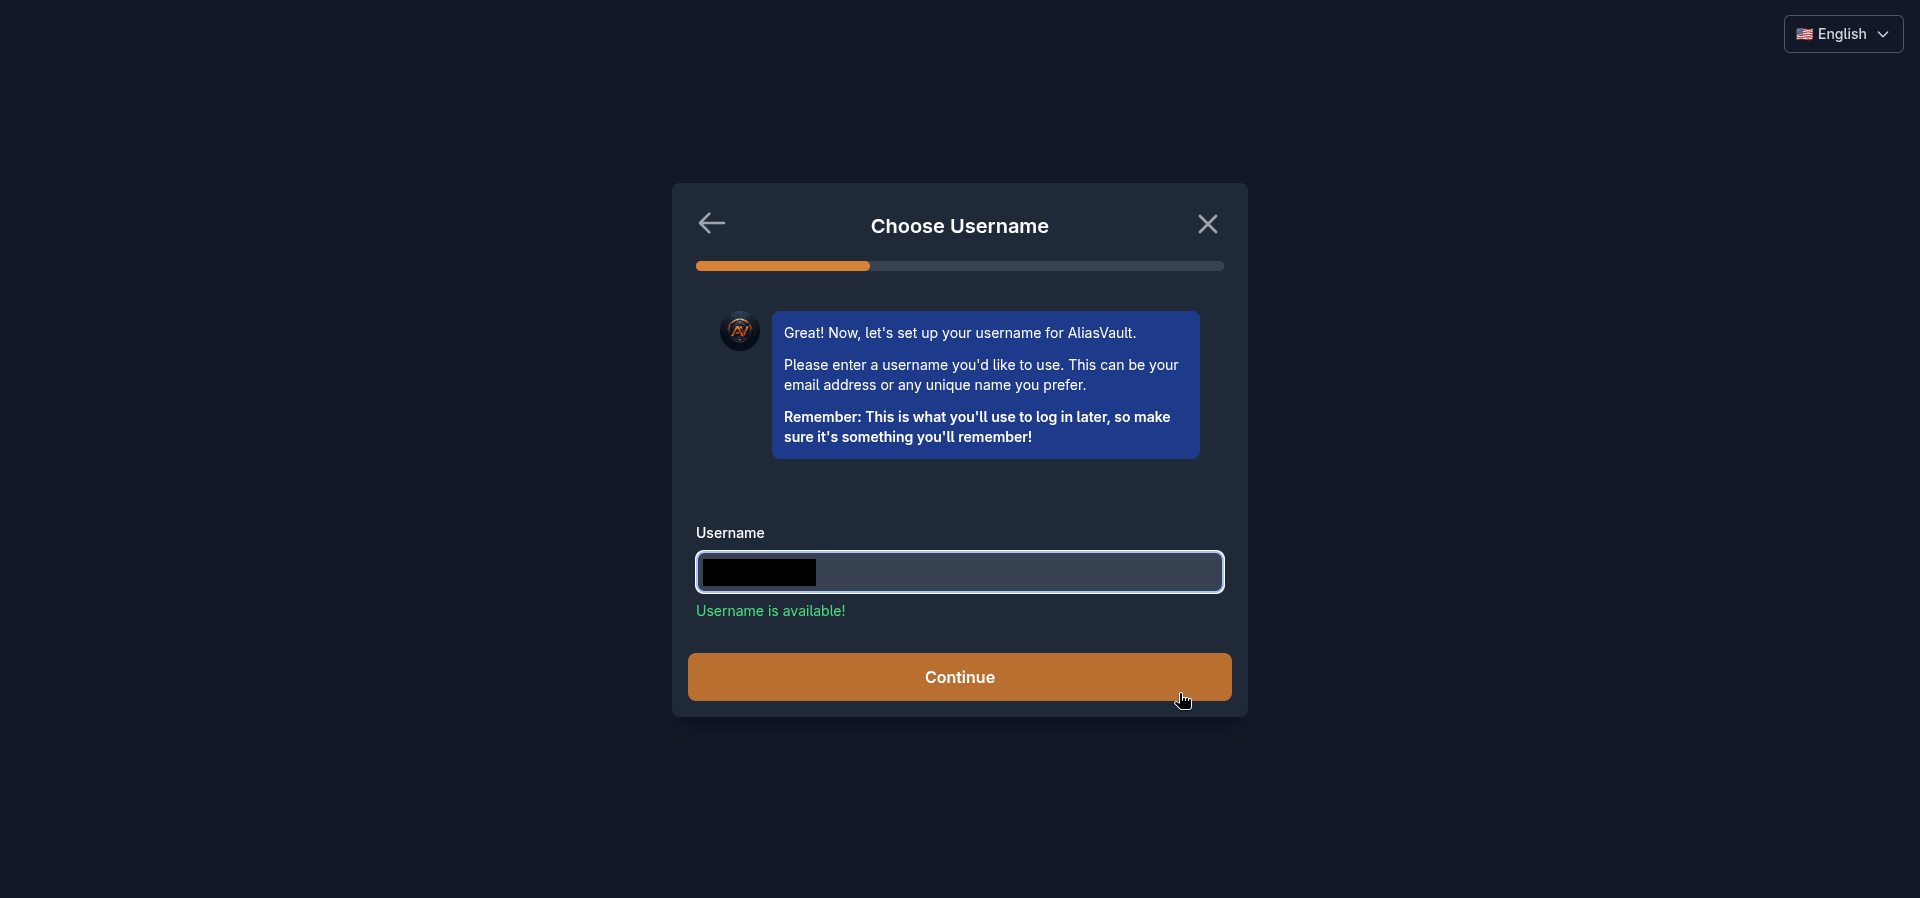
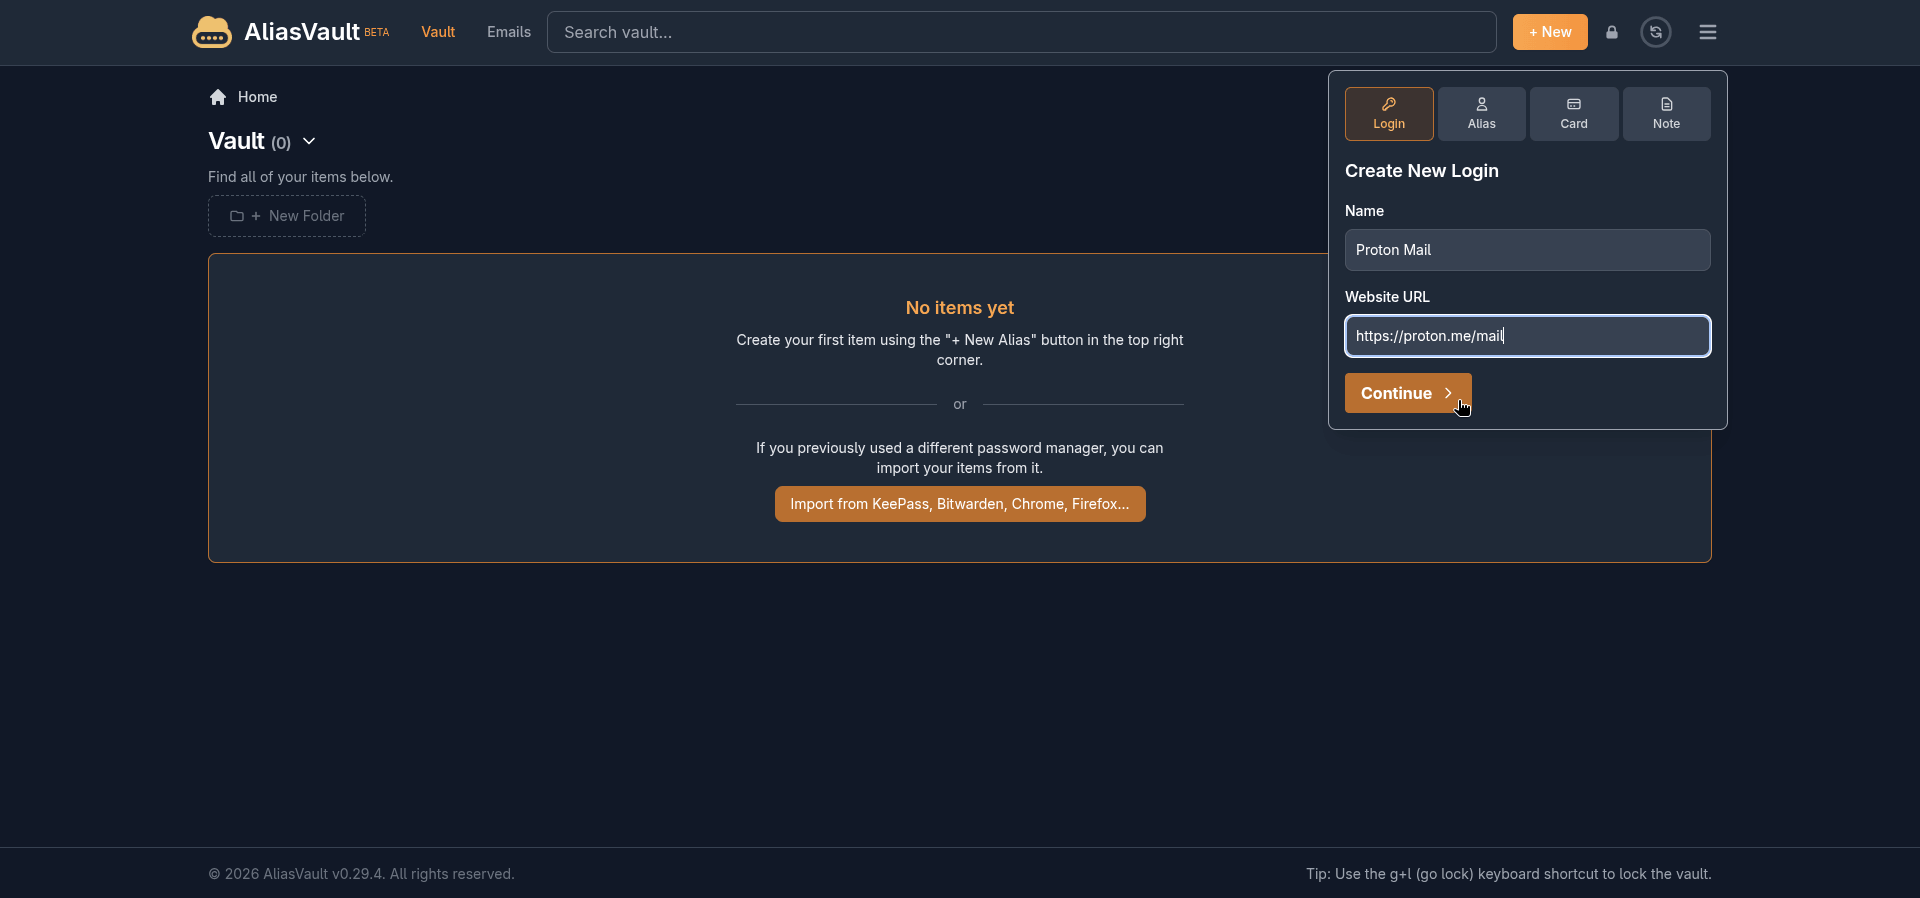
Getting started with AliasVault on the cloud version means heading over to app.aliasvault.net and creating a new vault.
The first thing I noticed is that it does not ask for an email address at signup. You just pick a username, anything you want, and that's all the identifying information it collects.
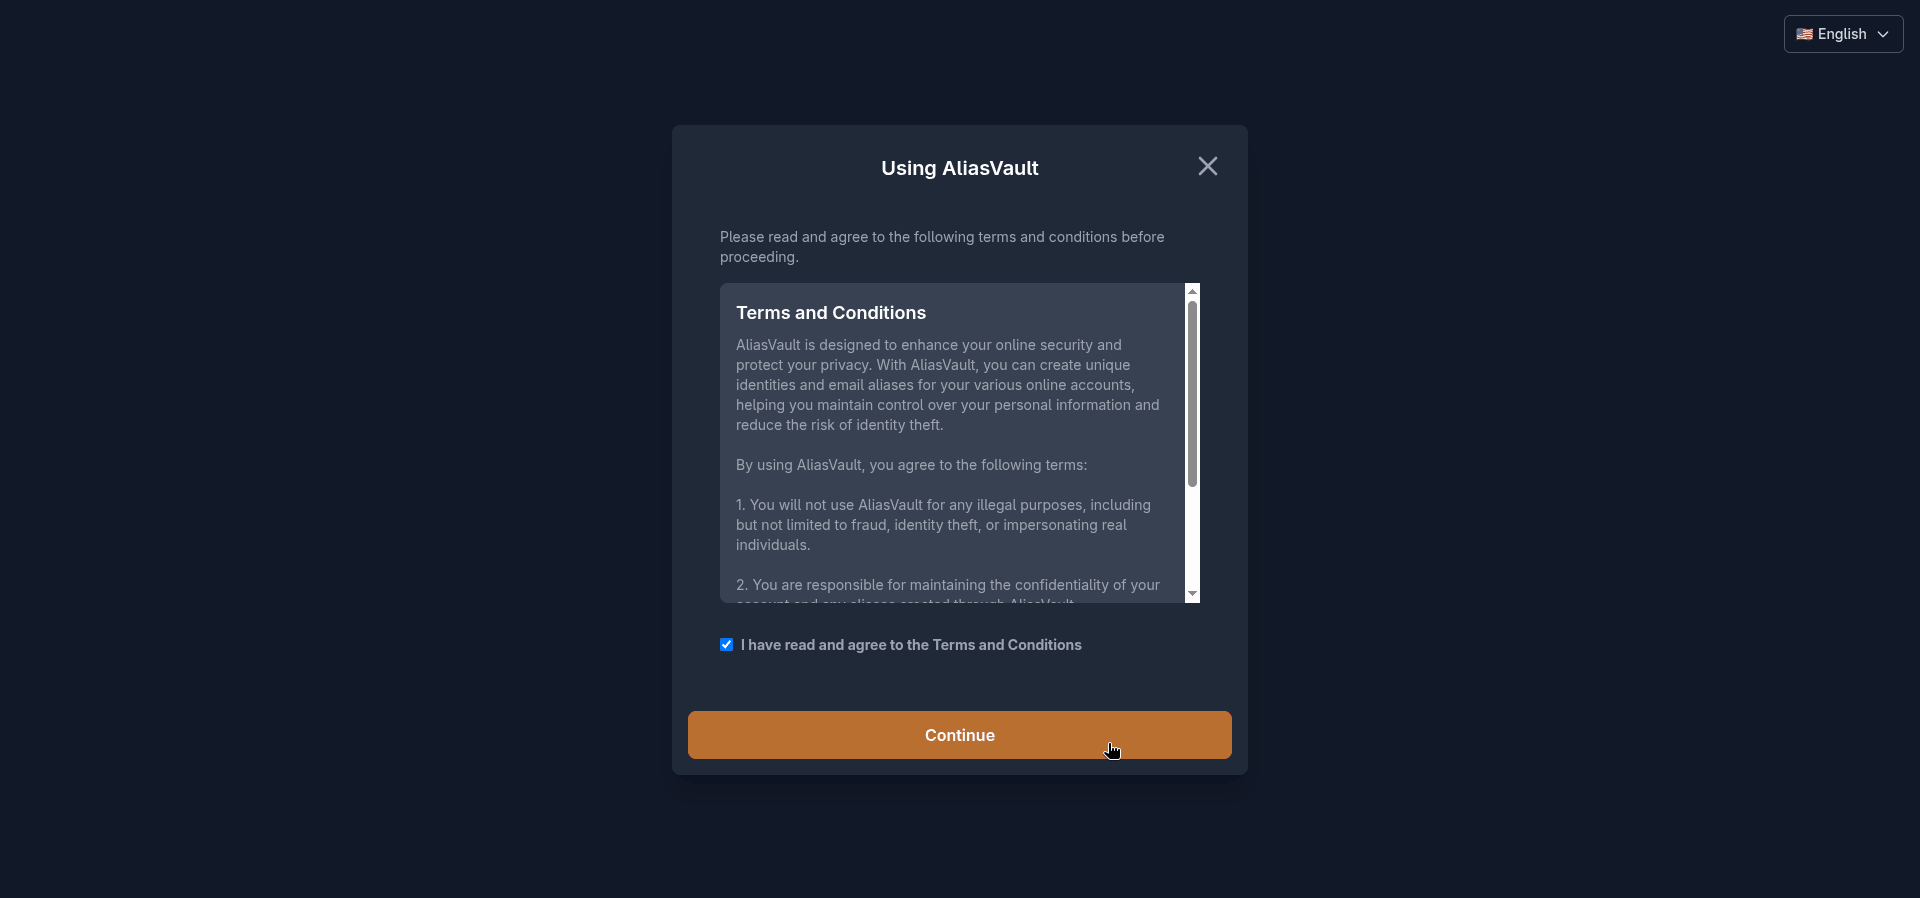
Before you get to the vault itself, you are asked to agree to the terms and conditions. This is pretty standard for any web service, though the terms here are straightforward and not particularly alarming.
The short version is that you cannot use AliasVault for illegal purposes, you are responsible for keeping your account secure, and the project itself is not liable if you lose your master password and your data becomes inaccessible.
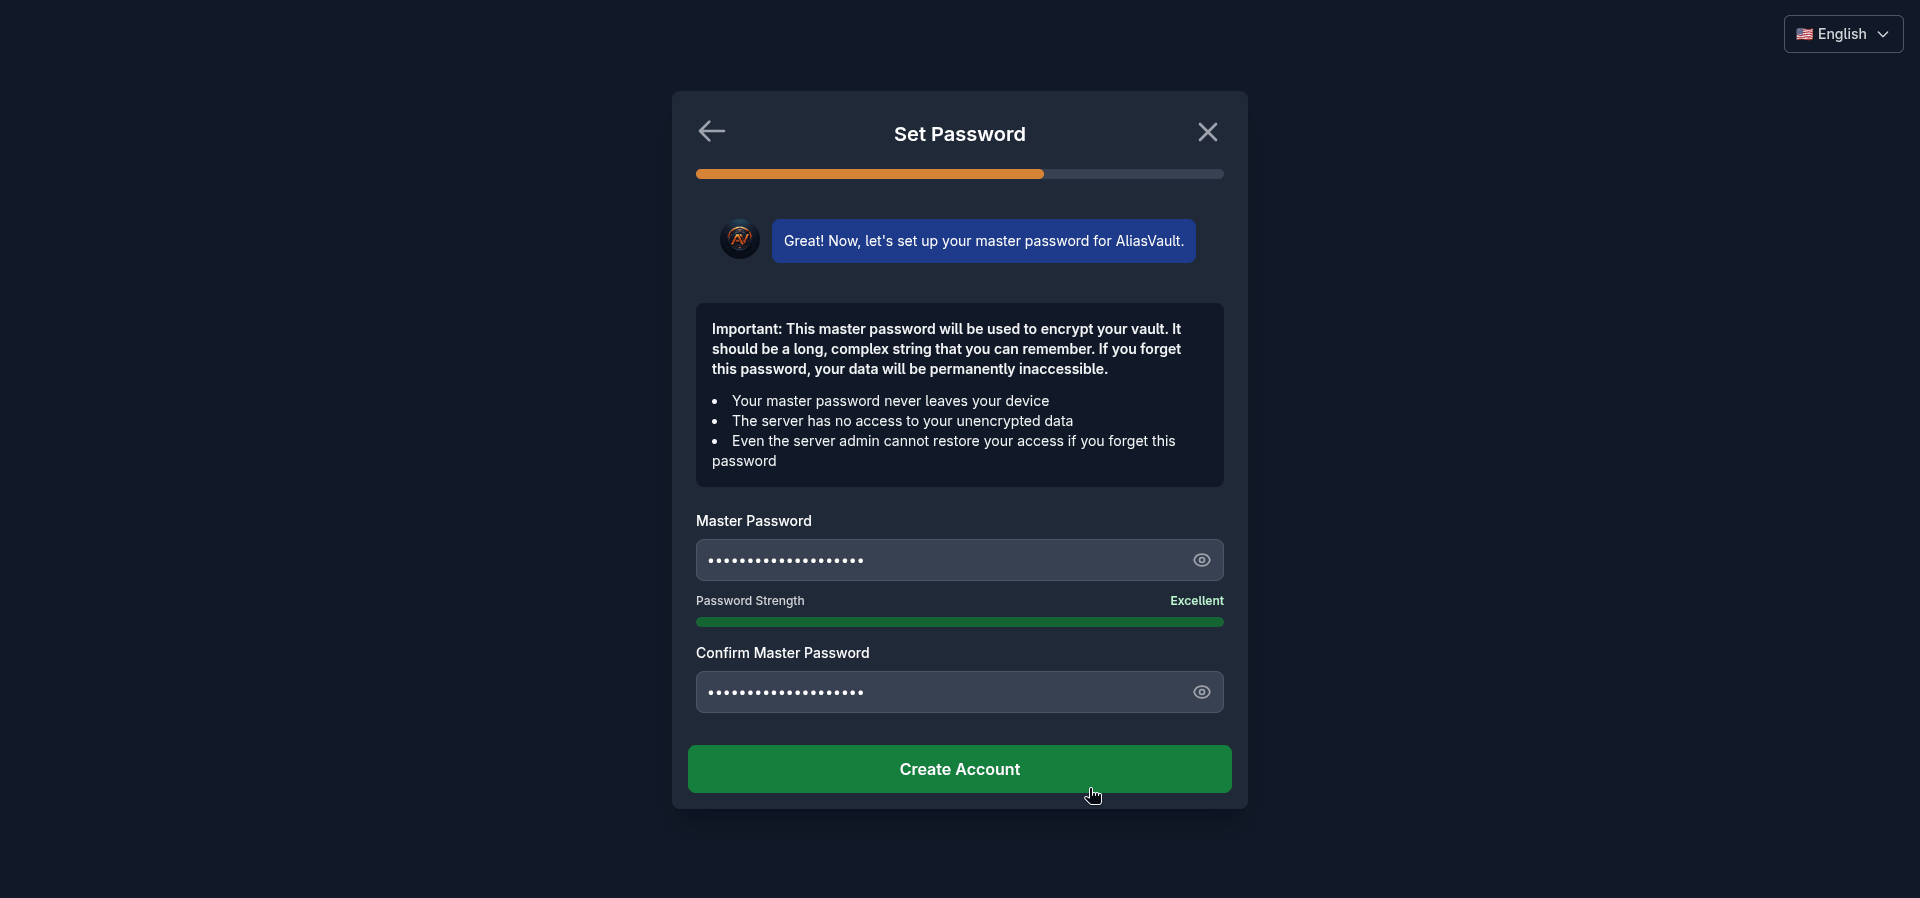
Once past that, you set your master password, and AliasVault shows a strength indicator right there during setup. A strong password is not optional here given the zero-knowledge architecture and the sensitive nature of the contents; lose it and the vault contents are gone for good.
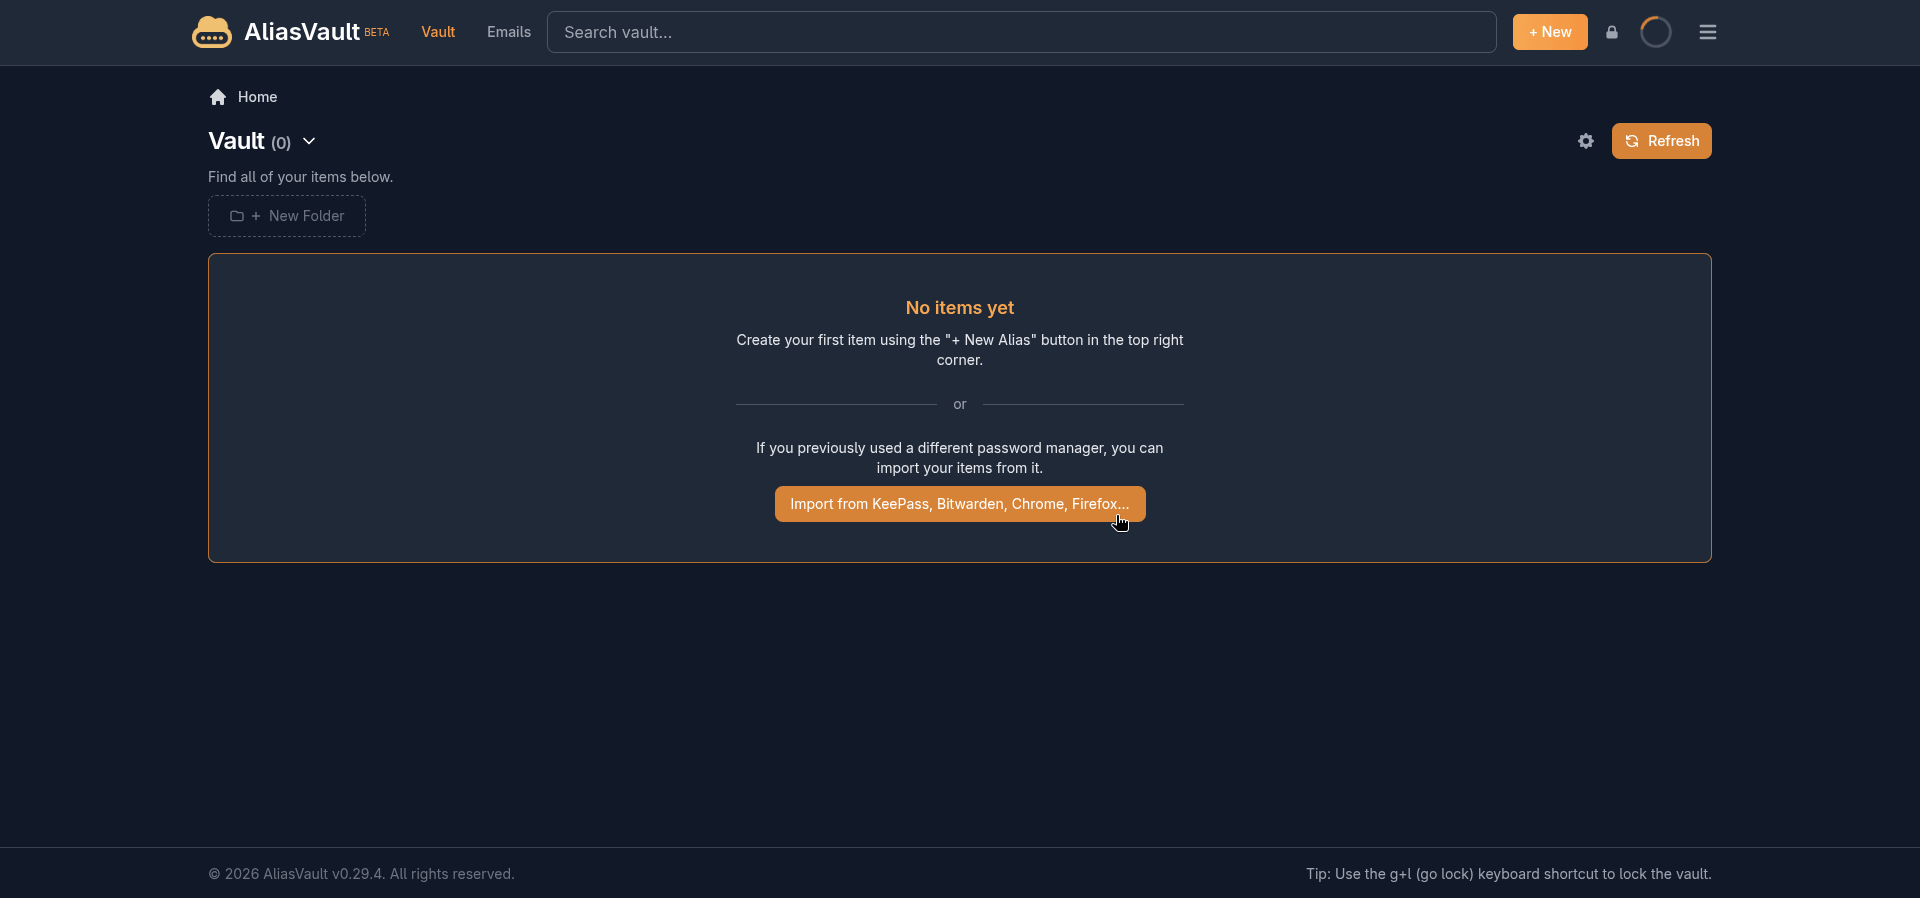
If you are coming from another password manager, the empty vault screen immediately displays an import button. AliasVault can pull in credentials from 1Password, Bitwarden, Chrome, Dashlane, Firefox, KeePass, KeePassXC, Proton Pass, and Strongbox.
Adding new logins
Clicking on the "+ New" button will give you multiple options to add a new entry for Login, Alias, Card, and Note. During my use, I mostly stuck to the Login entry, using it to add new credentials to the vault.
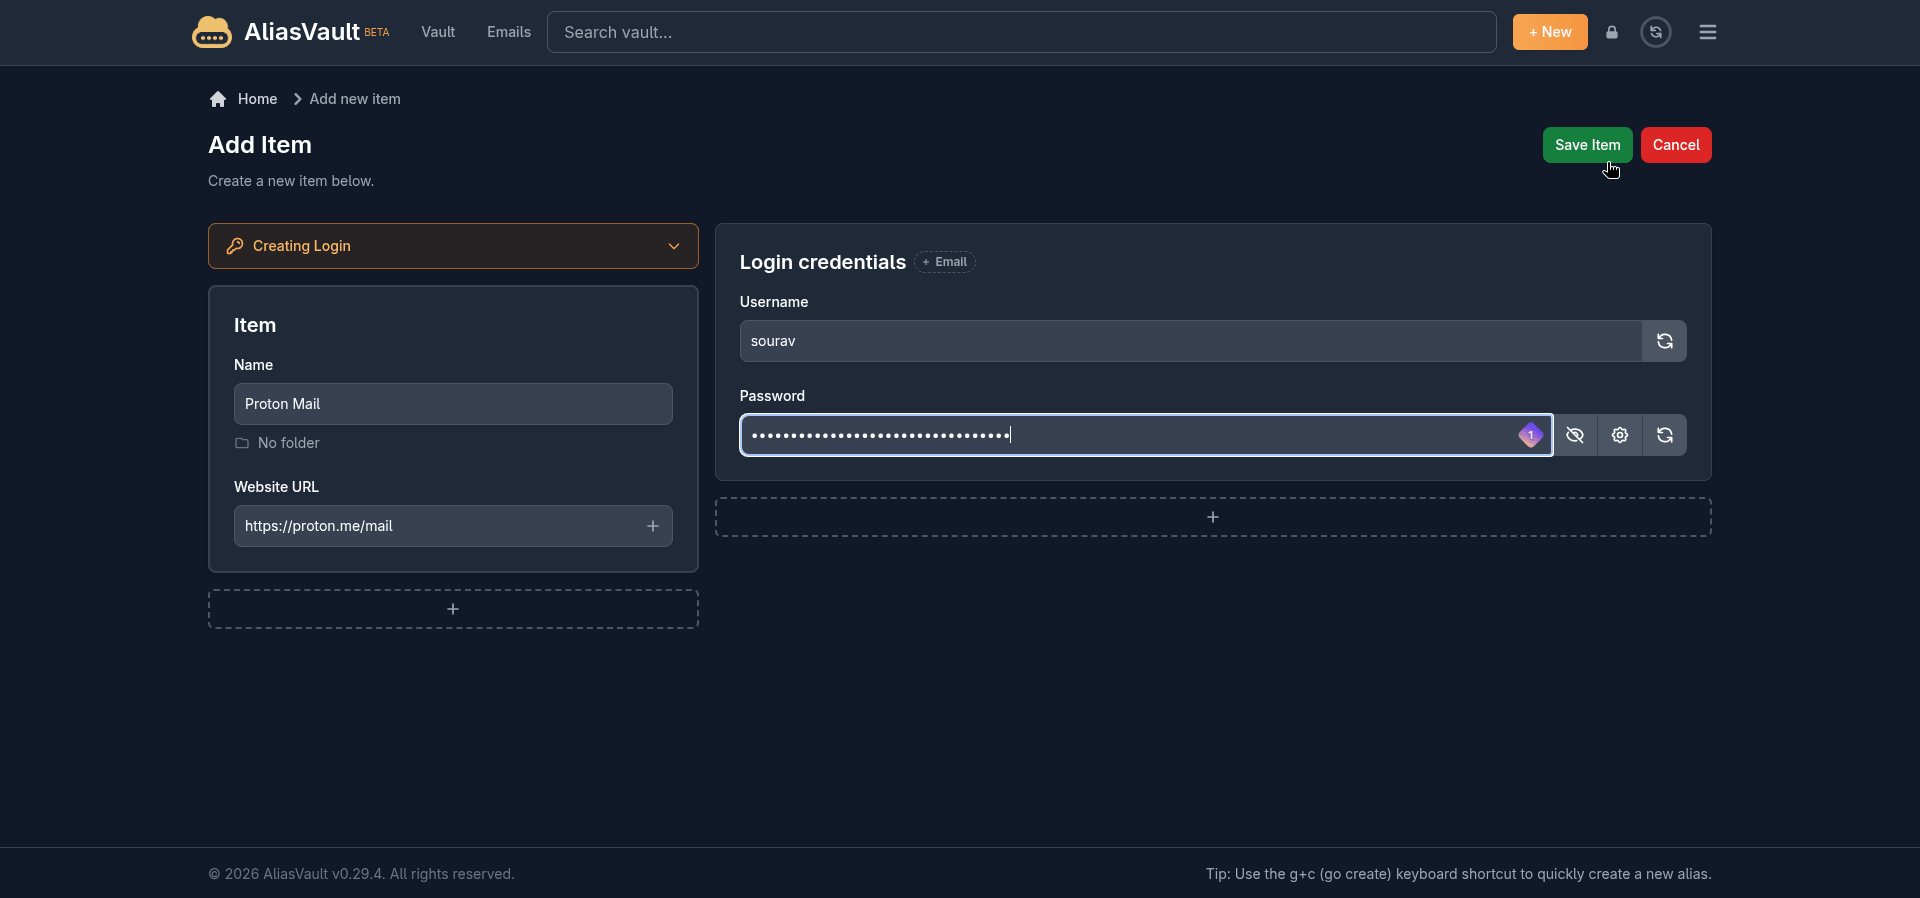
The interface presented here is easy to get used to. You enter the username, add the password, enter the website URL, and click on "Save Item" to get an item added to the vault.
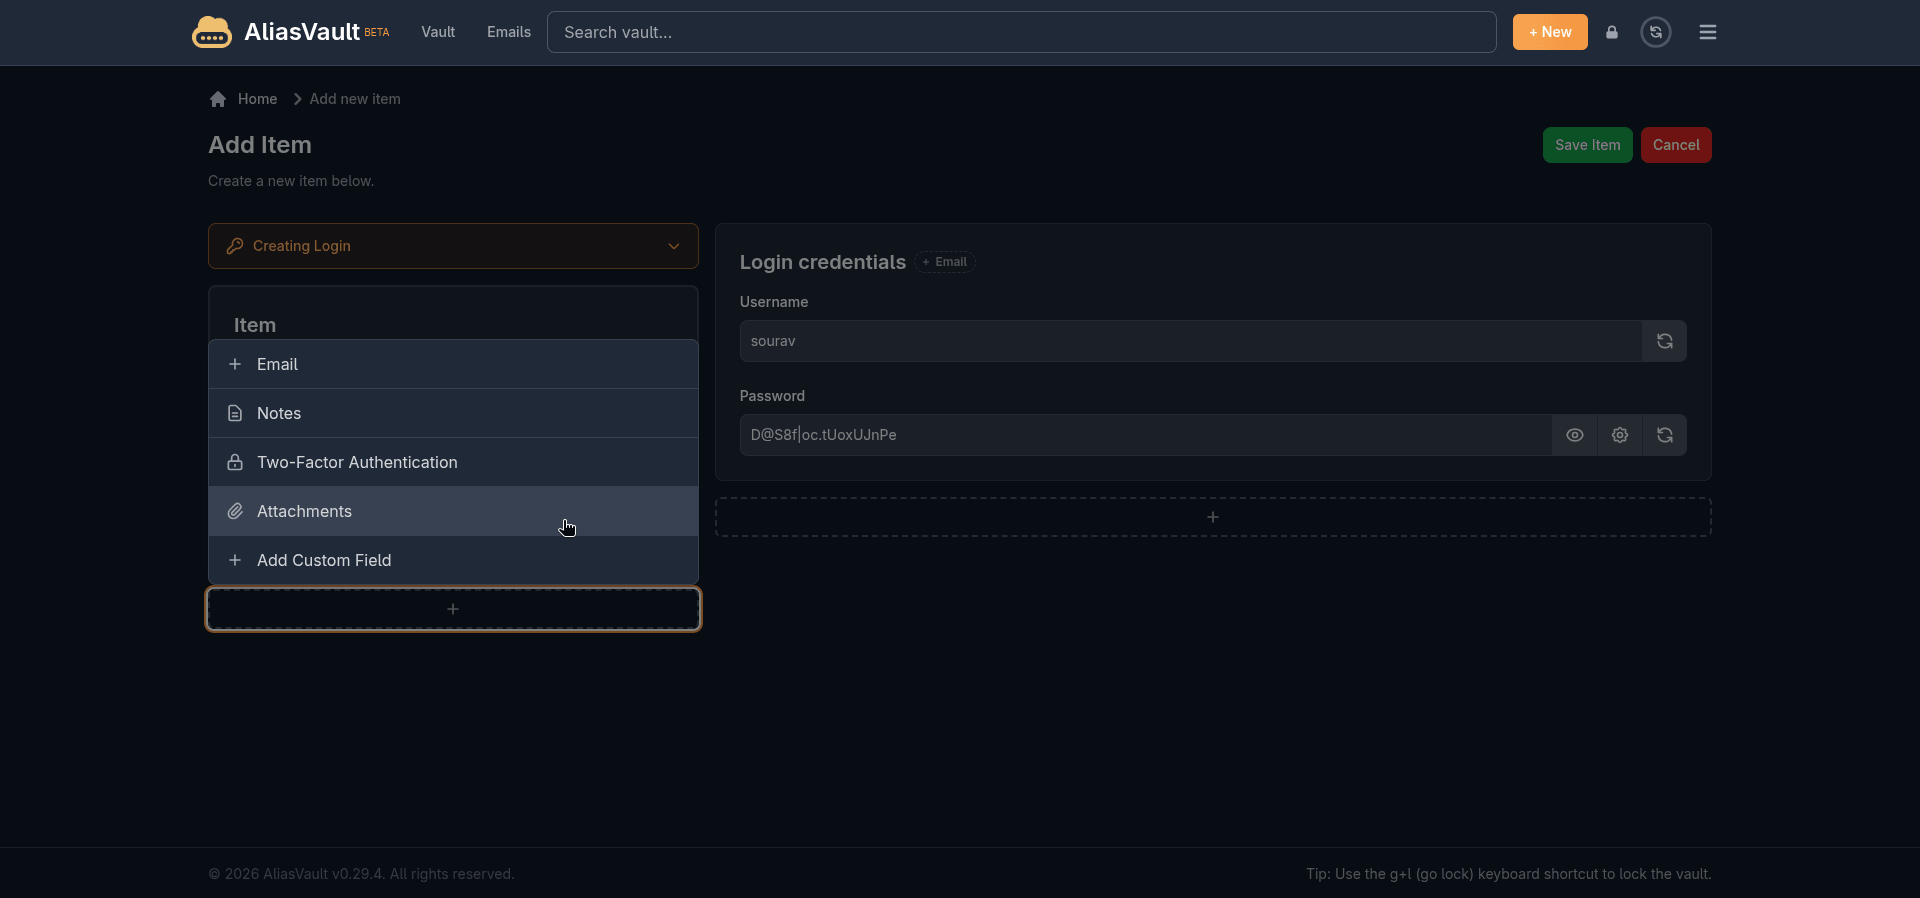
You can even generate passwords, and from the left-hand side menu or at the bottom of the item entry, you can add more content to a vault item, such as email addresses, notes, a two-factor authentication secret, file attachments, or a custom field.
Just click on the plus button to get going.
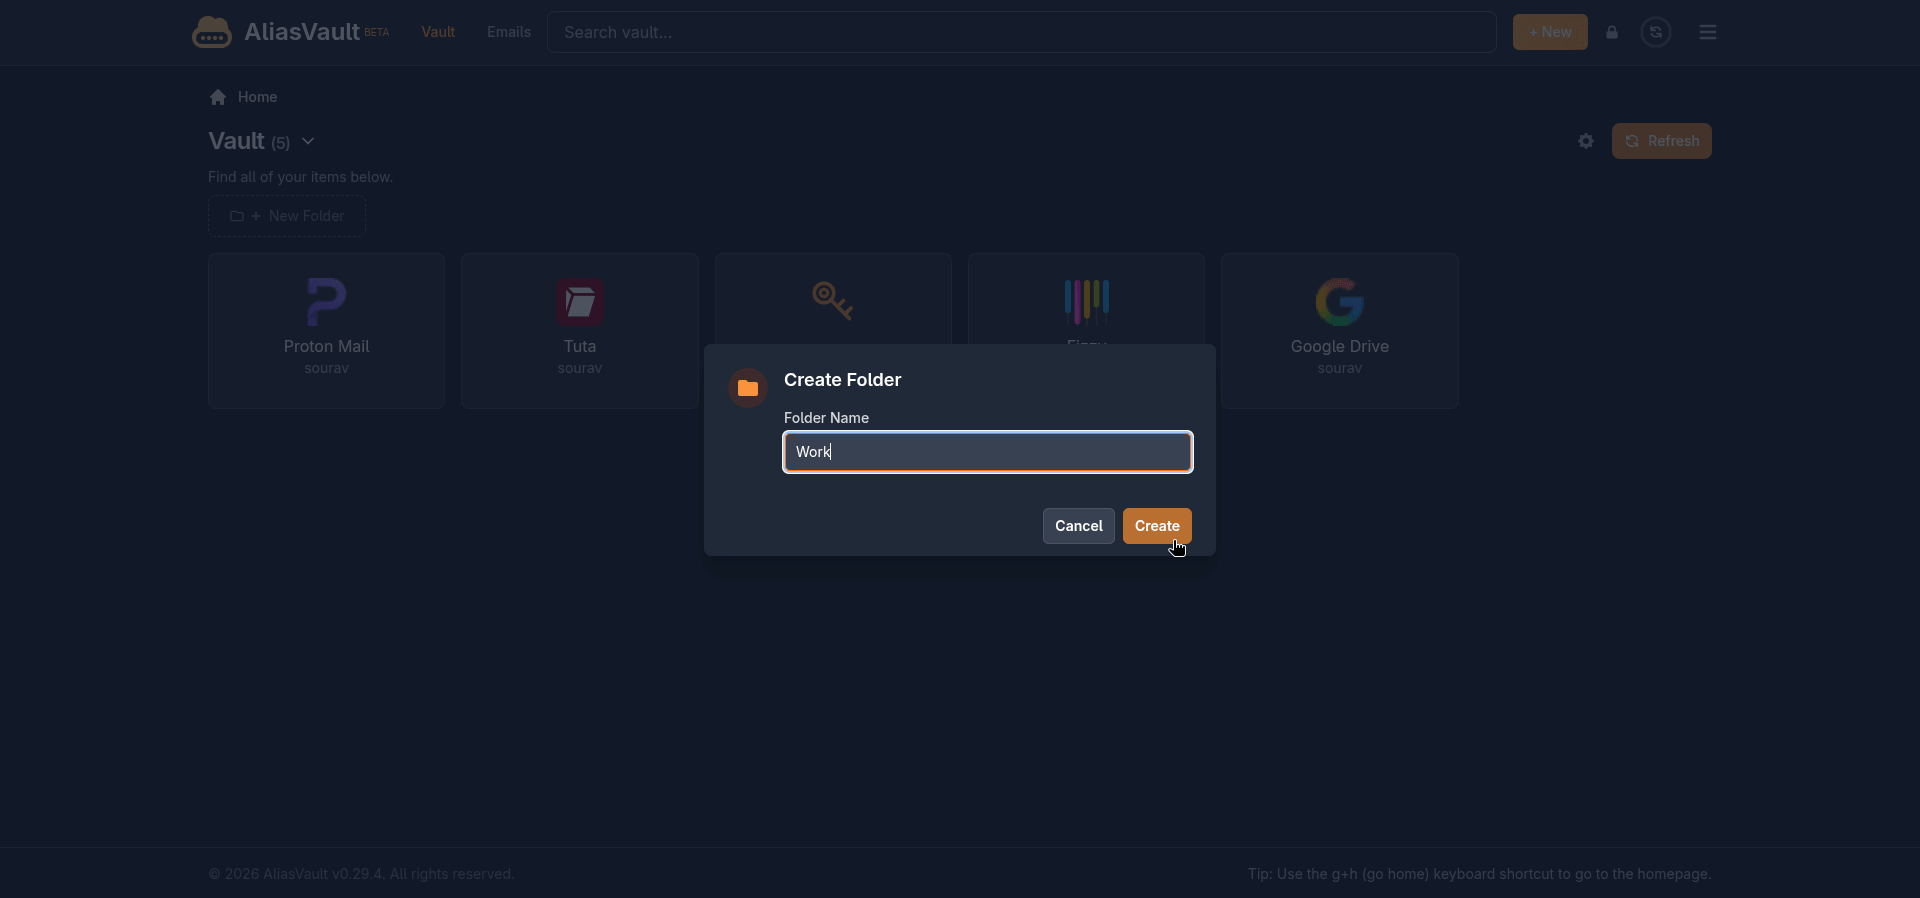
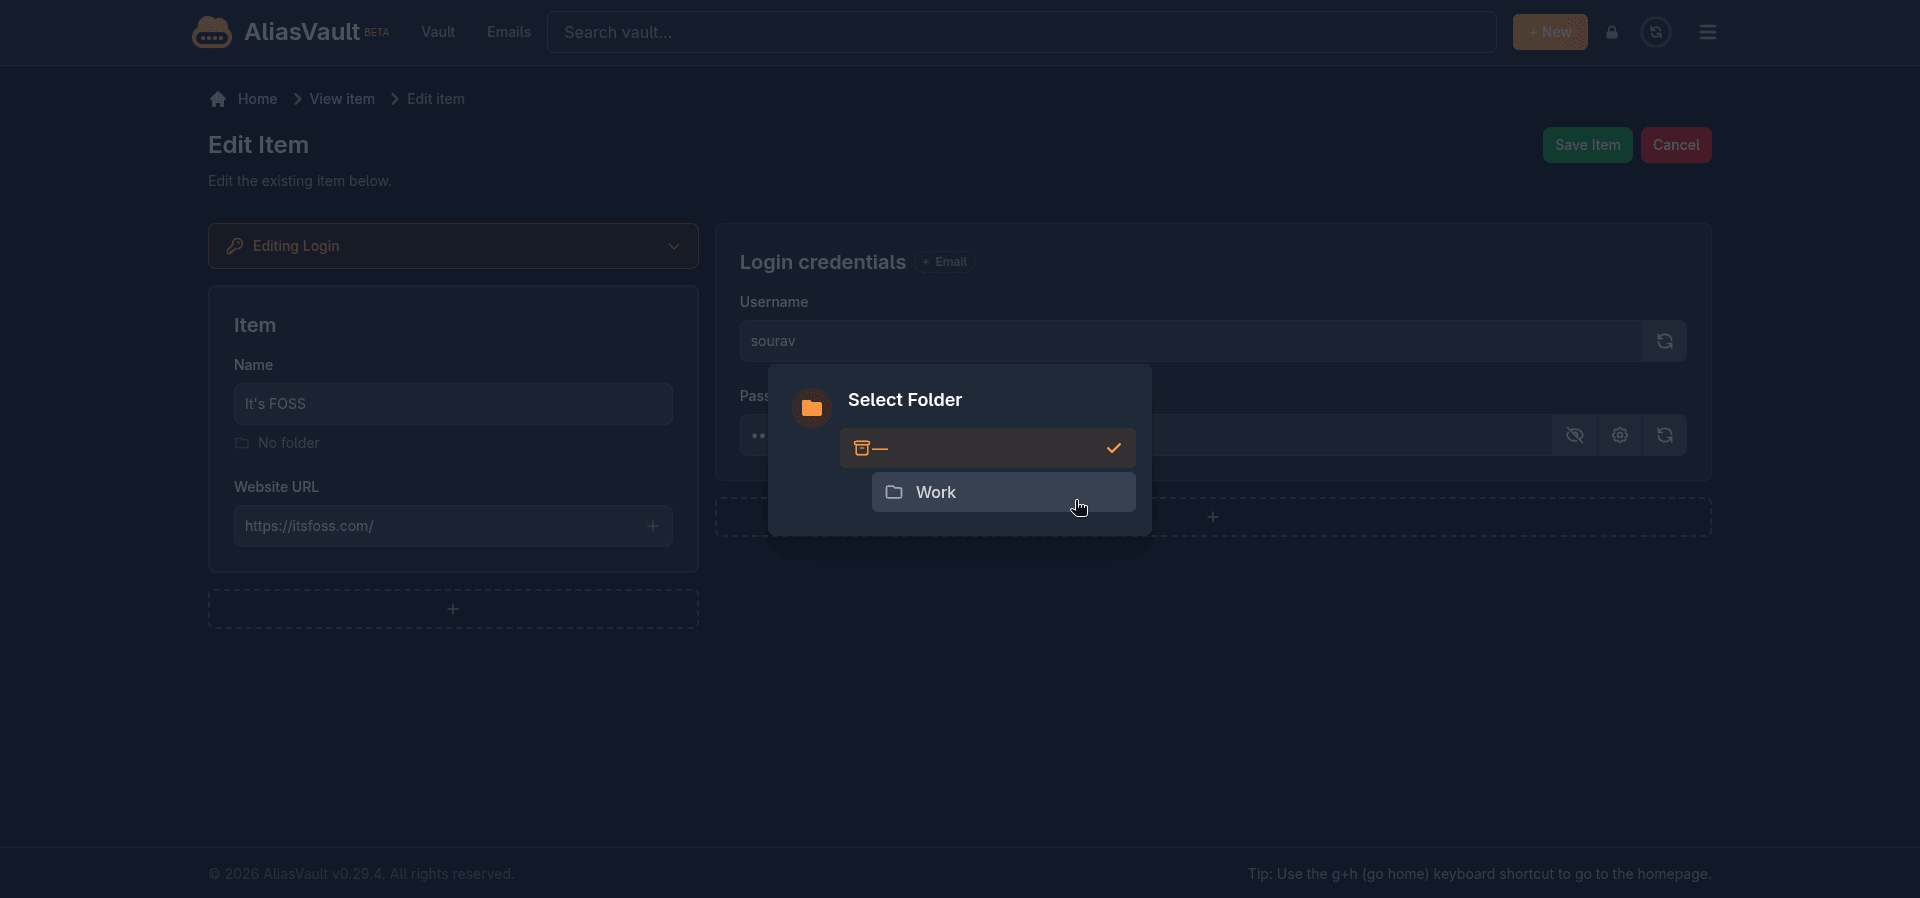
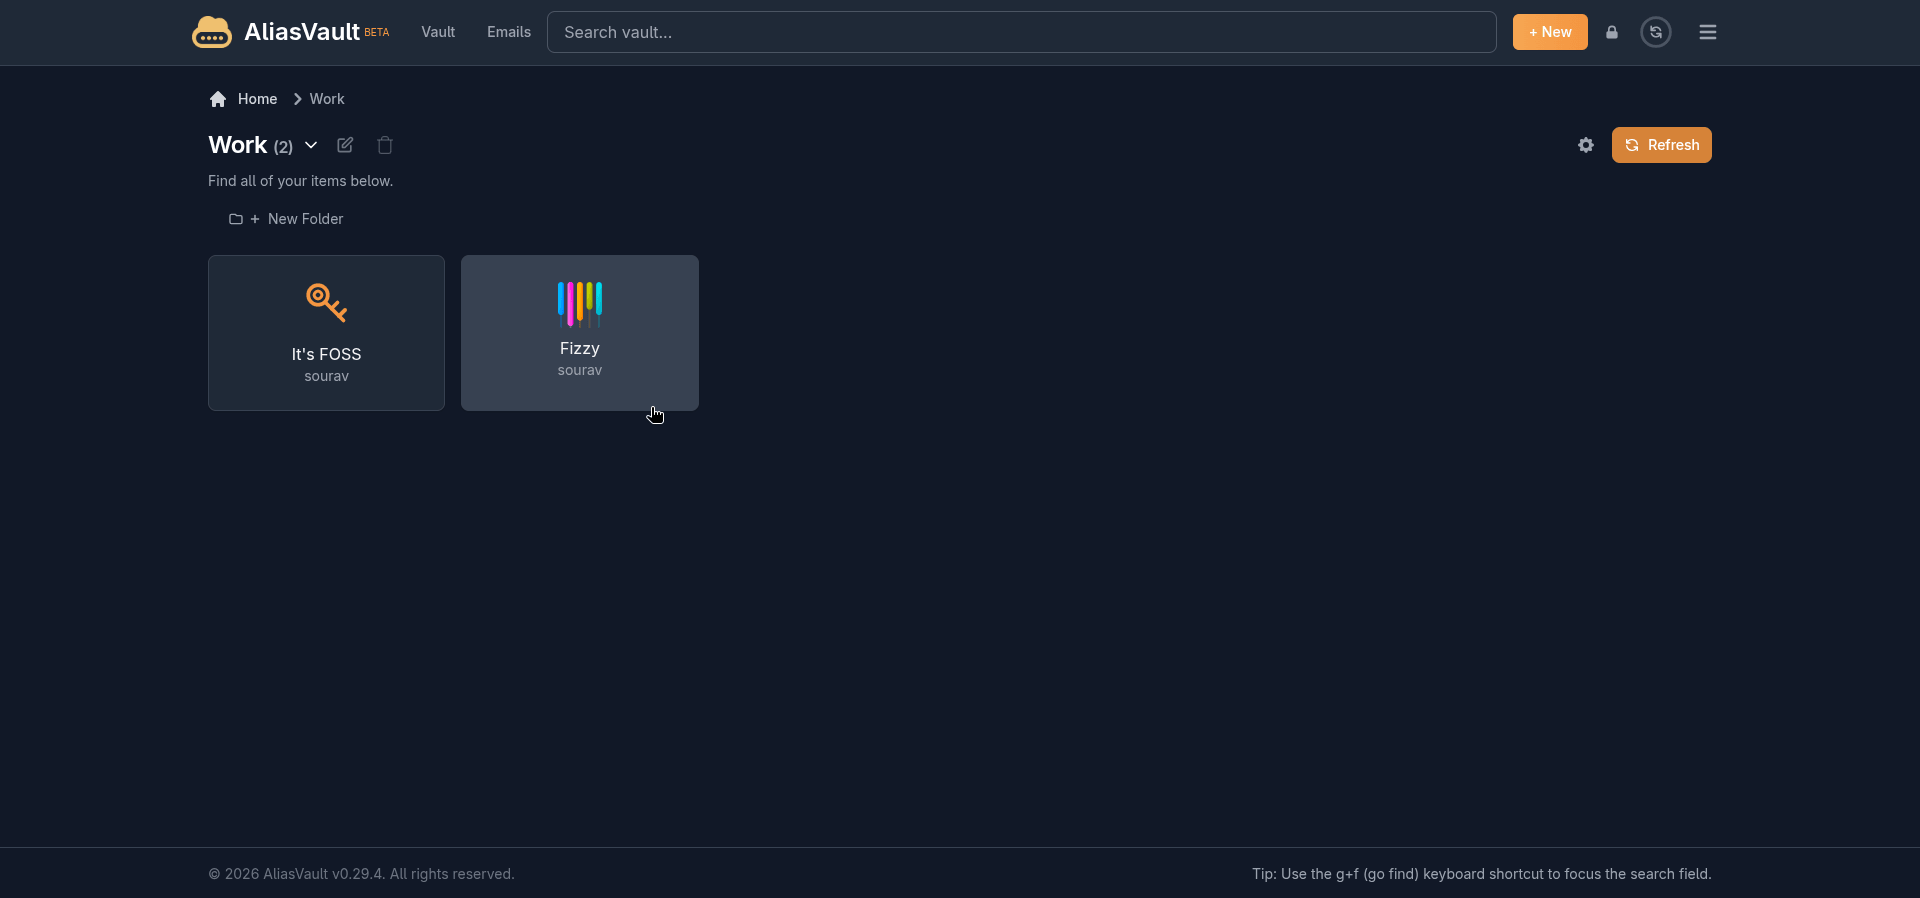
Keeping things organized is straightforward too. Creating a folder takes about three seconds. Click "+ New Folder", type a name, and hit "Create". Moving an existing login into a folder is done through the item's edit screen, where a Select Folder dropdown lists all your folders.
What is missing, though, is anything resembling bulk management. There is no drag and drop to move items into folders, no batch select to reorganize a bunch of credentials at once, and no multi-select for bulk deletion.
If you are migrating a large existing vault and want to sort everything into folders, you are doing it one item at a time.
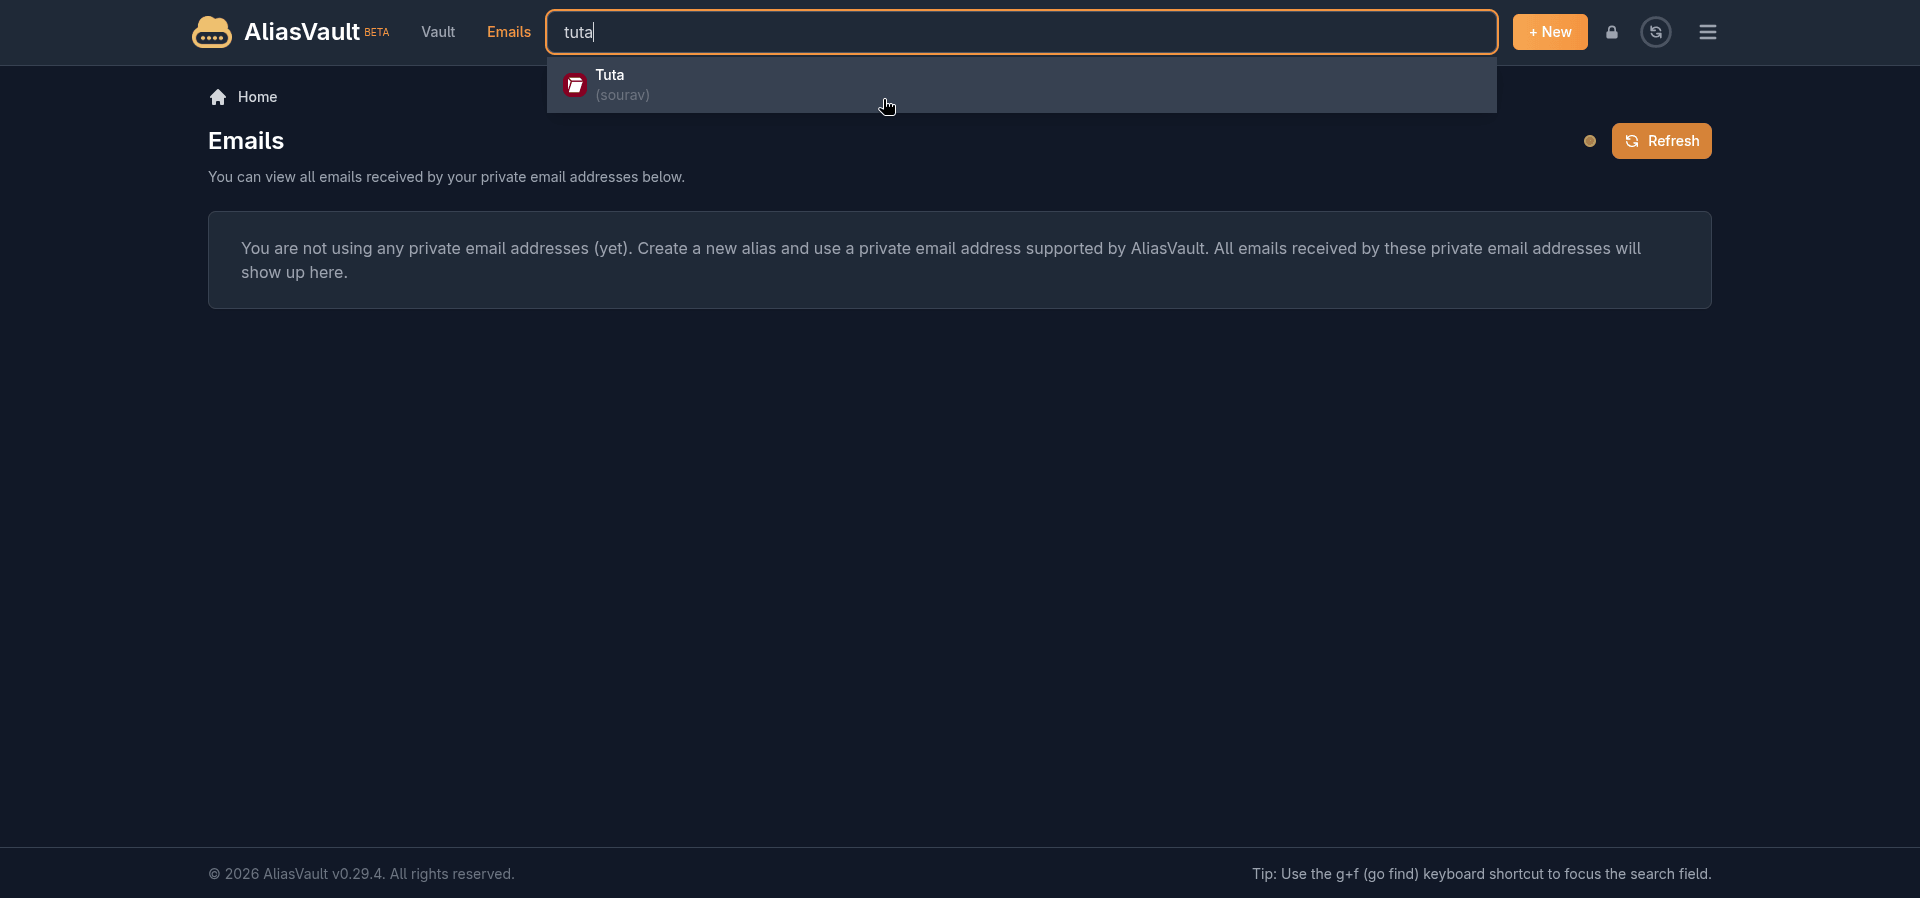
The search functionality does make navigating a crowded vault easier, at least. The search bar at the top of the interface queries across your entire vault in real time, pulling up matching items as you type, with icons shown.
Creating an alias
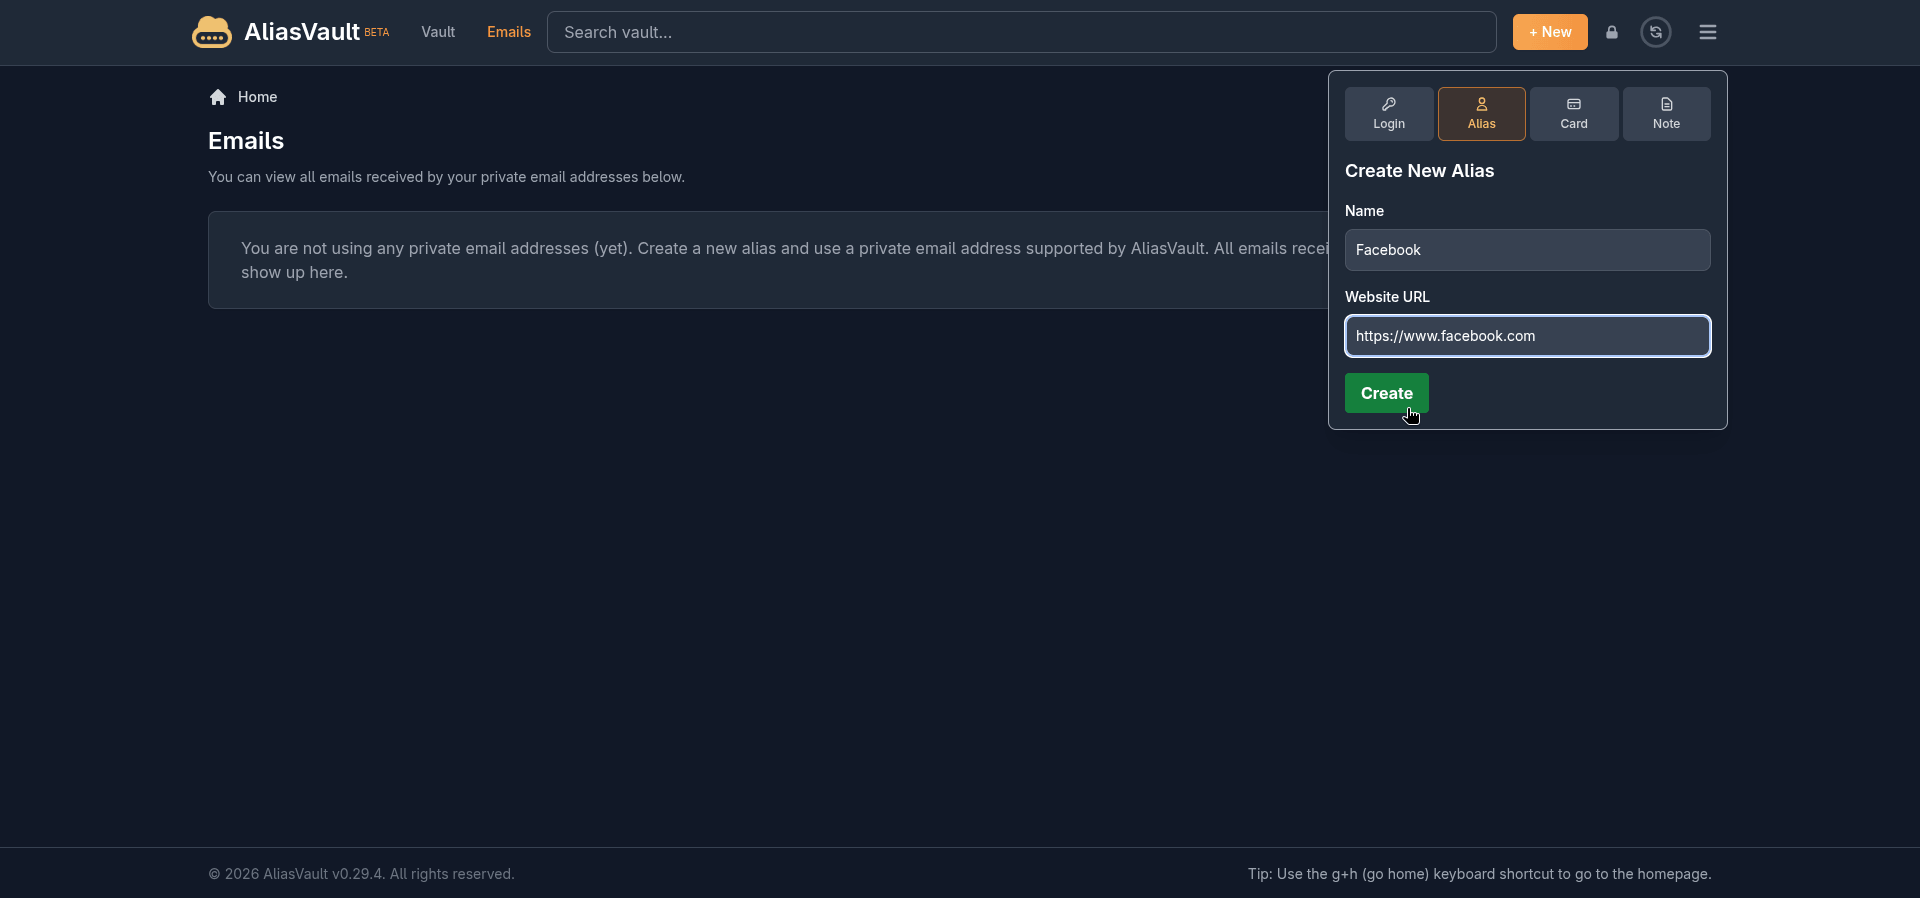
This is where AliasVault separates itself from a regular password manager. Switching to the Alias tab in the "+ New" panel lets you create a fictional identity tied to a service, not just a username and password.
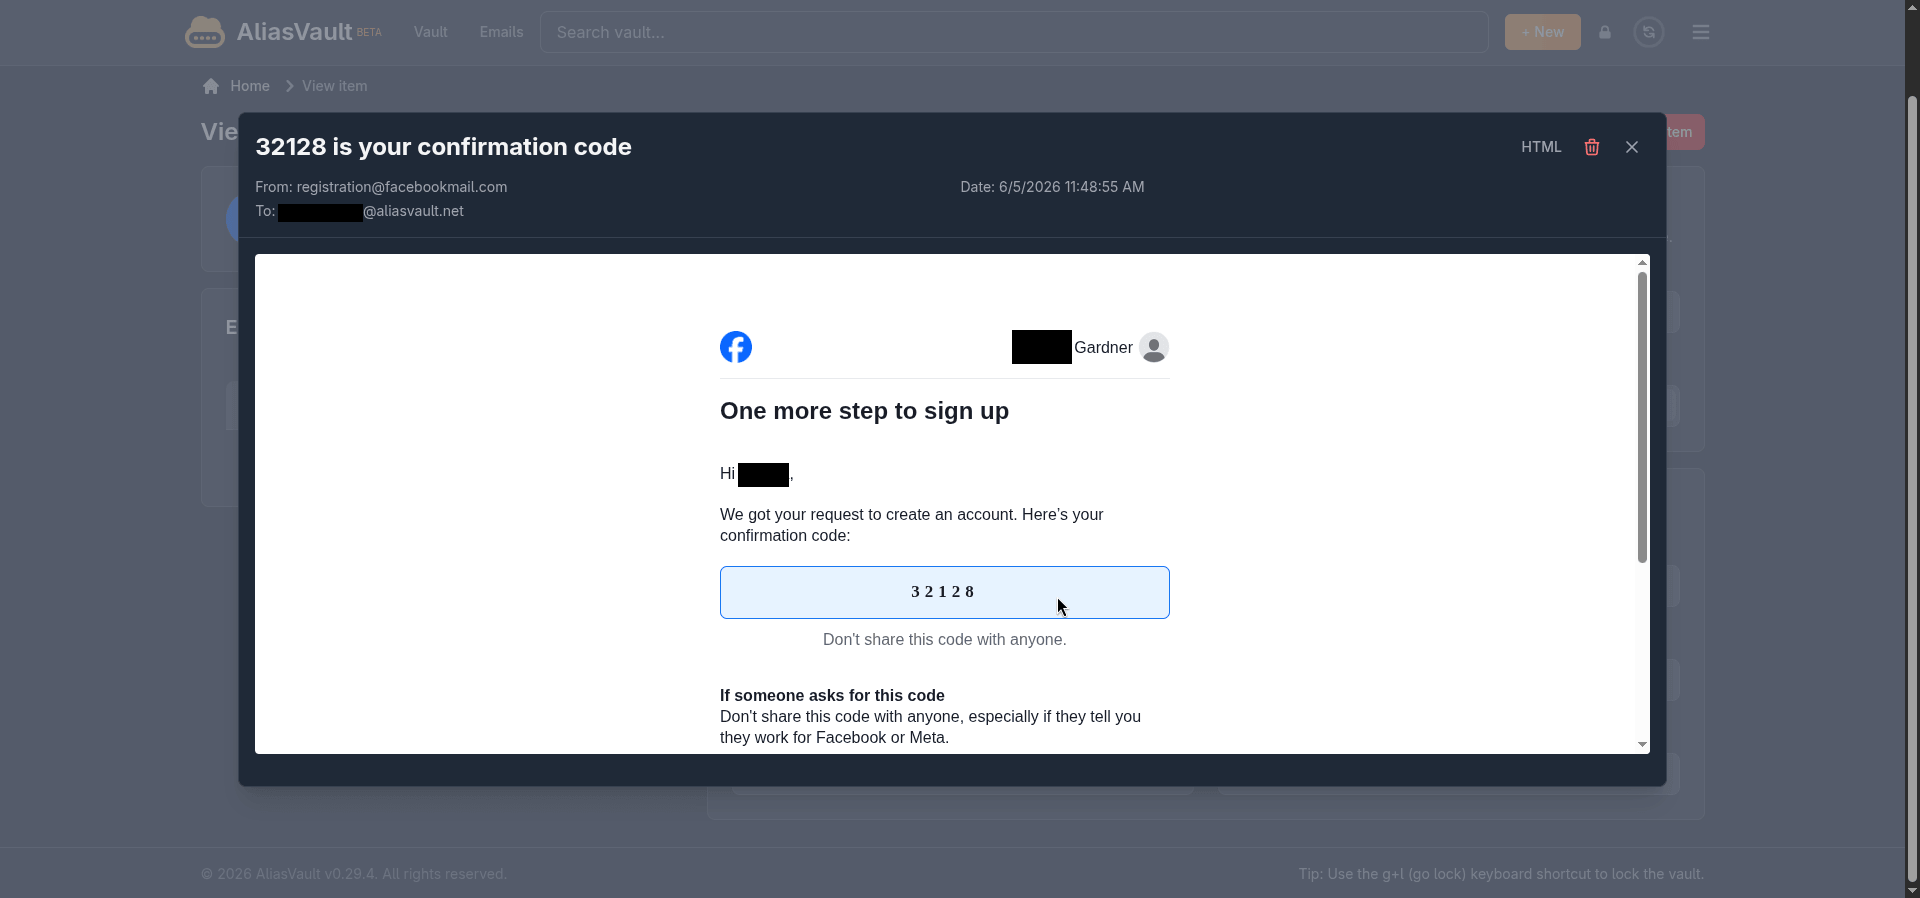
You give it a name and a website URL, hit Create, and AliasVault generates the whole package. A unique email address at the @aliasvault.net domain, a username, a strong password, and a fictitious identity complete with a first name, last name, gender, and birth date.
All of it is ready to use at signup for whatever service you are creating the alias for.
Any emails that land on that alias address show up directly on the item's page inside the vault. I tested this with Facebook, and it worked well enough, getting multiple emails, including the OTP needed to confirm the signup.
The only wrinkle was Facebook asking me to verify the account with a live selfie. ☠️
Another thing to keep in mind is that the built-in email server is currently receive-only.
You cannot reply to or forward emails from your alias addresses on the cloud version. It is a deliberate limitation for now, listed on the roadmap as a future paid feature, so if two-way alias email is something you need, that is worth factoring in.
The browser extension
AliasVault also has browser extensions available for Chrome, Firefox, Edge, Safari, and Brave. I tested it on Vivaldi using the Chrome extension, and the experience was clean.
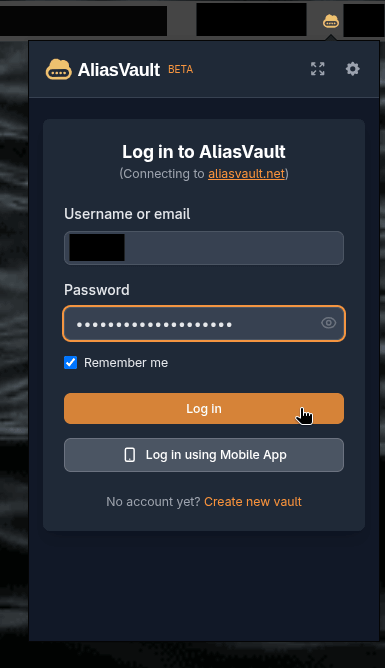
Logging in connects directly to aliasvault.net, and you get a "Log in using Mobile App" option here as you do on the web app if you would rather not type your master password. I didn't test this one, but it should work well.
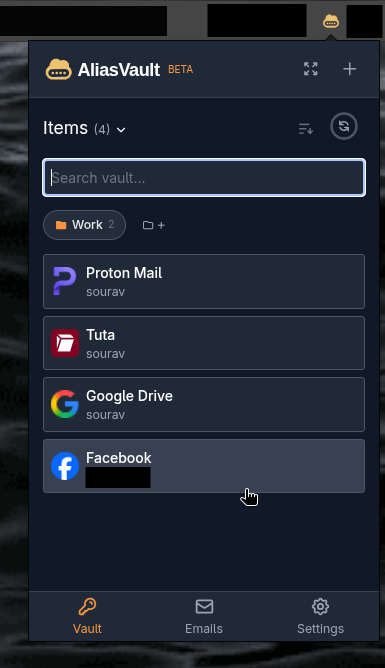
Once inside, the extension mirrors the web app fairly closely.
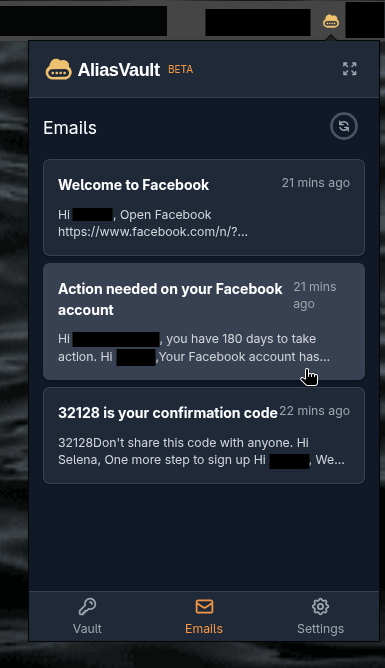
You get your full vault list with website icons, folder filters, a search bar, and a "+" button to add new items without leaving the browser. The Emails tab also works here, so you can check alias inbox activity without switching to the web app.
It even shows relevant saved credentials automatically when you land on a website you have a login stored for.
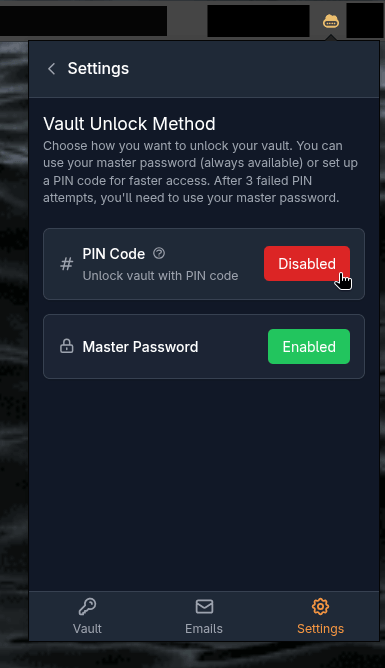
The Settings tab also has a few things worth knowing about. You can switch the vault unlock method between your master password and a PIN code, with the PIN falling back to the master password after three failed attempts.
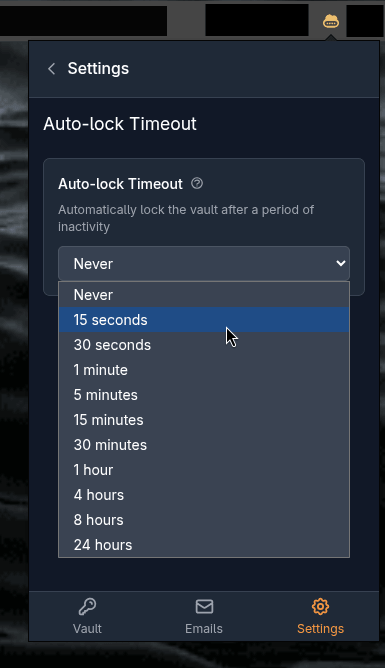
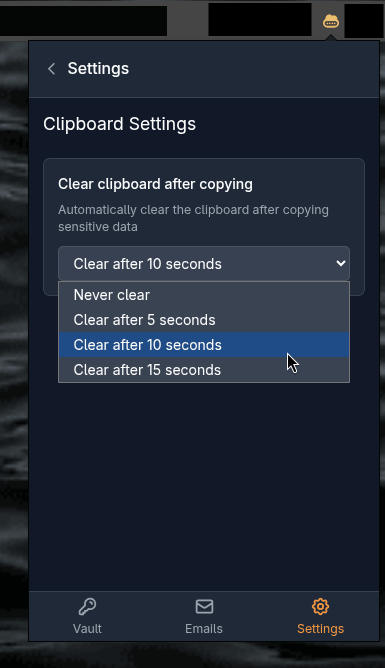
There is also an auto-lock timeout you can configure, ranging from 15 seconds all the way up to 24 hours, or never if that is your preference. Clipboard behavior is configurable too. Copied sensitive data is cleared automatically after 10 seconds by default, with options to change that to 5, 15, or never.
Closing words
AliasVault is one of those tools that makes you wonder why no one put these two things together sooner. A password manager that also handles email aliasing is something that Proton Pass does, but there are some limits involved.
While it is still in beta and missing a few things like bulk credential management and reply support for aliases, nothing about the current state feels rough or half-baked. If privacy matters to you and you have been running a password manager and a separate alias service side by side, this is worth a serious look.
If you've spent any time poking around the self-hosting world, you've likely come across containers. They let you run software in isolated environments that carry their own dependencies, keeping things clean and predictable without the extra weight of a full virtual machine.
That's made them a staple for everything from running a home media server to deploying production applications. Spin one up, use it, and tear it down. The host machine stays clean all the way through.
Docker is where most people start, and for good reason. It has the ecosystem, the documentation, and years of community knowledge behind it. Podman is Red Hat's alternative, largely compatible with Docker on the command line but without a daemon running in the background, and it runs containers as a regular user rather than root.
Now managing containers can be a handful if you have got a bunch of them running, and this is where Pods comes in. It is built in Rust and uses libadwaita for its interface, following GNOME's design principles closely.
From a single window, you can pull and build images, create containers and pods, start and stop them in bulk, view logs, monitor processes, inspect details, and clean things up when you're done.
With Pods 3.0, the entire backend was rebuilt to support multiple container engines, with experimental Docker support being the first addition to come out of that change.
I took this release for a test run to see how it performed.
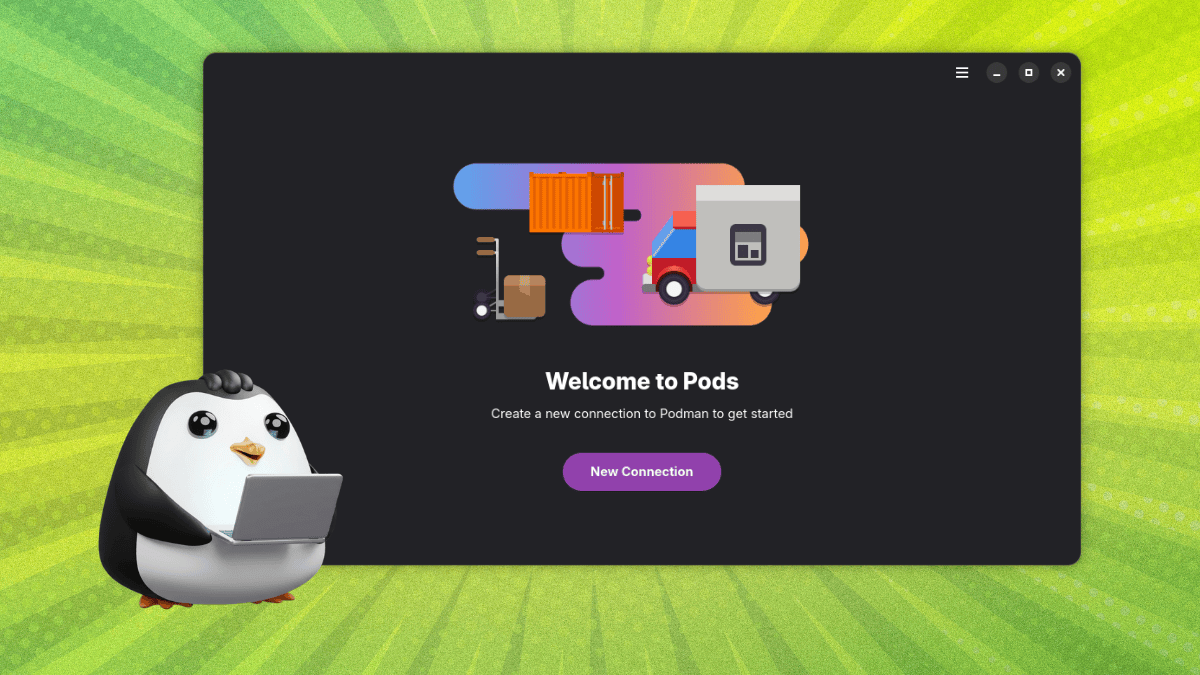
Pods: Easy Container Management
I ran Pods on a Fedora Workstation 43 system, which already had Podman pre-installed. Do keep in mind that I had no prior experience with containers going into this, so I stuck to simple images like PodmanHello, nginx, and BusyBox to get a feel for how the app handled the basics.
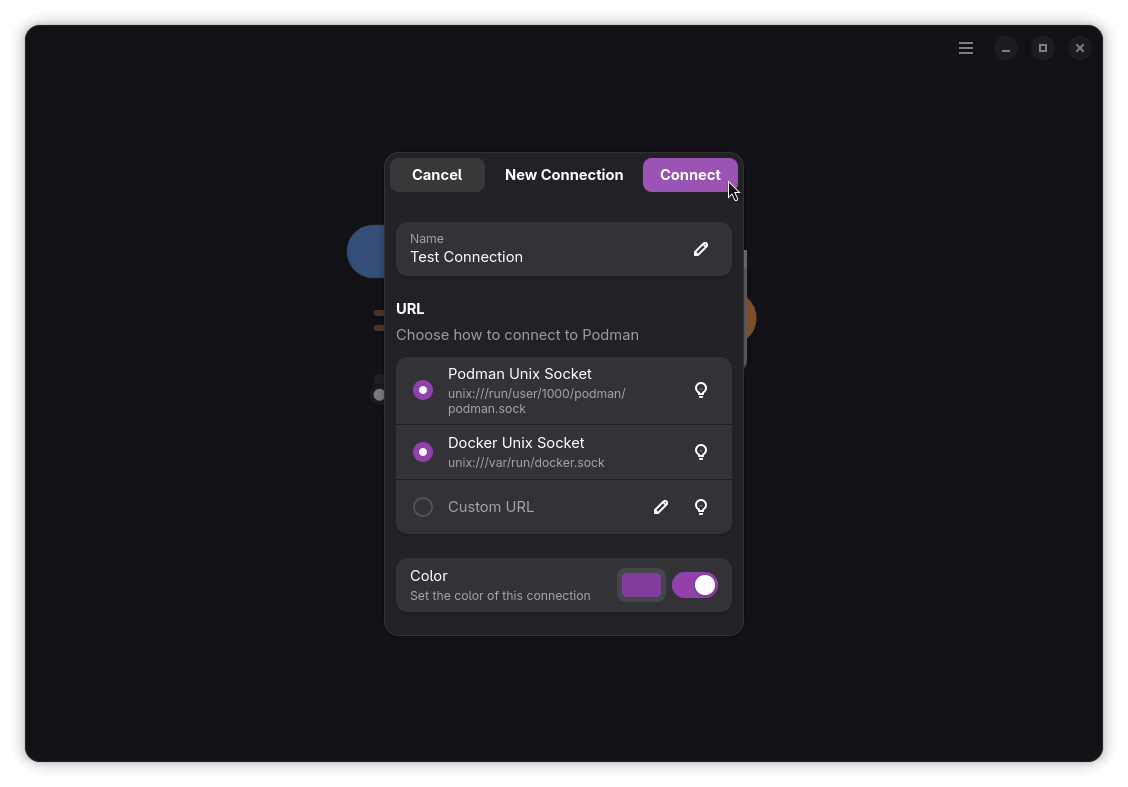
After enabling the Podman socket, I launched Pods and set up a new connection. Two URLs were already pre-selected, the Podman Unix Socket and the Docker Unix Socket, with the option to point to a custom URL if needed.
I gave the connection a name and a color, and Pods quickly populated with the available containers.
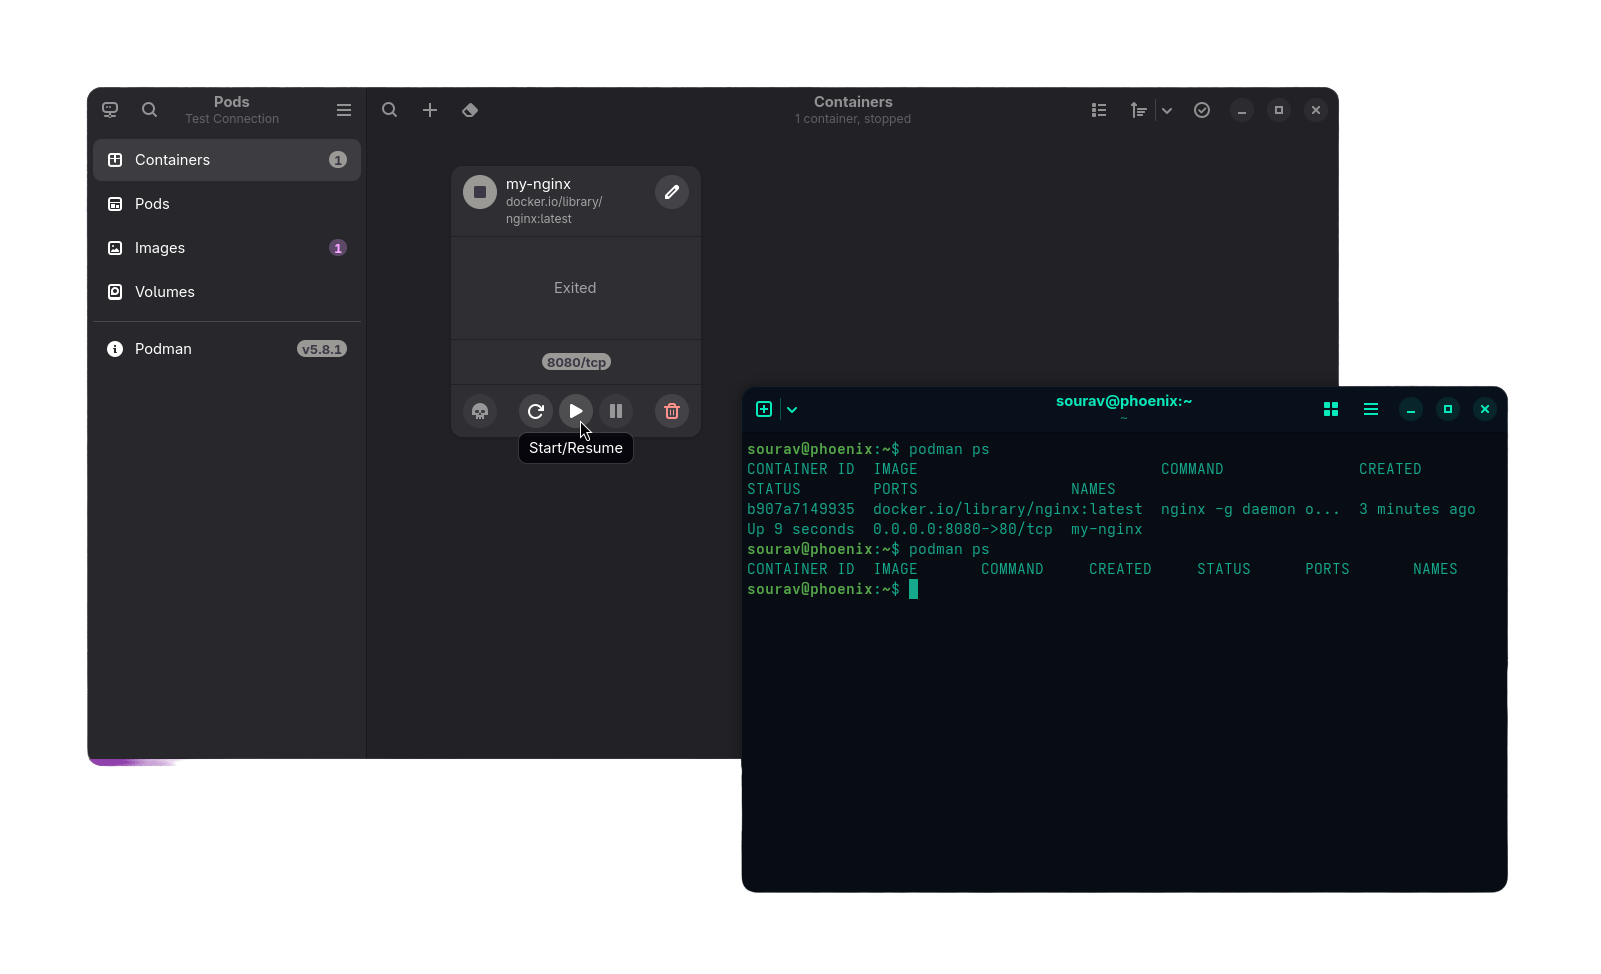
From there, I could see the telemetry of any running containers, along with options to kill, restart, start/stop, pause, and delete them. I tested the start/stop toggle with nginx, and it worked without a hitch.
I even double-checked that by running the podman ps command before and after I had used the start/stop toggle, and the results were positive. Pods was able to start and stop a container without much fuss.
Starting and stopping containers using Pods.
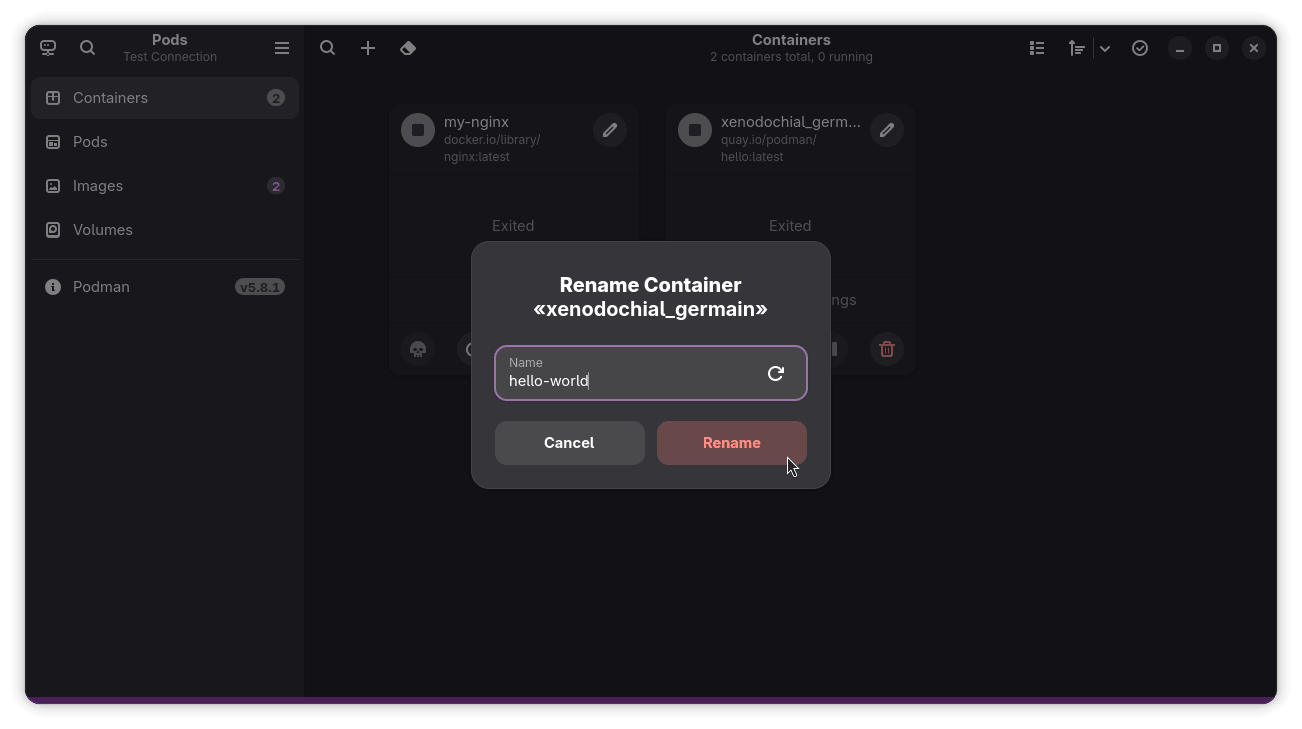
I did notice that freshly pulled containers came with long, jargony names by default. That was easy enough to sort out though, as Pods lets you rename them directly from the interface.
You can click on the pen icon near a container's name to do so!
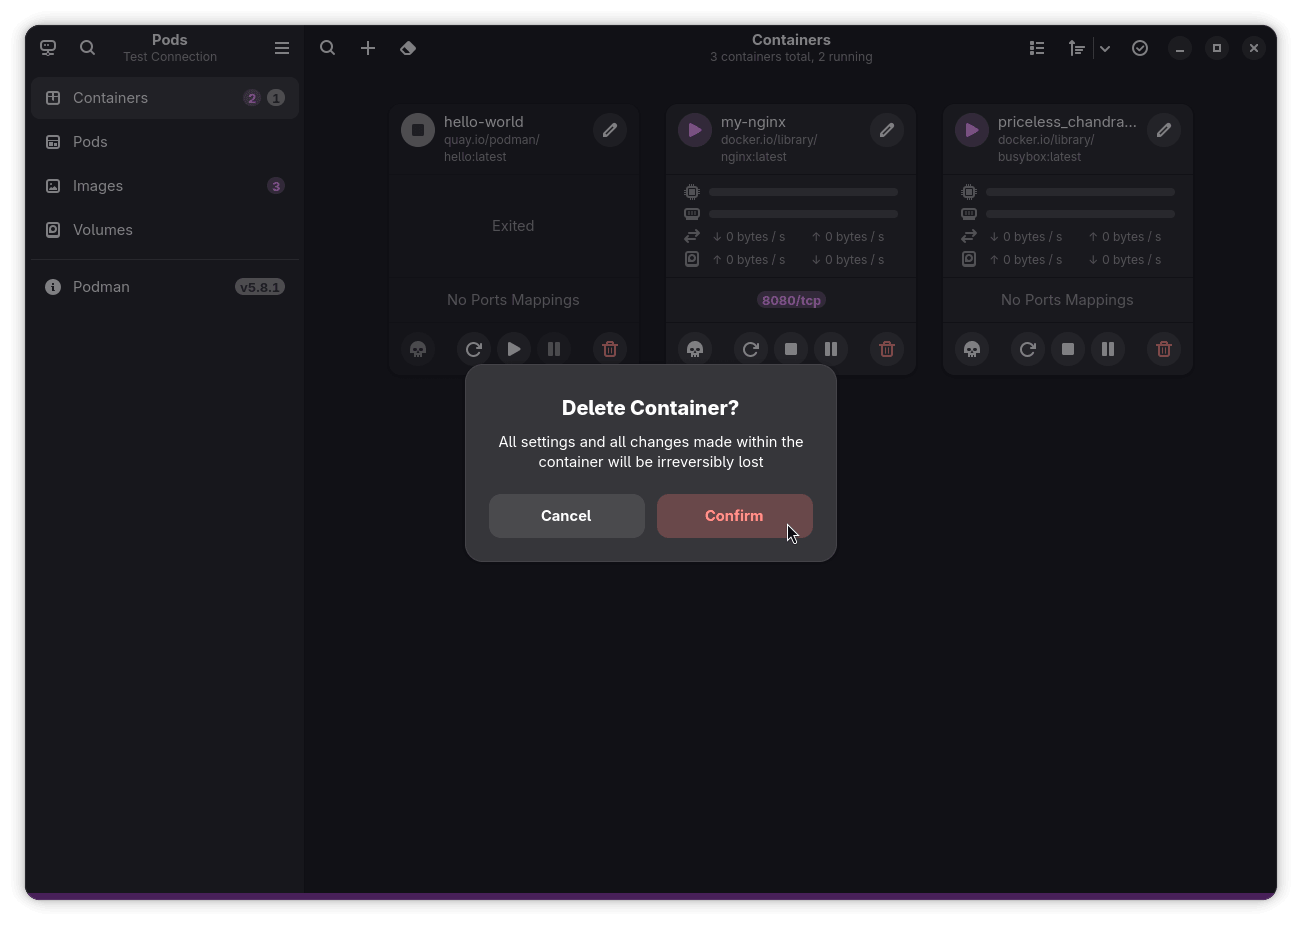
And in cases where I had pulled something by mistake or just didn't need a container around anymore, I could delete it just as quickly using the delete button.
Renaming and deleting containers using Pods.
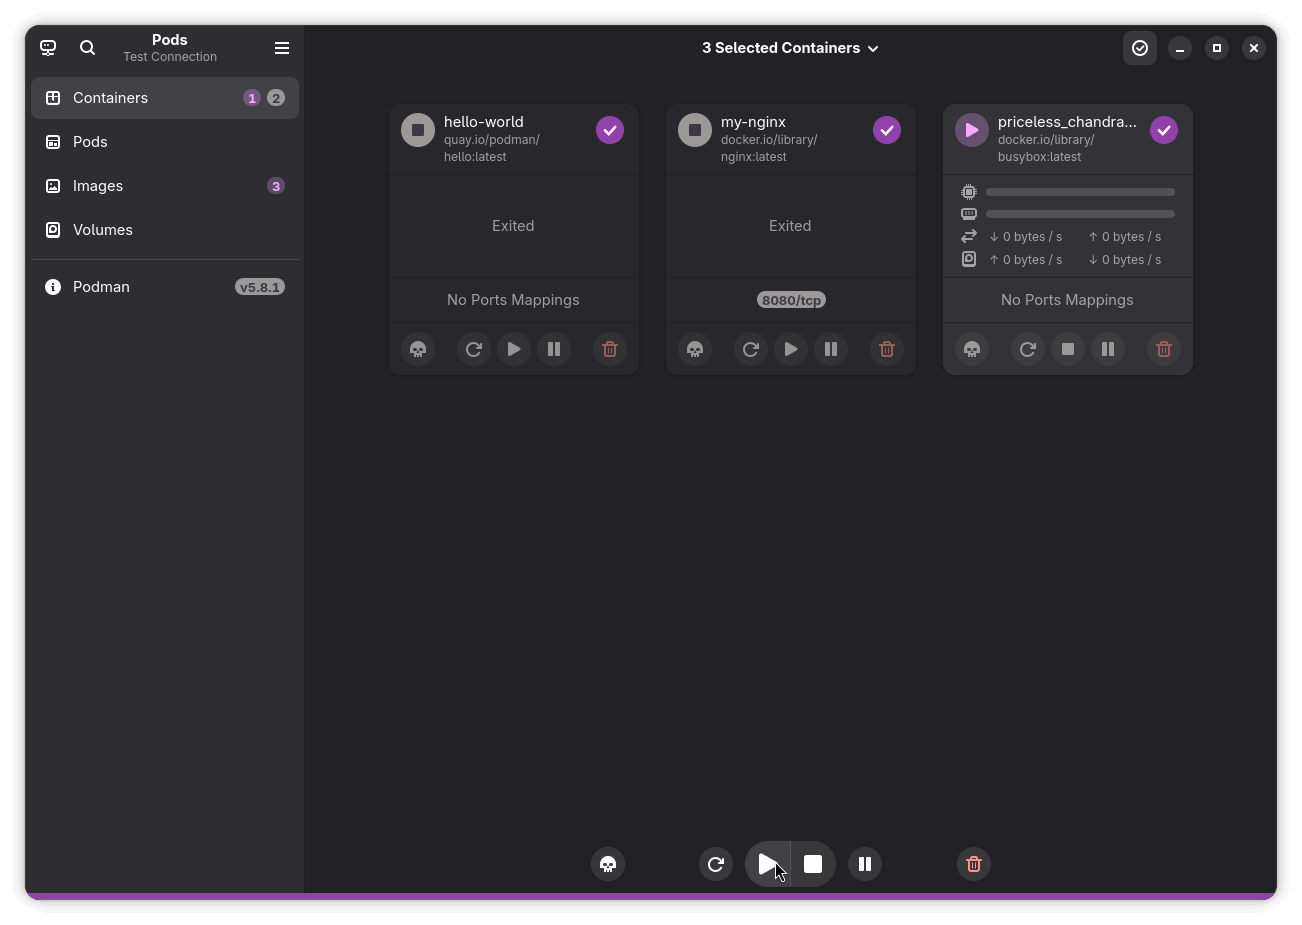
Pods also let me batch manage containers through a "Multi-Selection" mode, which surfaces the same kill, restart, start/stop, pause, and delete options but across multiple containers at once.
This can come in handy when you have several containers you want to act on without going through each one individually.
You will find this mode in the top bar menu; just click on the checkmark button.
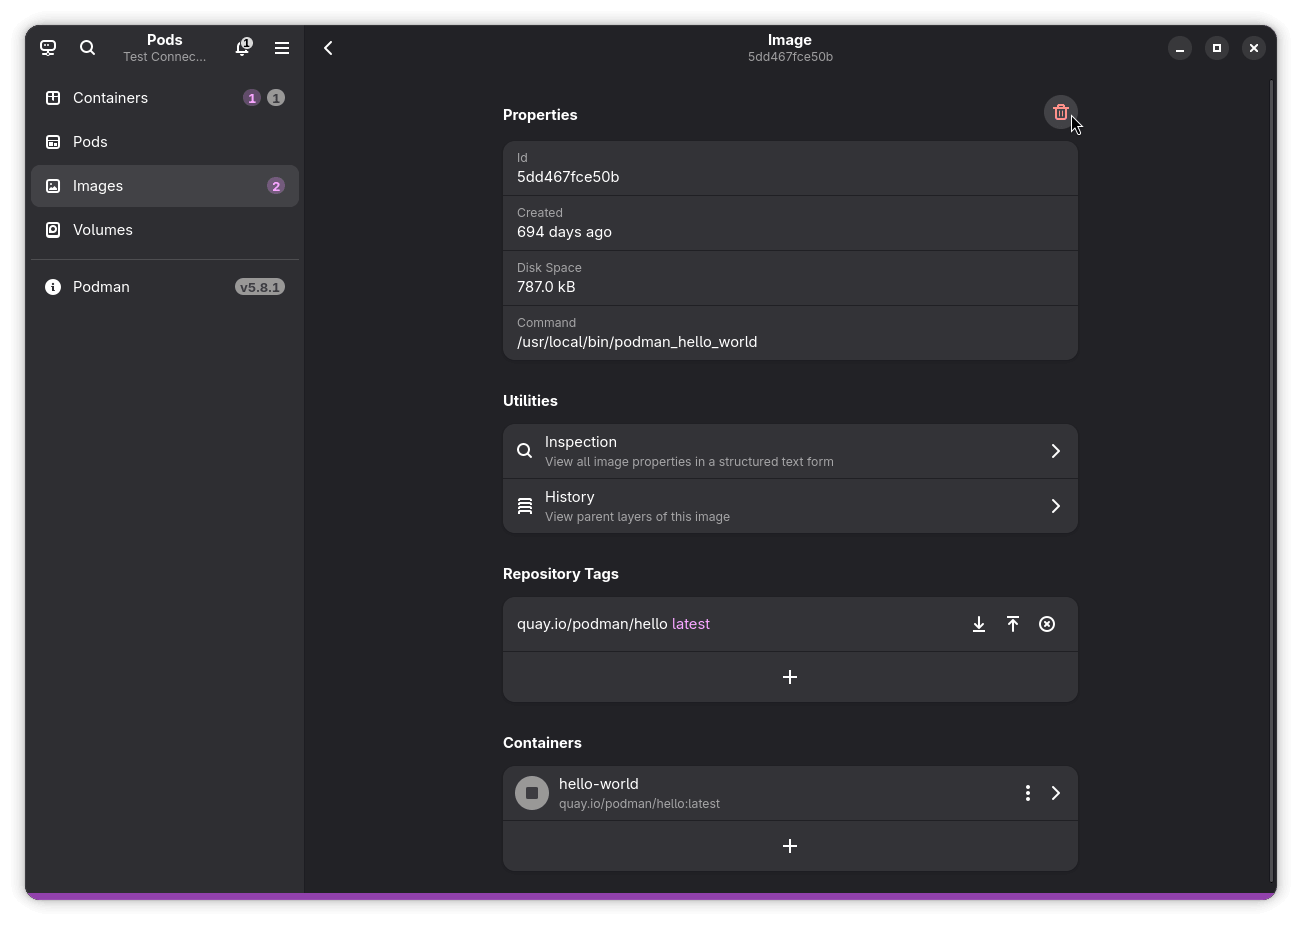
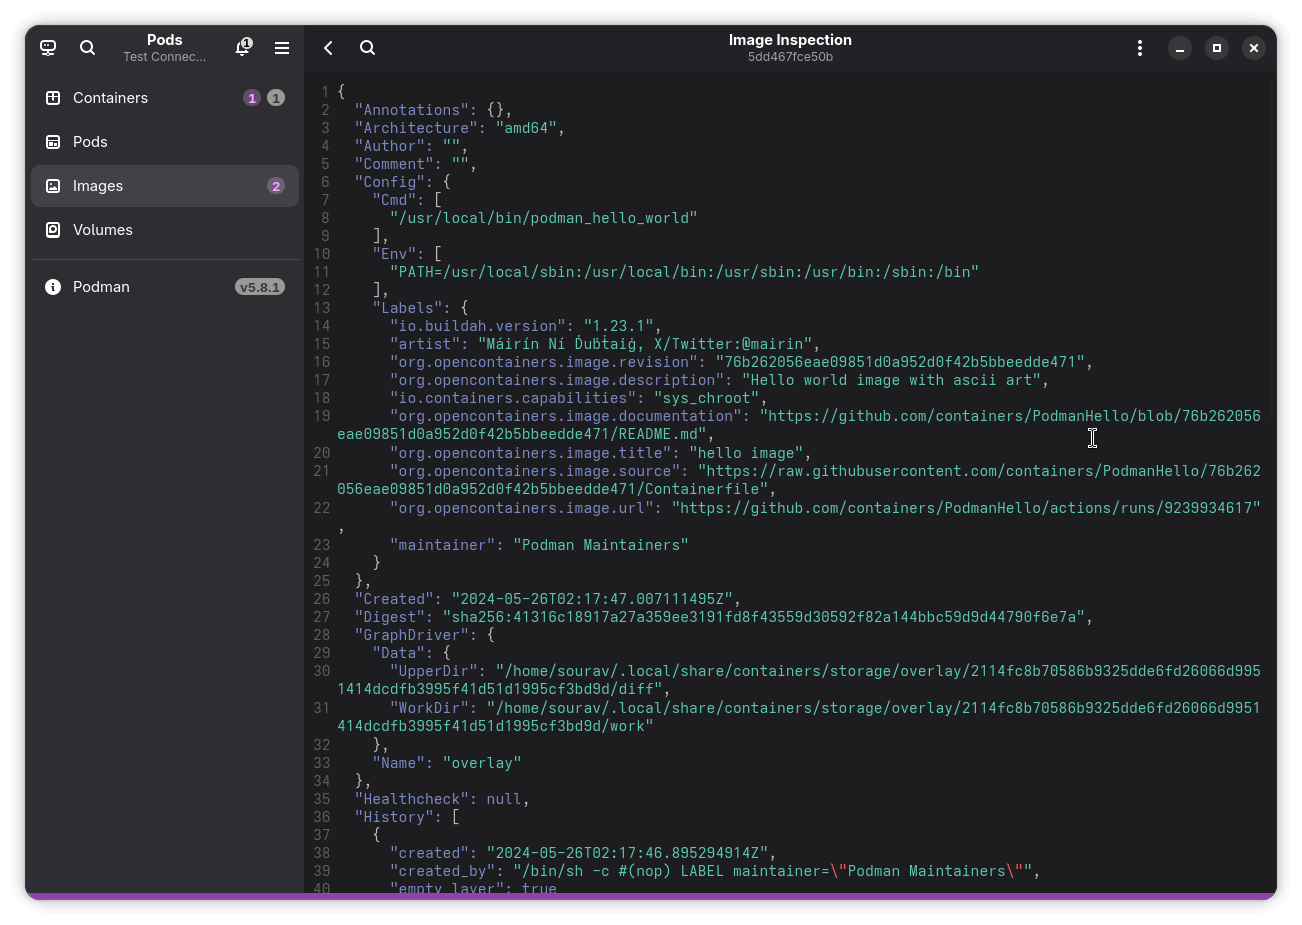
I could even create pods, which are groups of containers that share the same network and resources, but I stuck to focusing on containers for this one. I went into the Images page to see what options were on offer. Here, I could see each image's properties, like its ID, when it was created, how much storage it was using, and what command it had.
I could also inspect the image properties in structured text for a more detailed look under the hood, browse through the history of the image, and check the repository tags it was associated with.
Image management in Pods.
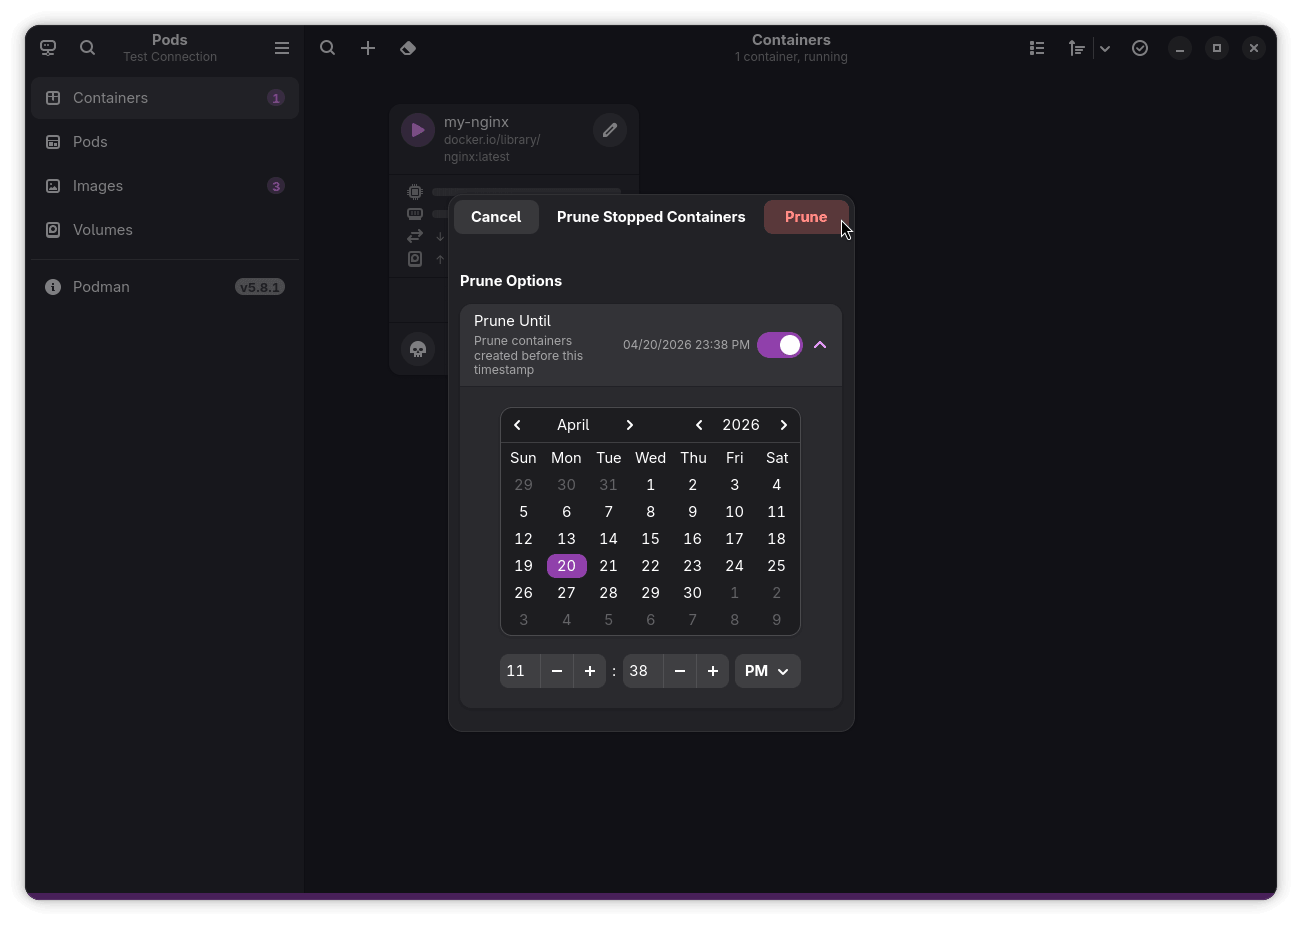
Finally, I checked out the Prune Stopped Containers option, which lets you bulk remove containers that are no longer running. It even shows a calendar view to set a cutoff time, so you can prune only containers that stopped before a specific date rather than wiping everything at once.
You can find it via a dedicated button in the top bar that looks like an eraser.
Get Started
If you think Pods would be a good fit for your workflow, then you can install it from Flathub, or, alternatively, by running the following command:
flatpak install flathub com.github.marhkb.Pods
If you prefer building from source, then you can visit the project's GitHub repository.
If you want to backup your data on Linux, there's no shortage of reliable options that offer some pretty good functionality. We have Déjà Dup that handles the basics well if you just want a simple GNOME app that protects your files without much fuss.
Timeshift takes a different angle; it snapshots your system so you can roll back after a bad update, though it's not really designed for personal data backups.
For users who want more control, Borg and Restic have been the standards for years. Both are encrypted, deduplicated, and trusted by a vast community of Linux users.
BorgBase, on the other hand, is a managed repository hosting service for Borg and Restic backups that has been around for almost a decade. Vykar is their newest project—an open source encrypted backup tool that's worth a look if you're in the market for something new.
🚧
This tool is not recommended for production use by the developers; proceed with care.
Vykar: Overview ⭐
Vykar is an open source, encrypted, deduplicated backup tool written in Rust, developed by the BorgBase team, and released under the GPL-3.0 license. It draws inspiration from the likes of BorgBackup and Borgmatic but uses its own repository format, making it incompatible with existing Borg or Restic repositories.
The whole thing is configured through a single YAML file where you define your repositories, source directories, encryption settings, and retention policy.
Key features include:
Scheduling via vykar daemon.
Deduplication is doable via FastCDC.
Compression support with LZ4 or Zstandard.
Desktop GUI (vykar-gui) with system tray support.
WebDAV server for browsing and restoring snapshots.
Encryption with AES-256-GCM or ChaCha20-Poly1305 (auto-selected), and Argon2id key derivation.
Concurrent multi-client backups, where multiple machines can write to the same backup repository at the same time.
The desktop GUI deserves a particular mention. Borg relies on third-party tools like Vorta for a desktop interface, and Restic has Backrest, which is also a community project. Vykar ships its own GUI as a first-party component.
It reads directly from vykar.yaml, runs backups on demand, and can sit in the system tray running scheduled backups in the background.
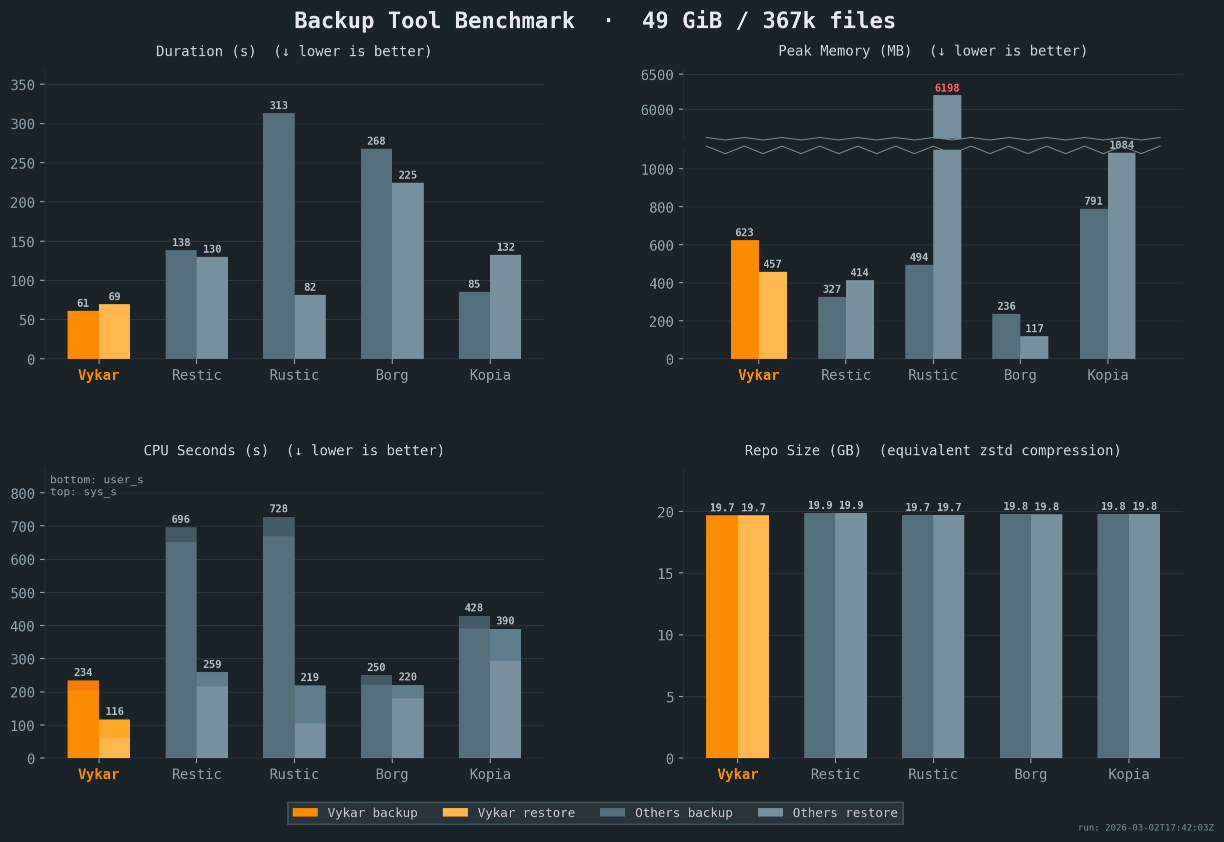
As for the performance, the project's website has put up a comparison of Vykar against Borg, Restic, Rustic, and Kopia, tested against a 49 GiB dataset of 367,000 files.
📋
These are benchmarks run and published by the Vykar team, not an independent party.
On backup duration, Vykar finished in 61 seconds, Rustic took 313, Borg 268, Restic 138, and Kopia 85. Restore times follow a similar pattern where Vykar does it in 69 seconds, versus 82 for Rustic, 225 for Borg, 130 for Restic, and 132 for Kopia.
CPU efficiency shows the clearest gap. Vykar used 234 CPU seconds for backup, compared to Borg's 250, Restic's 696, Rustic's 728, and Kopia's 428.
Memory usage is where the picture gets more interesting. Borg uses just 236 MB during backup versus Vykar's 623 MB. Restic is also lighter at 327 MB. So Vykar is trading some RAM for its speed advantage. This is something to factor in on memory-constrained systems.
Repository sizes across all five tools land between 19.7 and 19.9 GB under equivalent Zstd compression settings, so deduplication efficiency is roughly comparable across the board.
Get Vykar 📥
Before you install, know that Vykar supports four storage backends: the local filesystem, S3-compatible object storage (any provider works), SFTP, and a dedicated REST server.
The installation itself is a one-liner:
curl -fsSL https://vykar.borgbase.com/install.sh | sh
Pre-built binaries for Linux (x86_64 and aarch64, both glibc and musl), macOS (Apple Silicon), and Windows are also available on the GitHub releases page.
From there, you can refer to the quickstart guide for going through the creation of a config file and initializing the backup process.
The demand for data centers worldwide has shot up in recent years, with the blind rush for AI being a big reason behind it. I, personally, don't think we need AI shoved into every corner of our lives, but certain regimes and organizations seem to think otherwise, and they keep pushing hard for it.
So, if hearing all that makes you want to just roll up your sleeves and build one yourself, then this indie game might scratch that itch.
📋
This game is not natively available for Linux. But it does interest me as a Linux user.
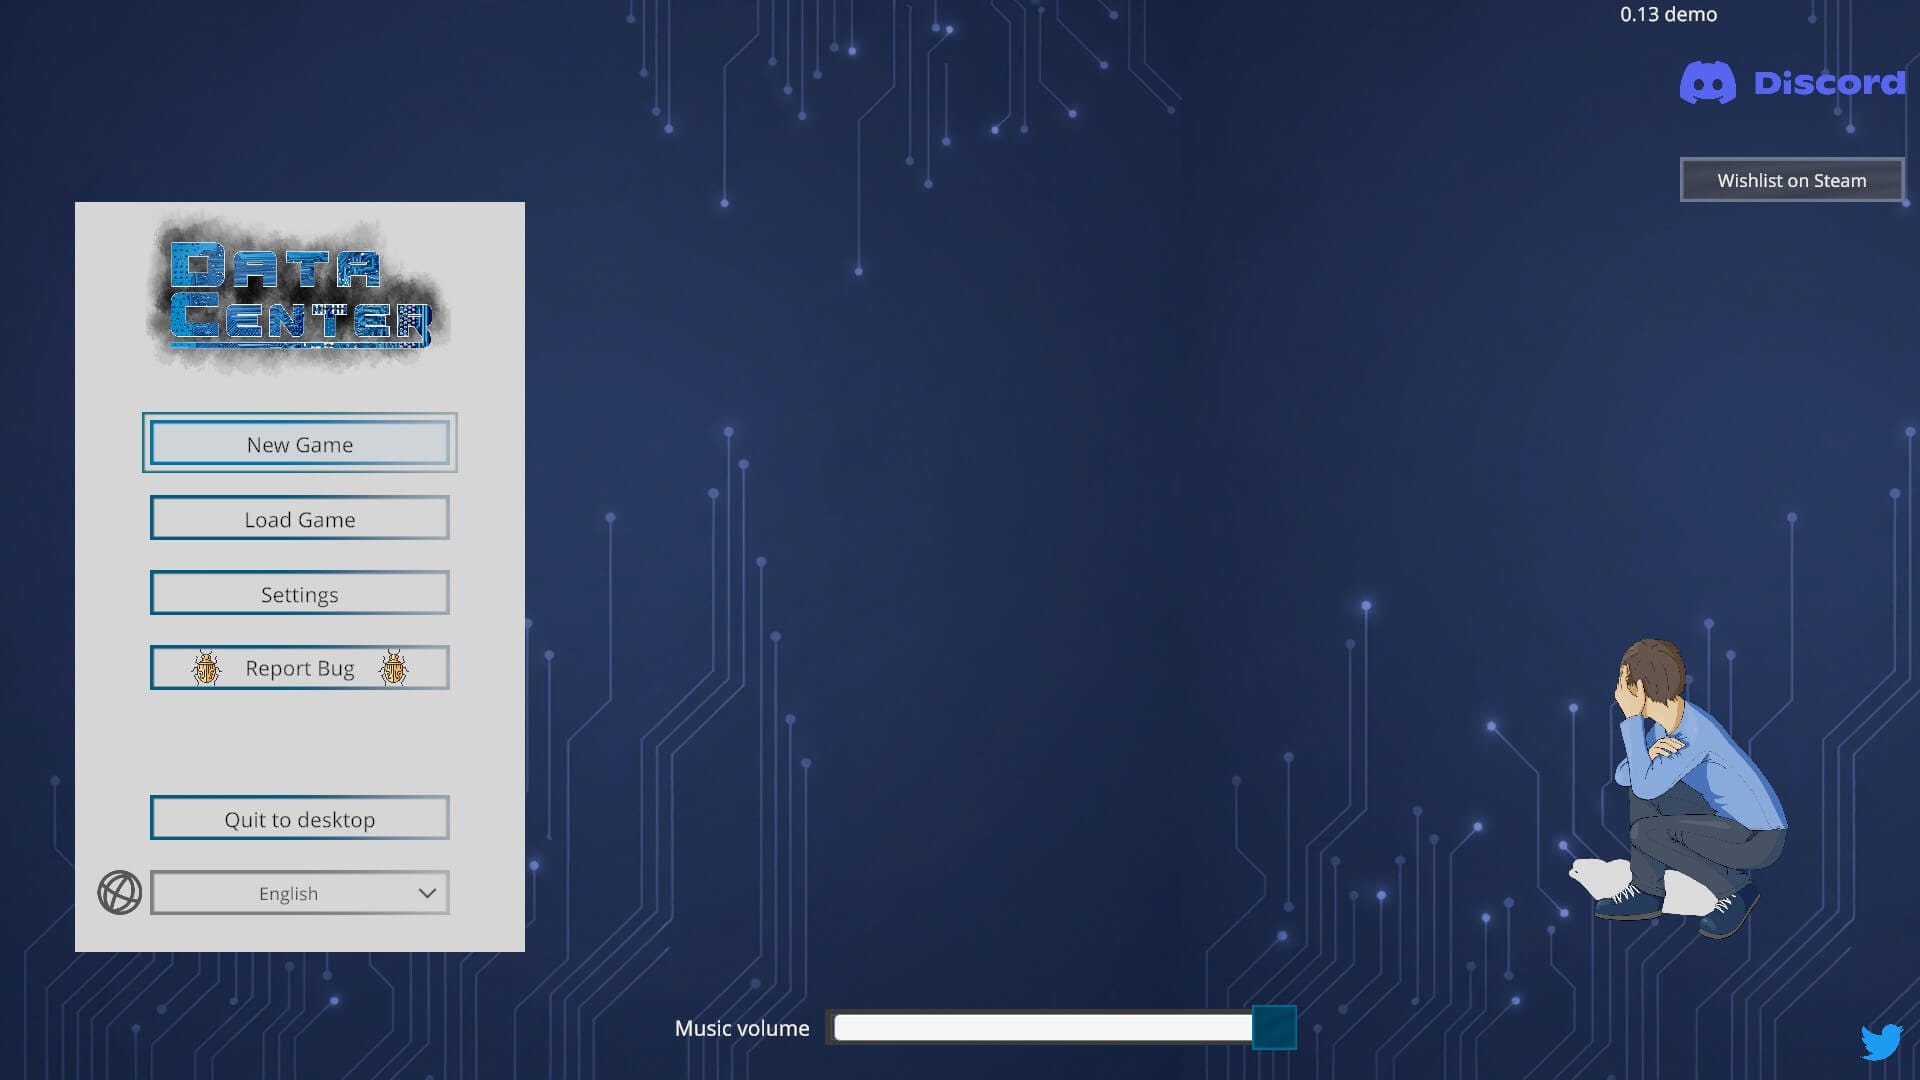
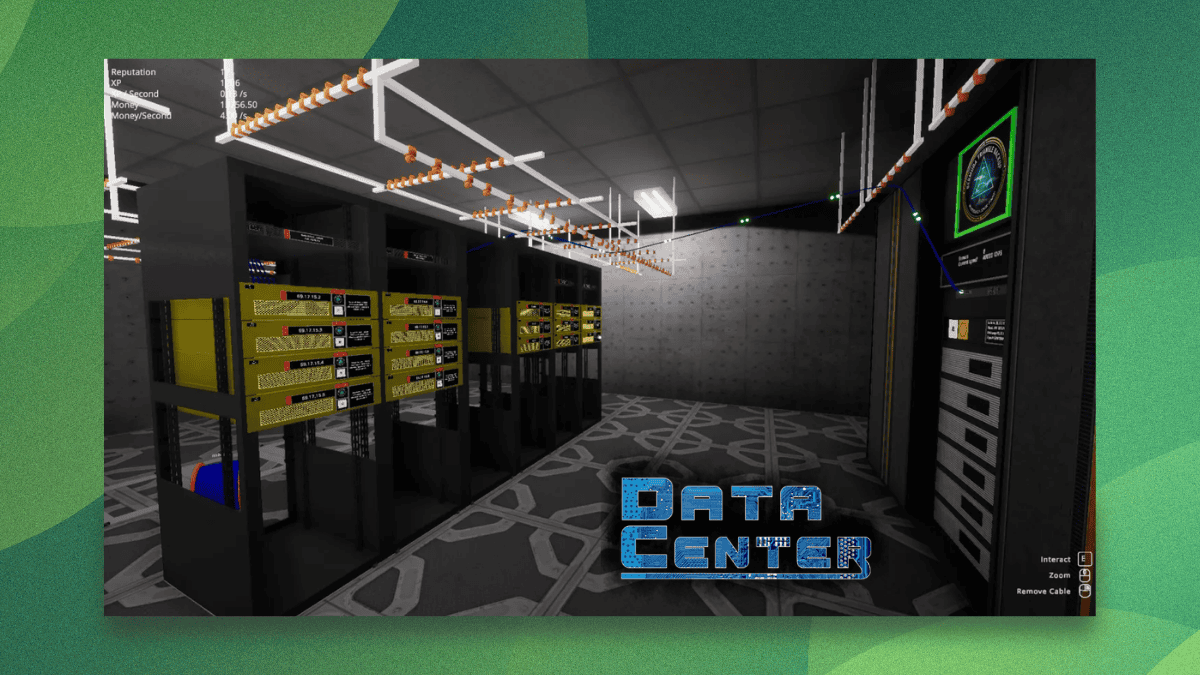
Data Center: A Work in Progress
Data Center is an upcoming simulation game from solo developer Václav Novák, who goes by Waseku on Steam. He is based in Brno, Czech Republic, and has been building games since 2020 using the Unity engine.
The main idea here is that you build and manage a data center from scratch. That involves buying racks, servers, and switches; physically placing and stacking your hardware; and then running cables between ports to tie it all together.
It lets the player monitor network traffic via colored, sphere-shaped balls that move around in the cables, and any idle network cable connections are easy to spot. You earn money by serving customers according to their requirements and capacity expectations.
When you process data successfully, you get money, gain experience to unlock better hardware, and build your reputation to draw in larger clients.
Worth Playing?
Possibly. I played the free demo on a Nobara Linux system, and the overall experience was okayish.
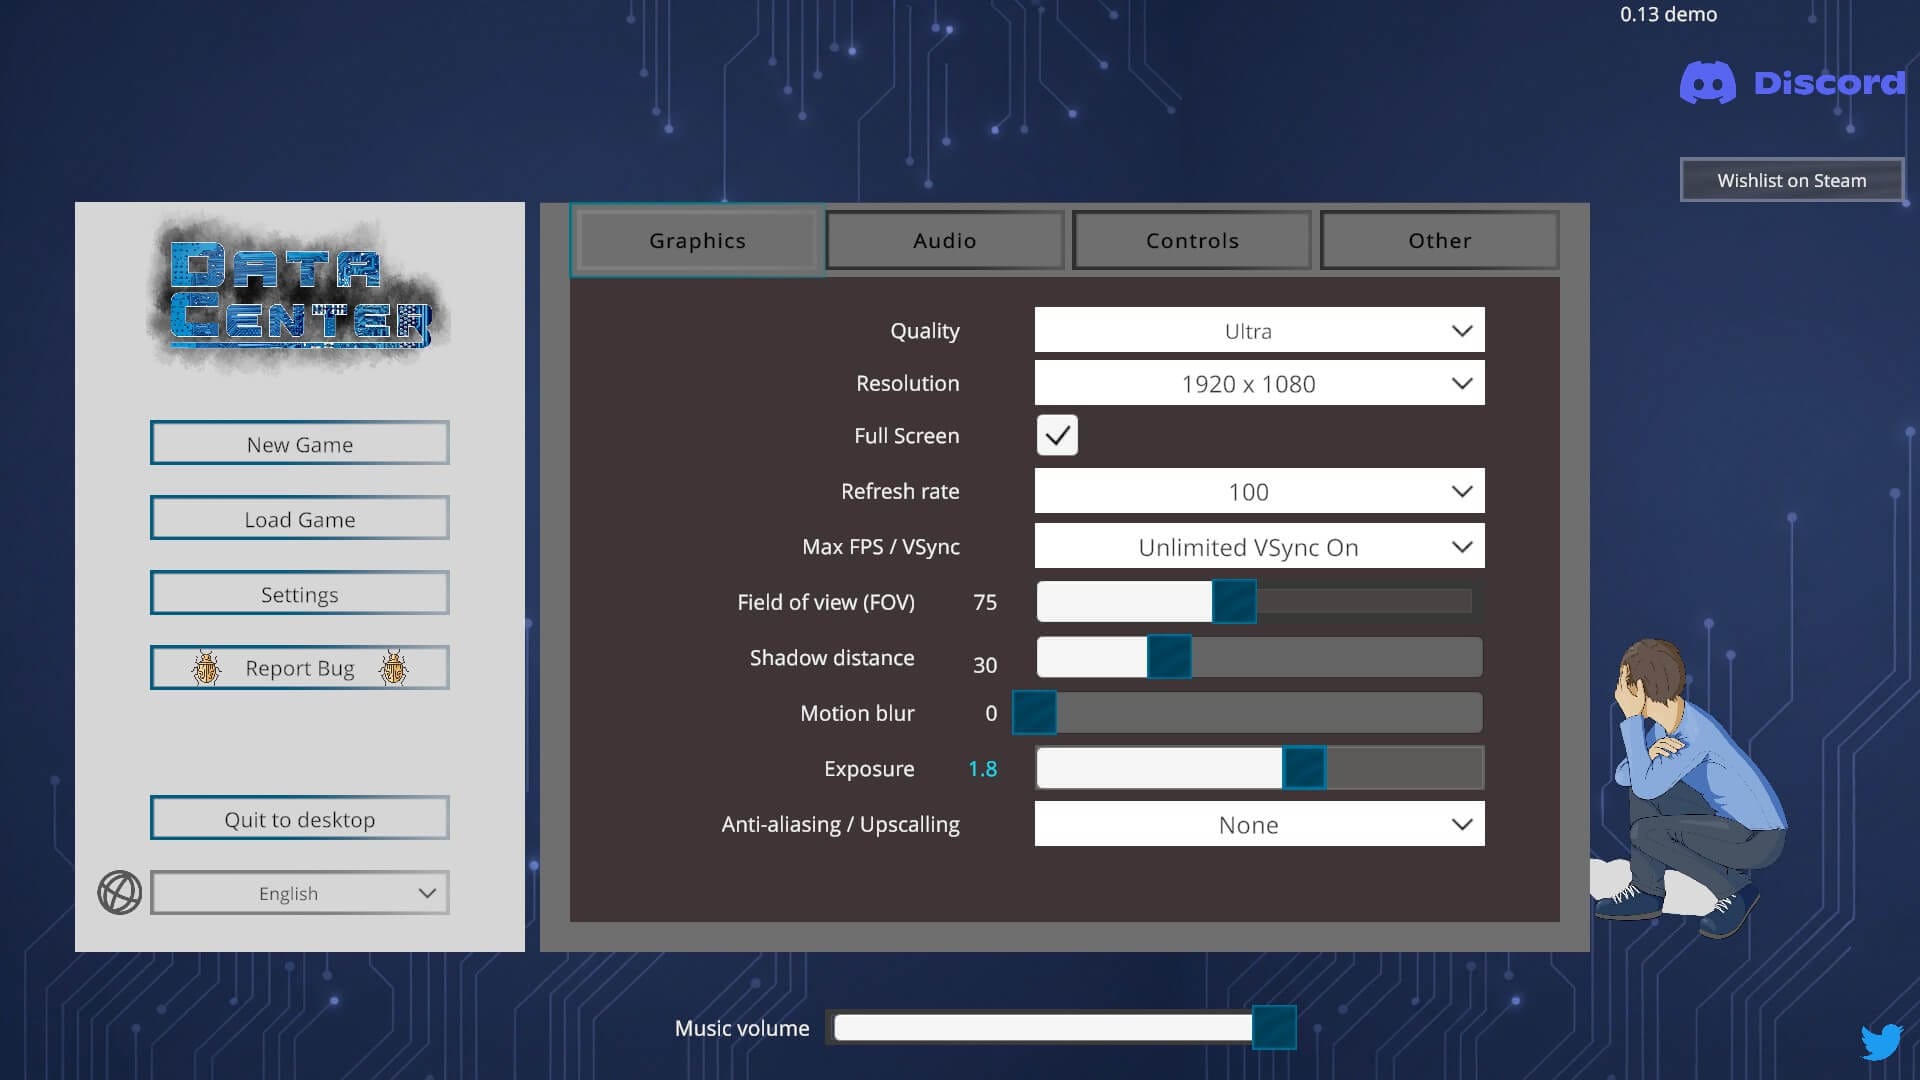
First, I configured the graphical settings, disabling NVIDIA DLSS and cranking most settings to their highest possible states. When I went into the game, the game was capped at 50 FPS.
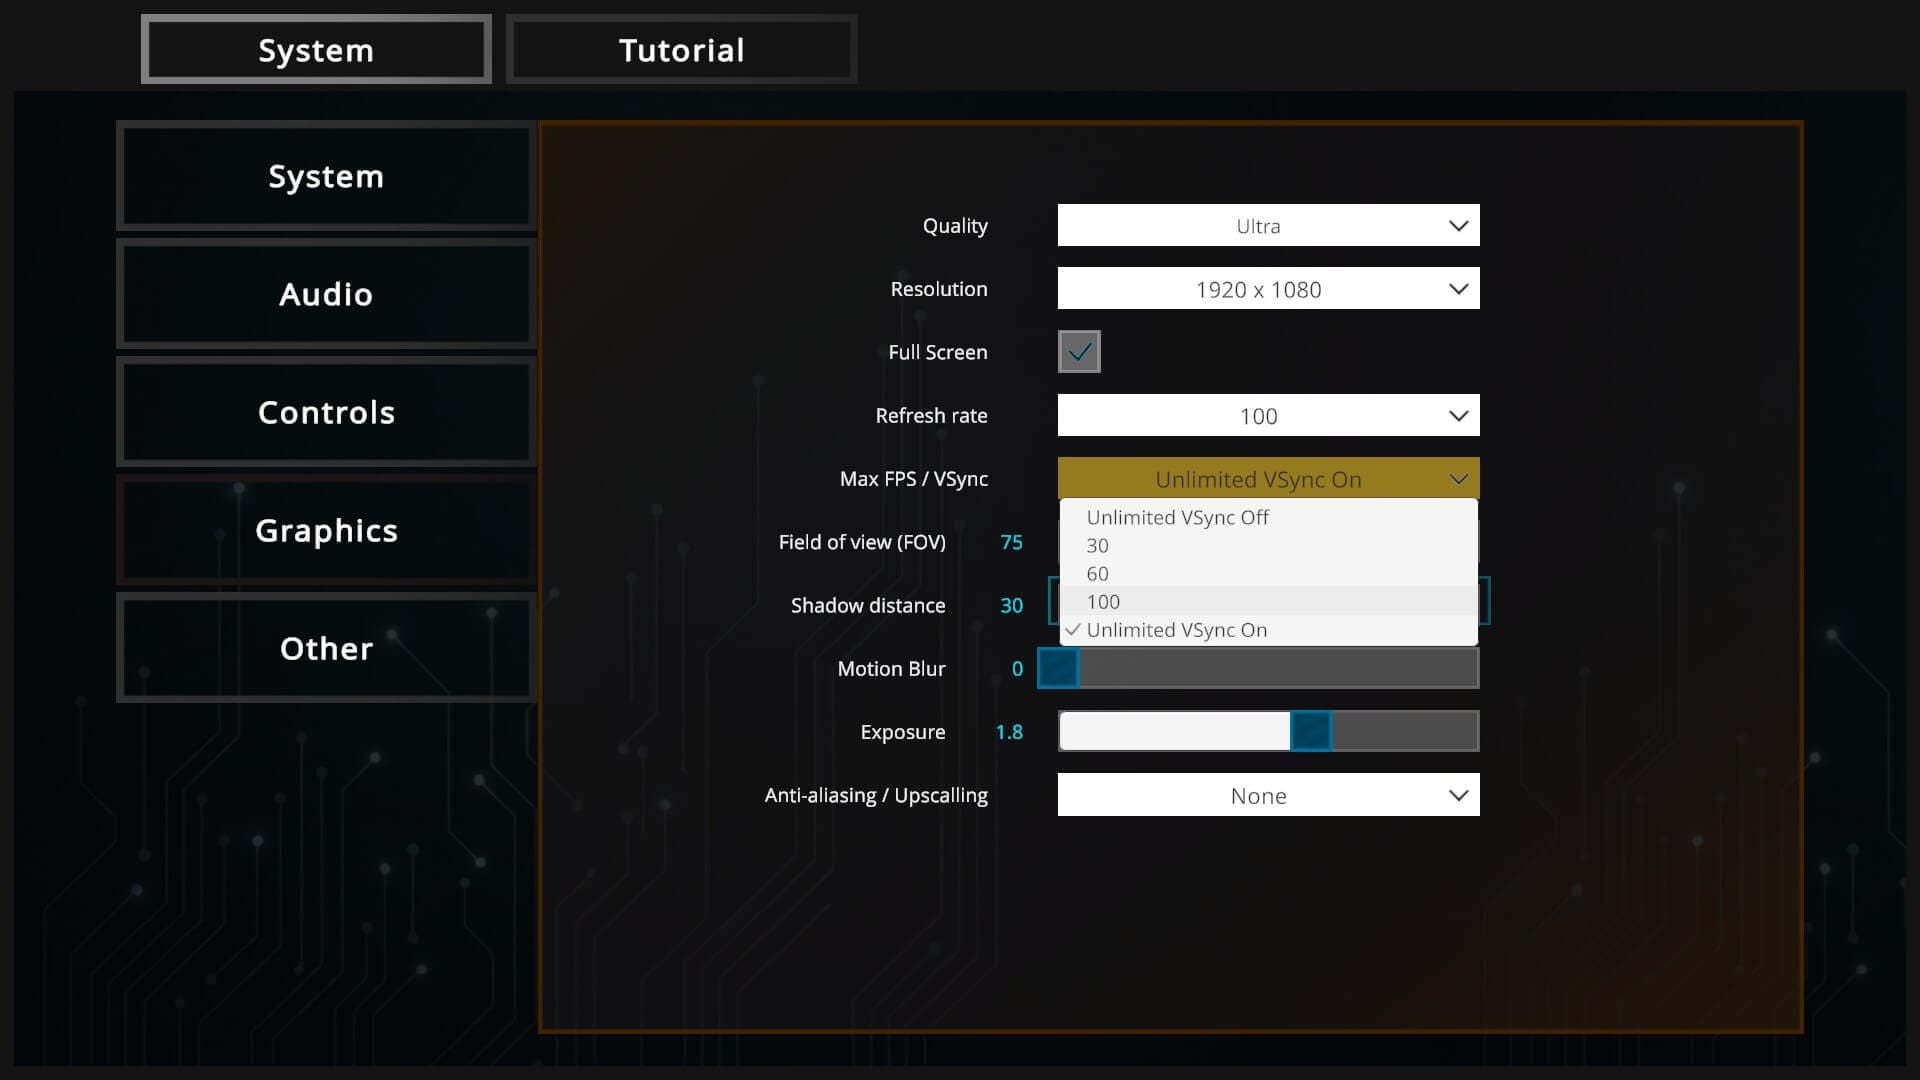
Turns out VSync was the culprit (unsurprisingly), so I disabled it and set a 100 FPS limit.
The graphical settings I used to play the demo.
But the performance woes didn't end there, as throughout gameplay, there were visible drops in the FPS that happened intermittently; the performance graph on the top-right (for FPS) shows it well. 👇
Even forcing the use of Proton Experimental didn’t seem to help, so I rolled with it. Plus, some reviews of the demo on Steam mention this issue, so it was probably that.
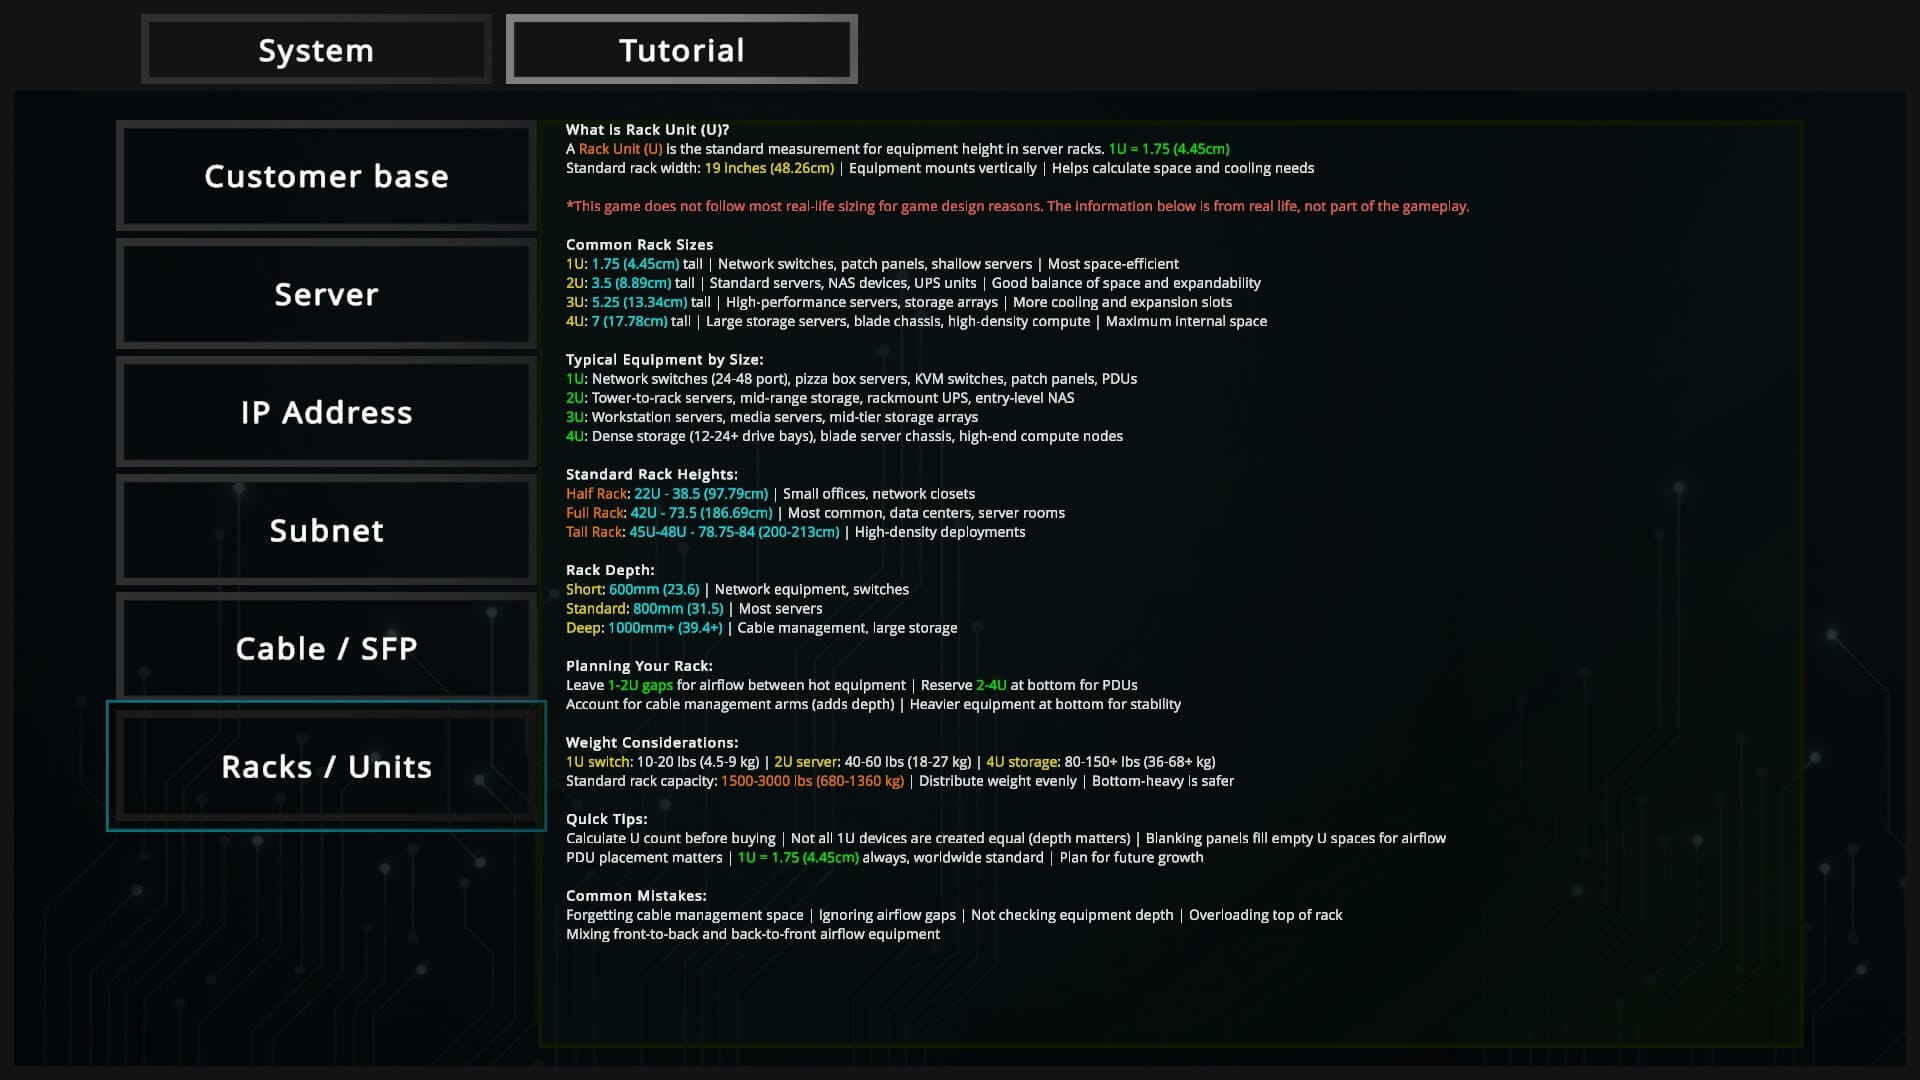
The game doesn’t have a proper new player tutorial just yet; it shows some vague objectives, and I had to find my way through the game. The closest thing to an onboarding guide is the Tutorial menu found by pressing the Esc key.
I could read up on how to handle customers, how to configure a server, what kinds of racks and units were available, and a lot more beyond that.
Initially, I was lost and placed patch panels, switches, and servers randomly, without any sense of how these are usually arranged. After a quick web search and closely following what the minuscule object tracker was saying, I was on the correct path.
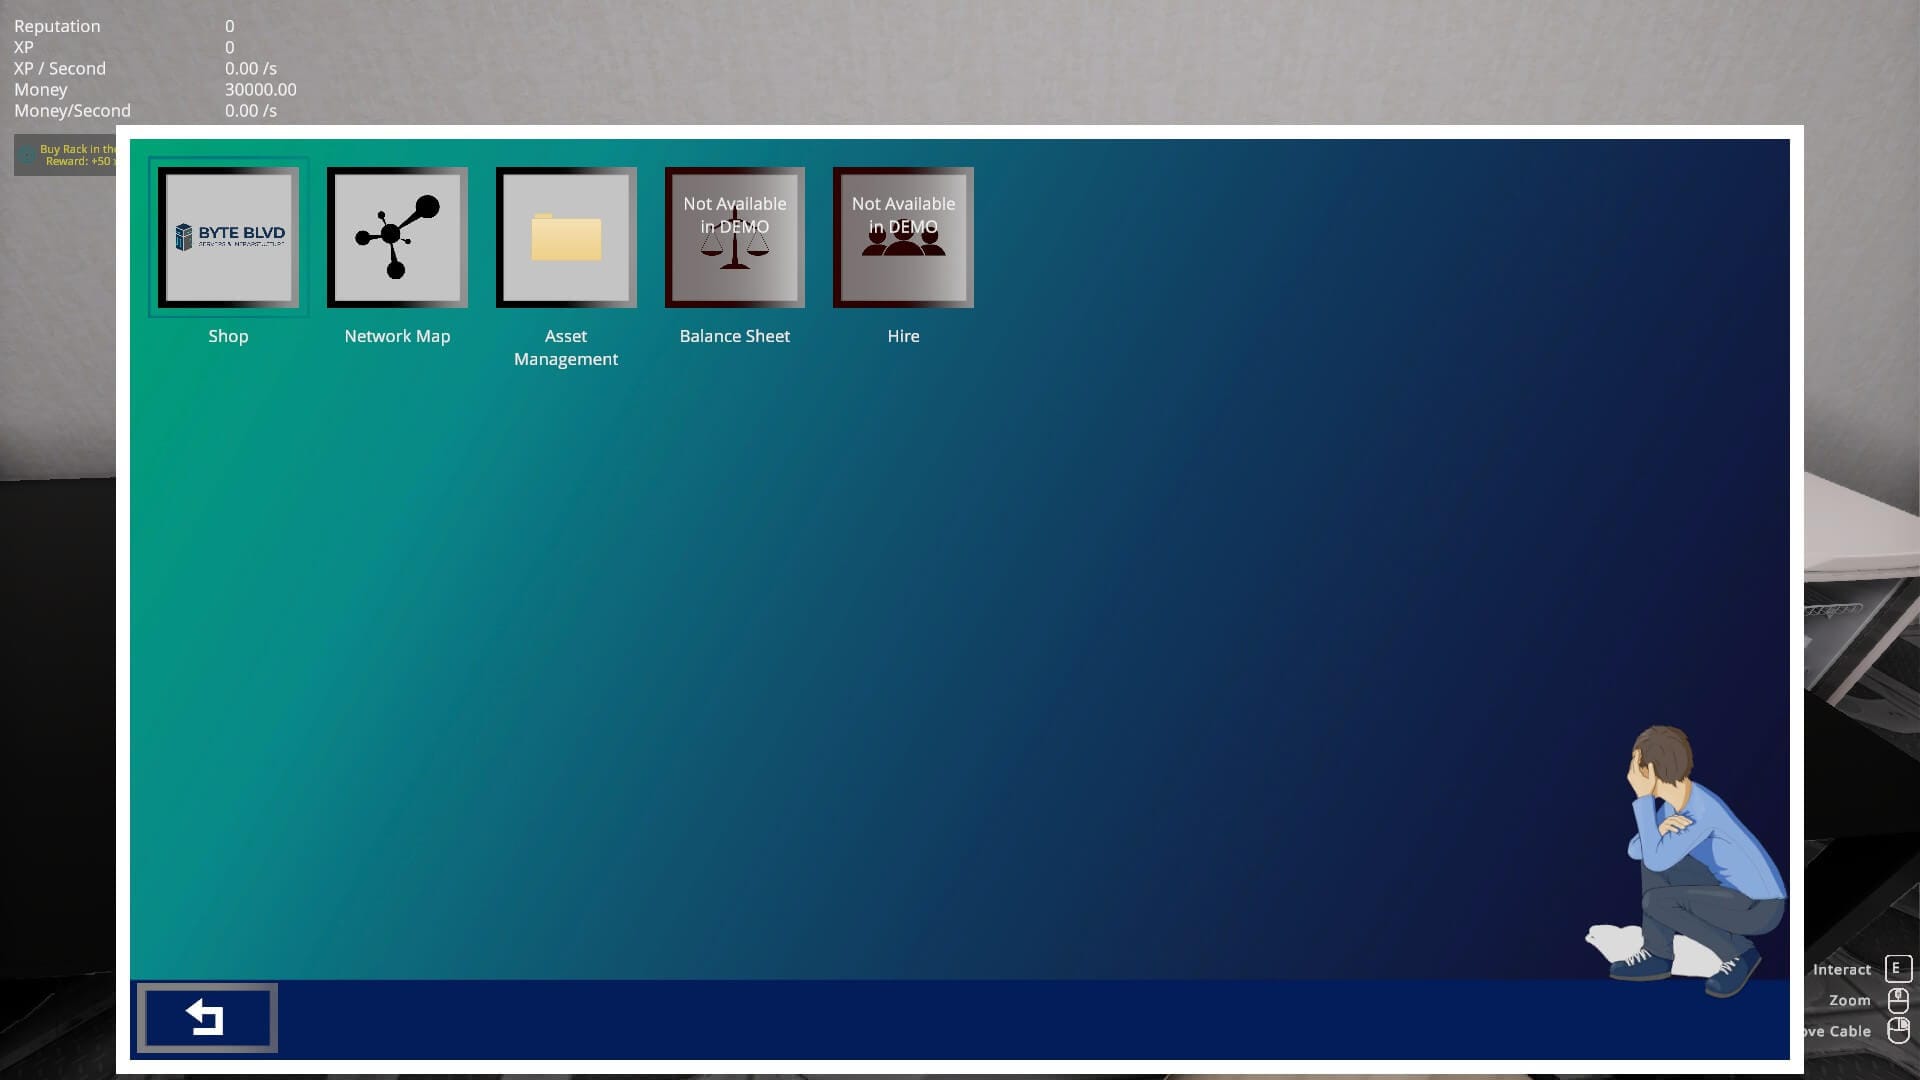
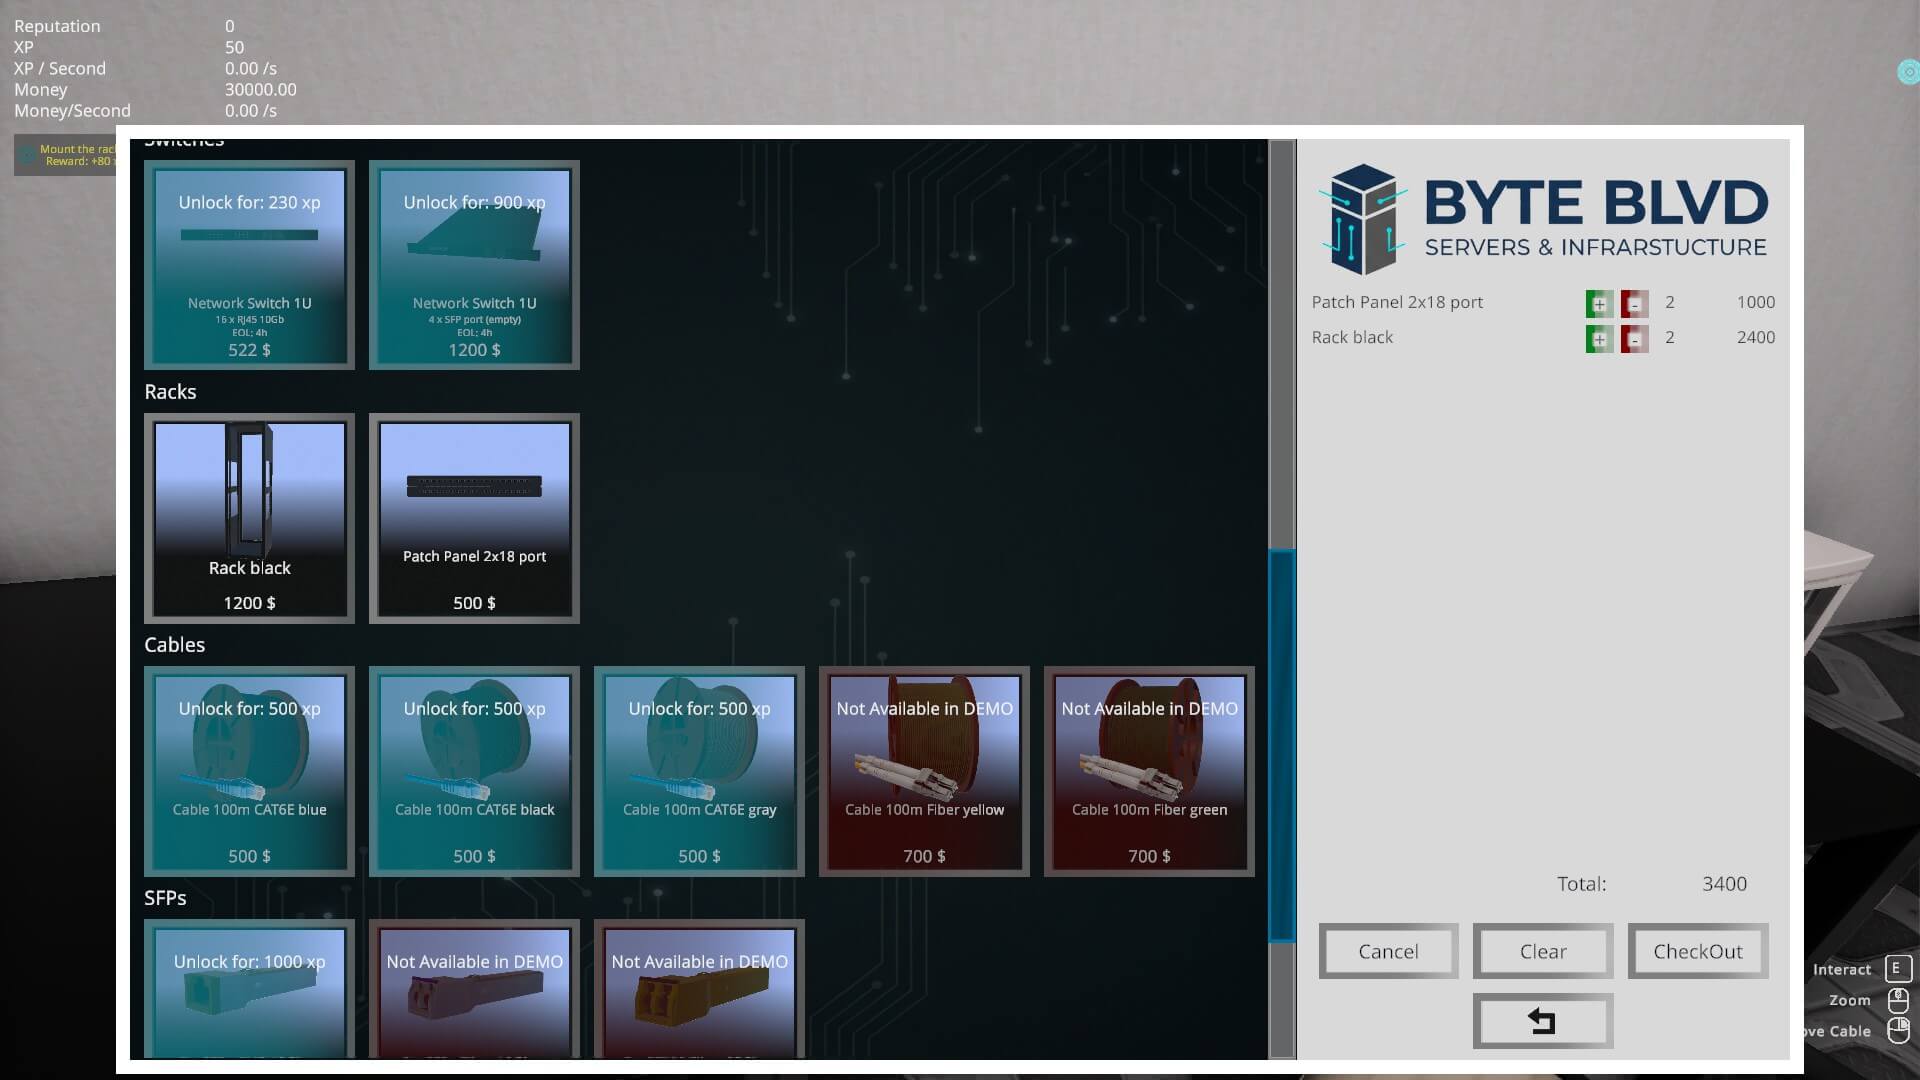
First, I went to the computer at the desk and headed into the shop. Here, I could unlock some starter server hardware for 0 XP and continue building up from there.
The online shop acts as a one-stop portal for all your server hardware needs.
As you can see, I purchased a few patch panels and racks to start populating my data center. The provided utility cart for transferring items from the shipping bay to the server room is, well, jank.
It either keeps any placed items intact or it tosses them off as if it has a mind of its own. Even moving it around is a chore, as it has a habit of clipping below the floor for a quick trip to the underworld.
Placing new racks is another story. You just pick up a rectangular cardboard box and press E to install it over a designated spot on the floor. And to place network switches, patch panels, or servers, a handy yellow-colored outline is shown in the available space on a rack.
Wiring all of that up is effortless too. After purchasing 100 meters (🦅 328 ft) of CAT6E cable, I was able to connect the server hardware, with some slip-ups that I fixed later during my play.
Configuring a server for a fictional customer in Data Center.
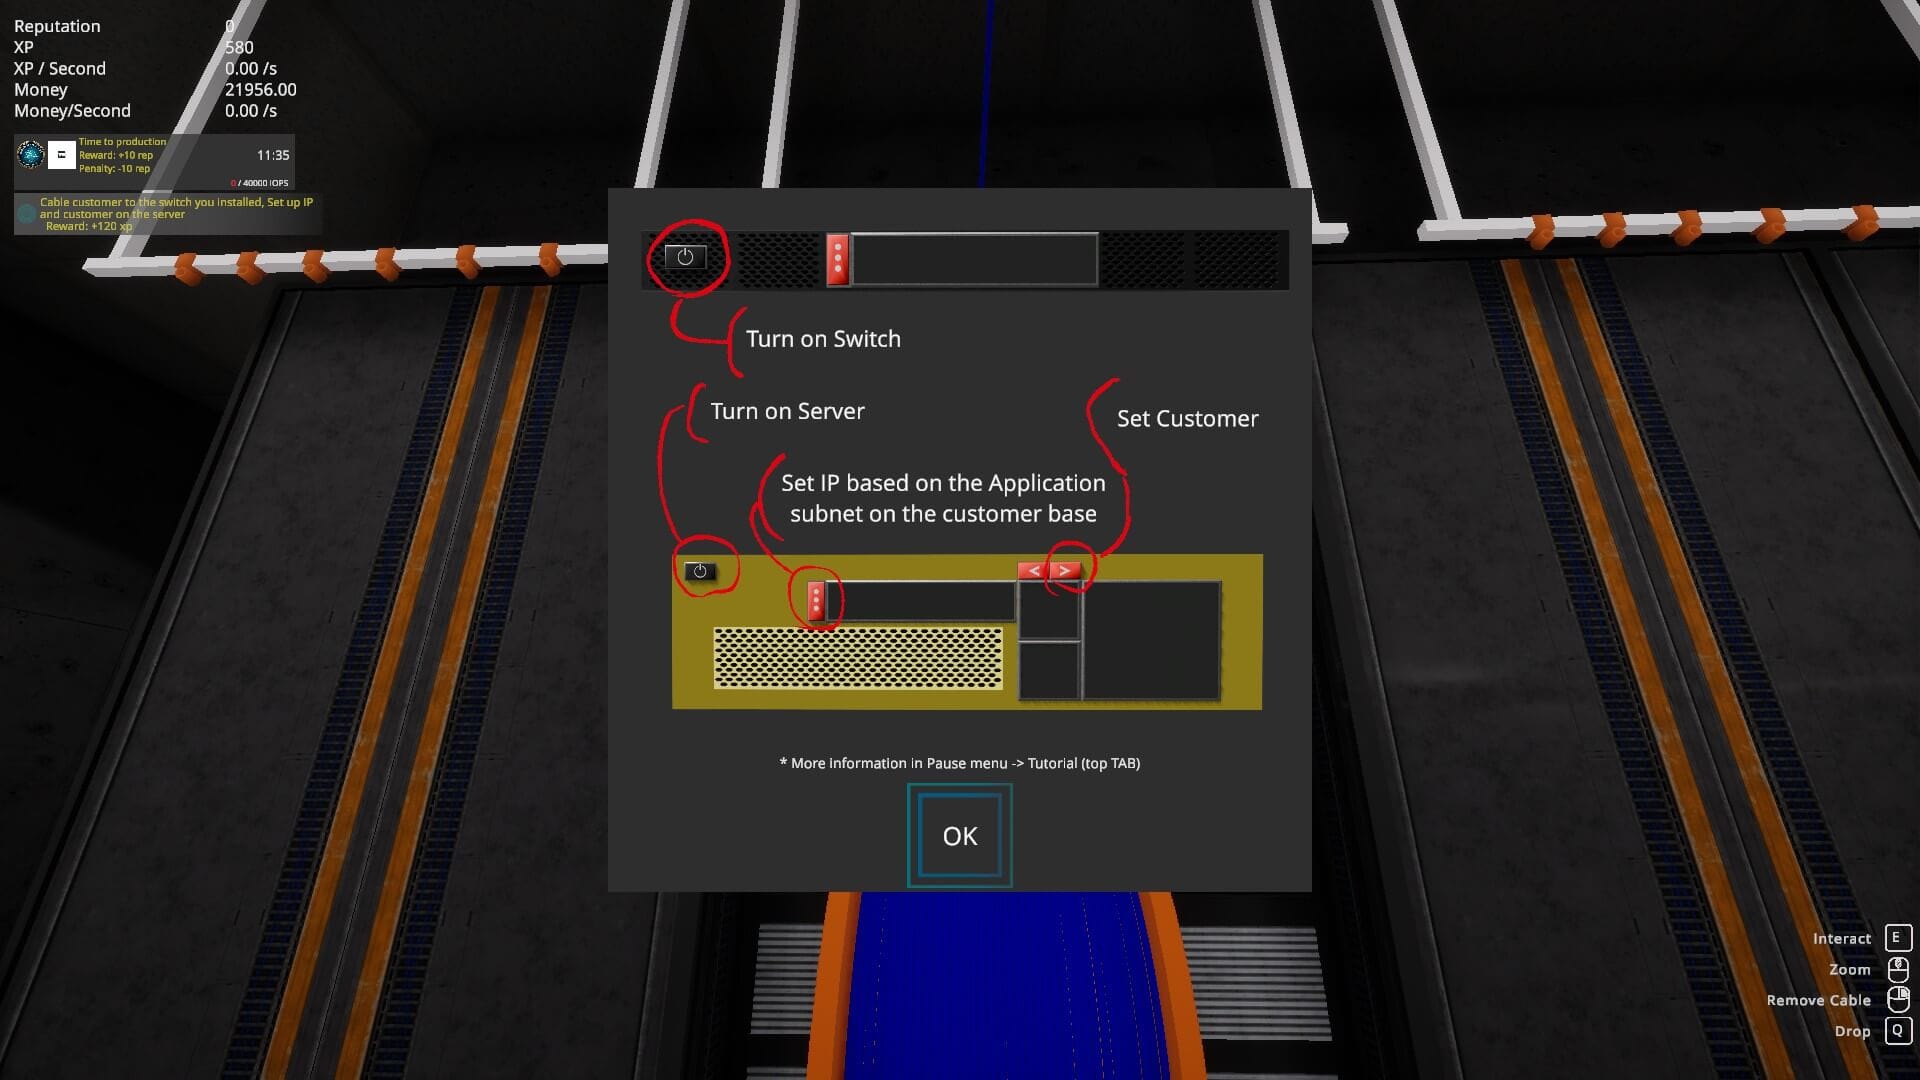
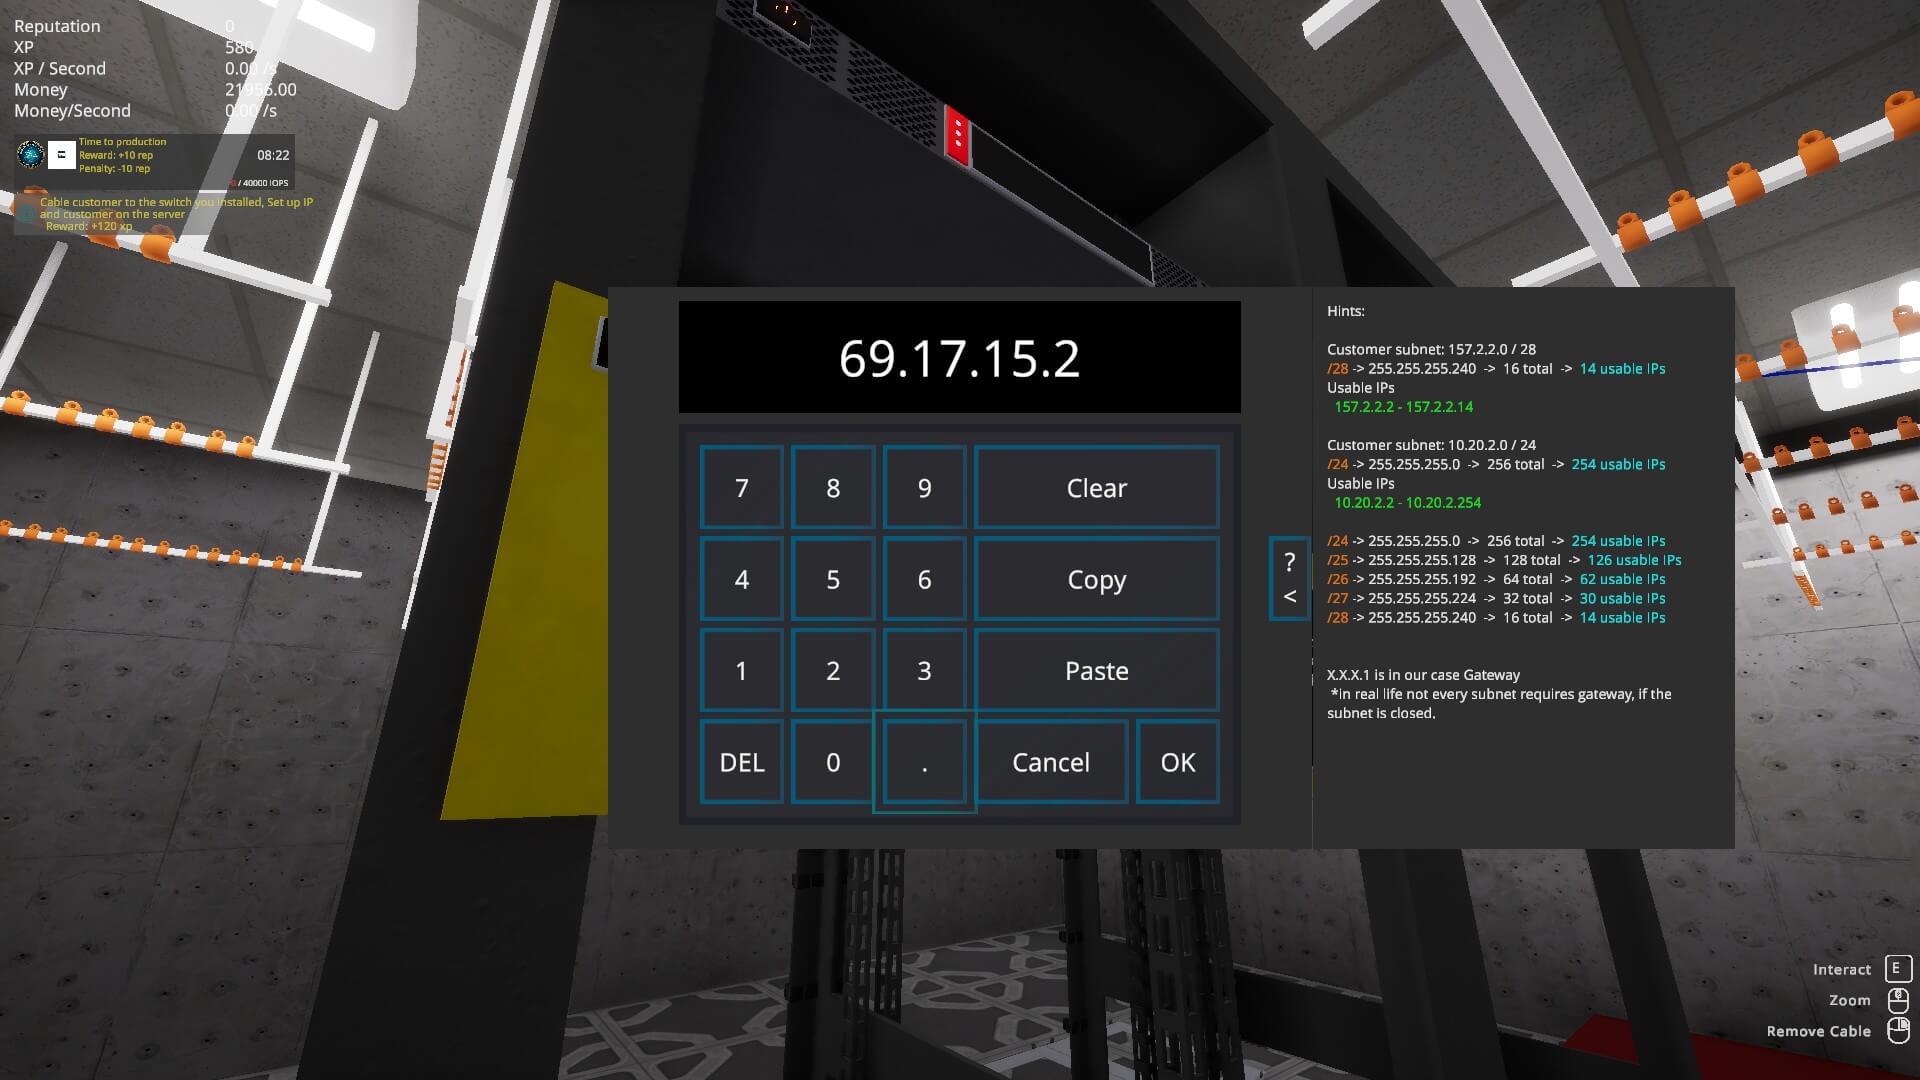
Onboarding new customers is as simple as connecting a wire from the network switch to the outbound connection panel thingy; I am unsure what that's called. Here, you select a customer, review what they want, and then a small guide pops up on how to get them hooked up.
I then turned on the power for the servers and set the IP addresses from the individual control panel to get the connection up. I had to add a few more servers and turn on the network switches before I could serve the customer, "Bermuda Triangle Backup" at 40000 IOPS speed.
📋
Hmm, I wonder if they lose all of their customers' data citing mysterious phenomena.
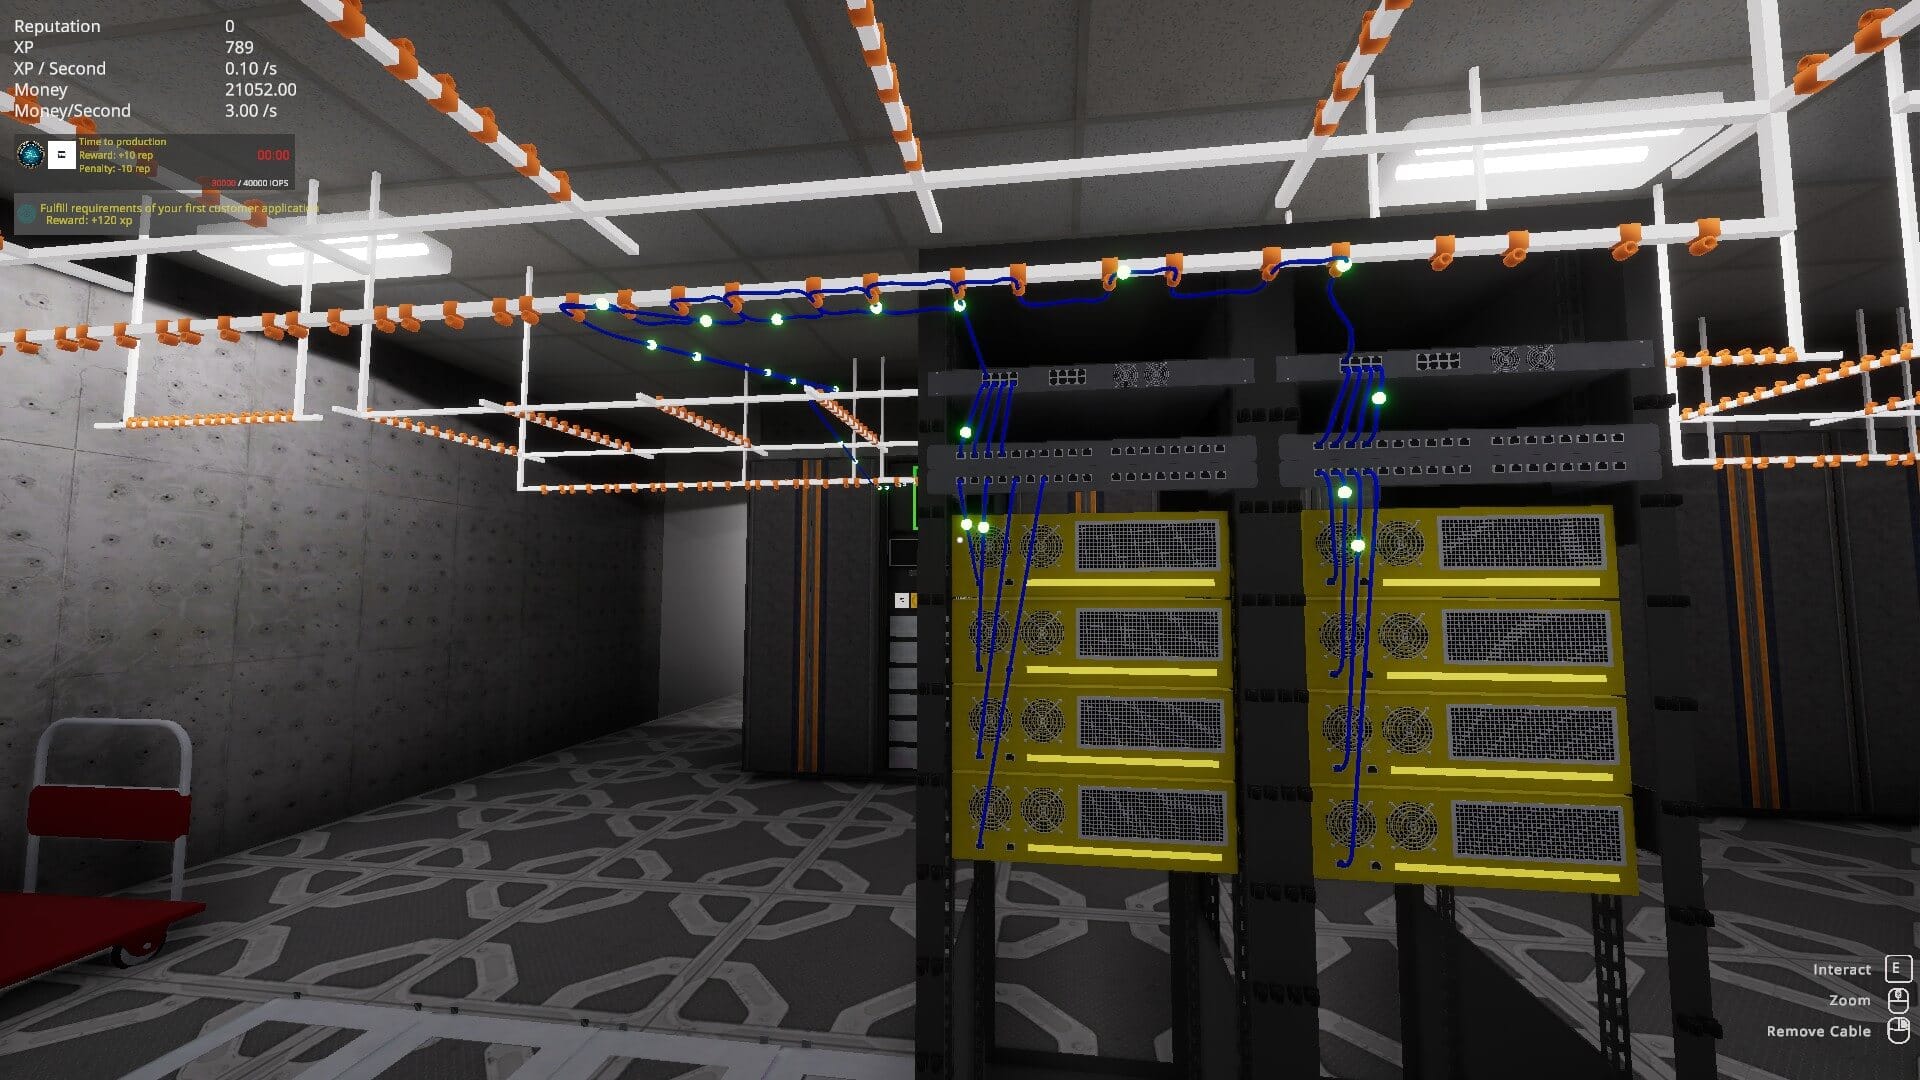
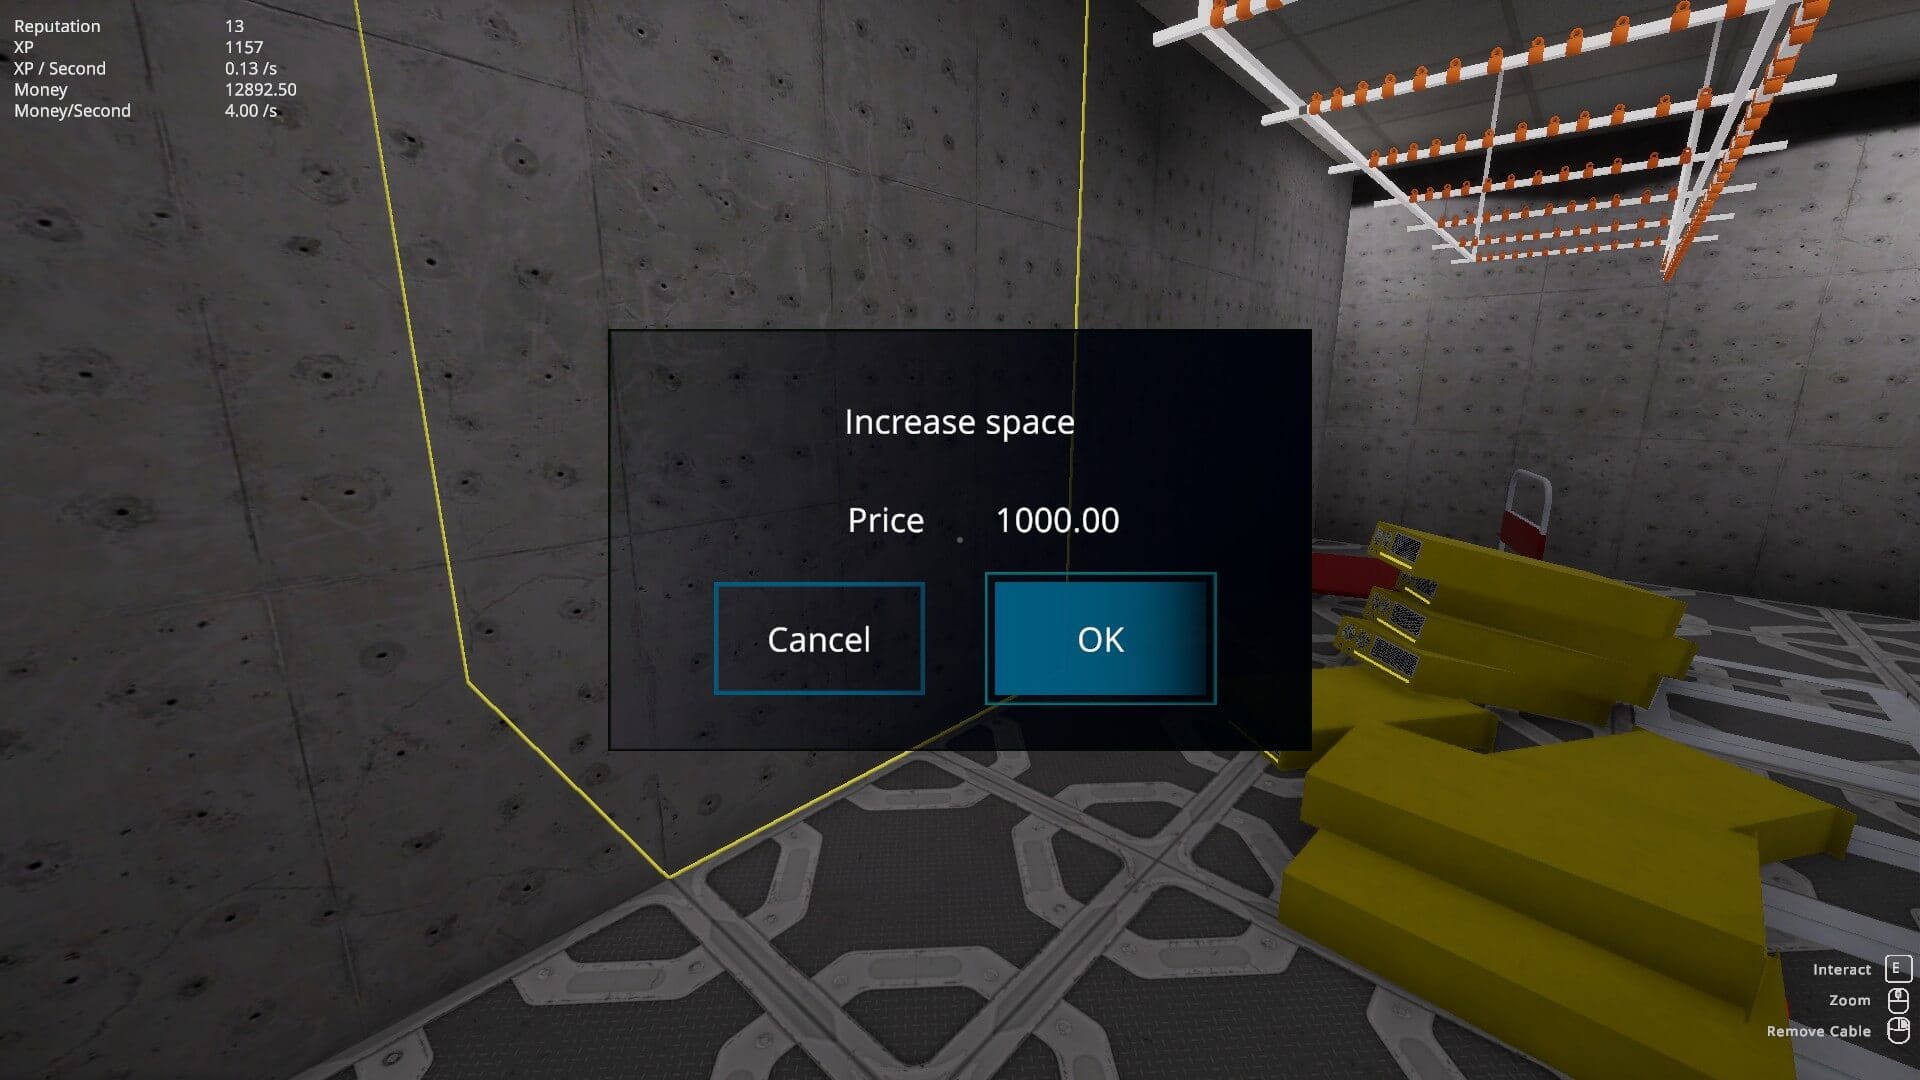
Kinda borked cable management on the left; on the right is the server room expansion dialog.
If you noticed the abysmal cable management job I did in the video above, then fret not; I have redeemed myself by fixing it (in the video below). But before that, you have to know that there are handy cable management loops across the racks and the roof of the server room that make your job easier.
You can also increase the space of your server room by purchasing additional space for 1,000 in-game currency per block. If you see a pile of strewn-about servers, ignore it.
Making use of the aforementioned mounts, I neatly rerouted the Ethernet cabling to clean up the spiderweb-like arrangement I had in place. As you saw, it is fairly easy to do, provided you have some patience and a little obsession with keeping things in proper alignment.
Overall, the game needs a lot of polish before launch. A proper tutorial would be a good start because right now new players are pretty much left to figure things out on their own.
On my wishlist for later upgrades would be multi-storey data centers, a utility cart that actually works without going into a void, and a computer portal that isn't so basic and awkward to use.
How to Play?
A free demo with some restrictions has been available on Steam for some time now. The game is planned to launch on March 31, 2026, though without any pricing information yet.
There is also no mention of an early access release, so it looks like Václav is aiming for a stable 1.0 release.